This will detail the process of making a Viking style bearded axe using a billet of 8-bar, turkish twist damascus.
Starting at the beginning, the forging of the damascus
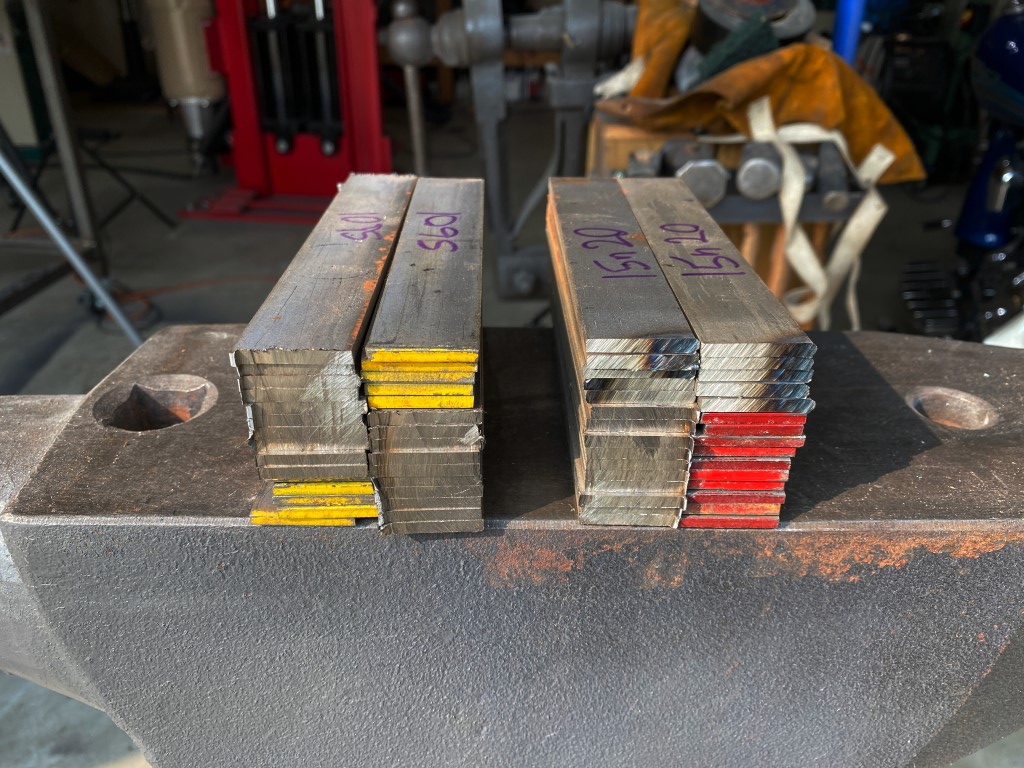
This is two stacks of different types of high carbon steel. 1095 on the left, and 15n20 on the right. The only major difference between the two types is the 15n20 is alloyed with a decent % of nickel, which makes it much more resistant to corrosion than the 1095. The result of that difference is that when the finished product is etched in ferric chloride, the 1095 will turn dark, and the 15n20 will remain brigher. the contrast between the two can be formed into various cool patterns depending on how you forge it.
This particular pattern is called a 4 bar turkish twist. Dont blame me, I didnt come up with the name ")
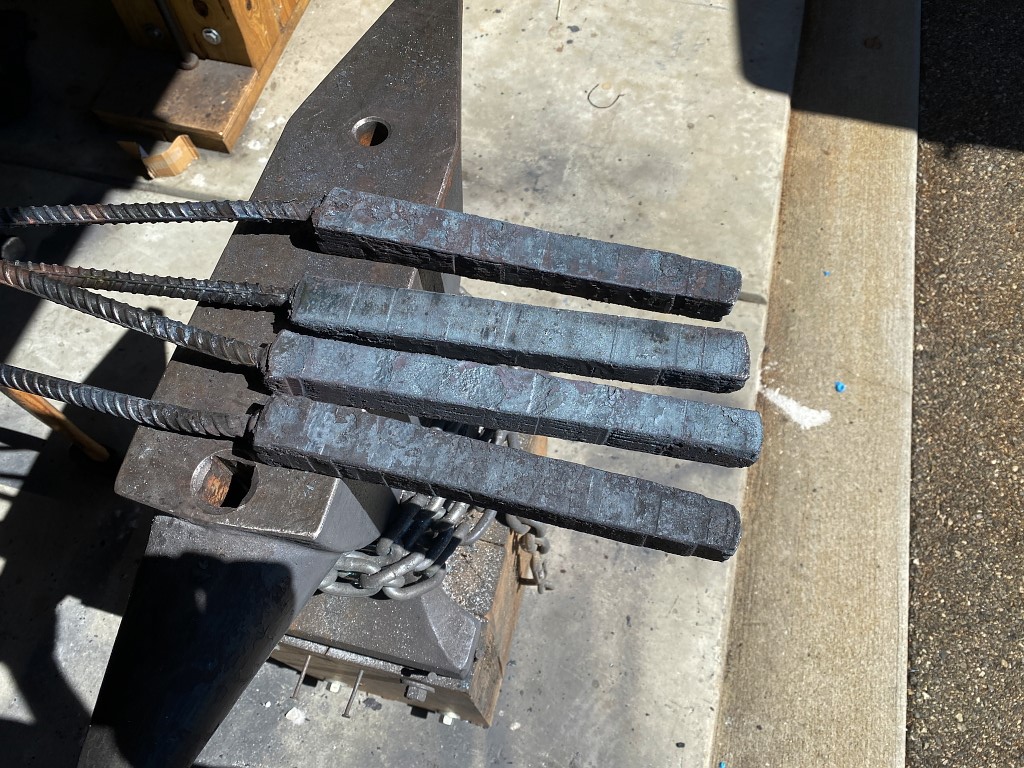
There are 60 pieces here, all cut to 6″ x 1″ x 1/8″ totaling around 14 lbs of steel.
I use my 2×72 belt grinder to remove all the rust and mill scale from all sides. the steel has to be as clean as possible in order to get solid fusion between all the pieces
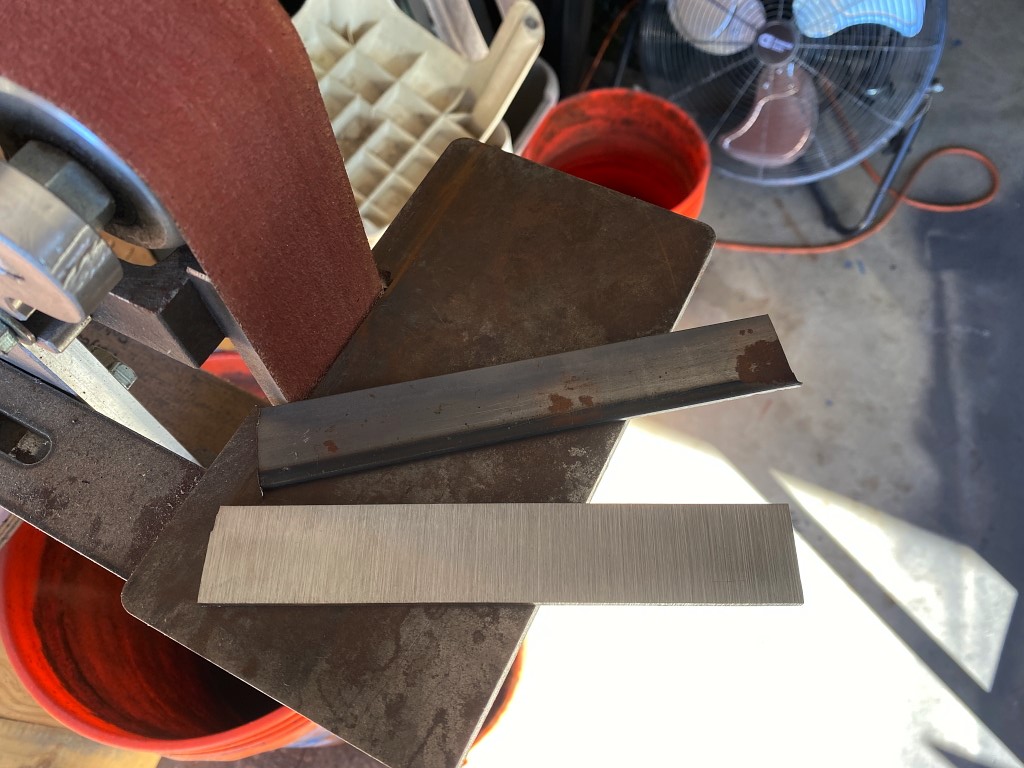
Its a tedious job. I have a full face respirator as the dust from steel and mill scale isnt really something you wanna be breathing
then I wash it all in acetone. residual oil and grease can also screw up the fusion.
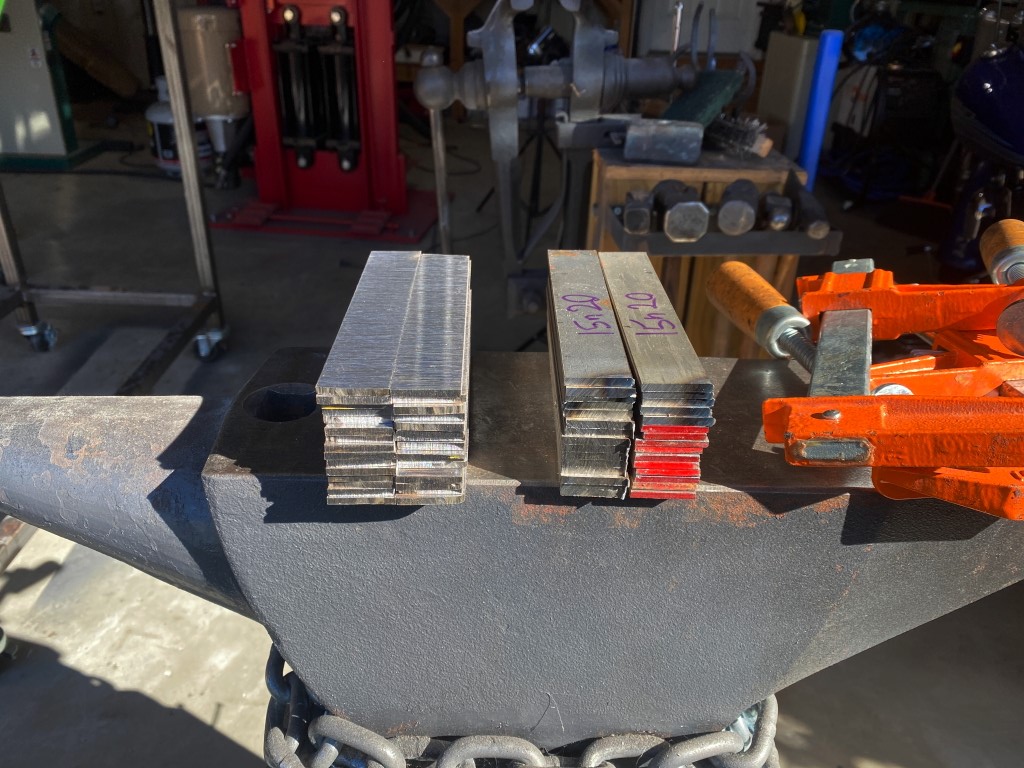
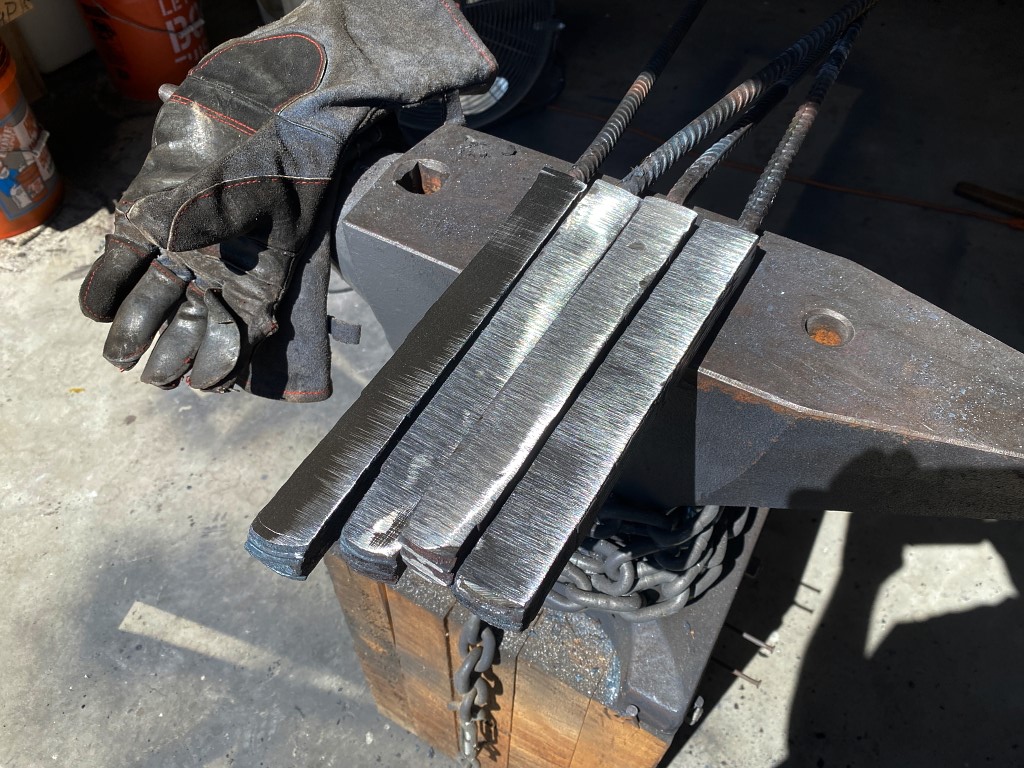
Good to go. At this point its VERY important I dont mix these up or knock them over. I will have no way to know which steel is which.
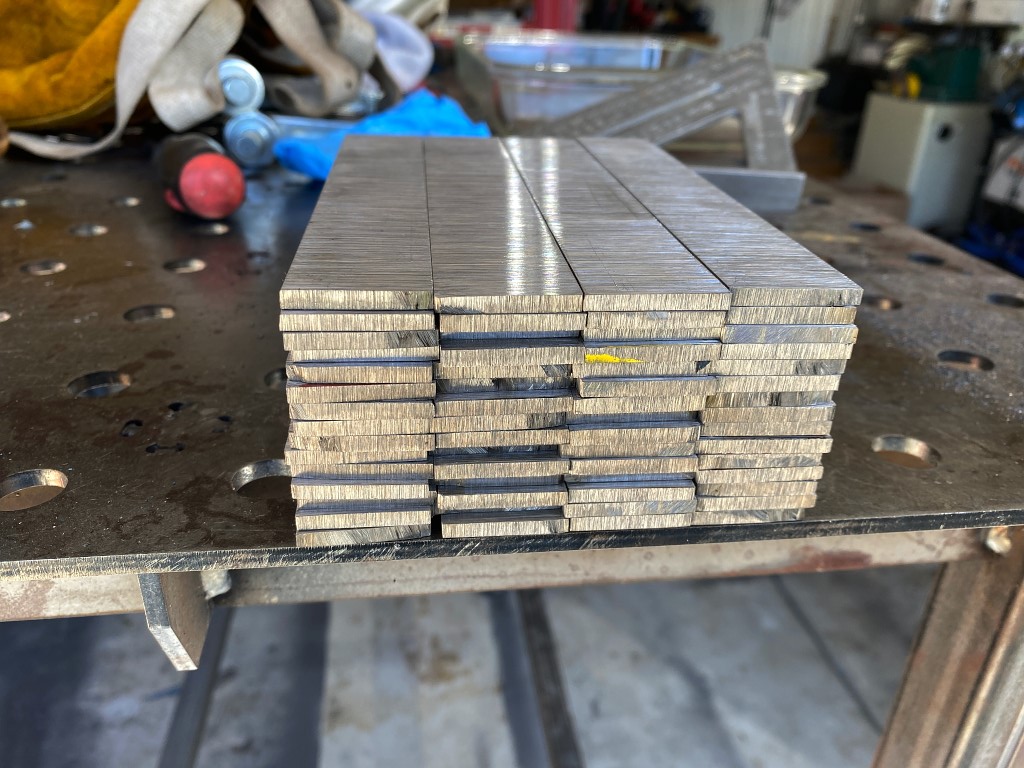
Next I make 4 stacks of 15 pieces each, and the two steels are mixed together at this point. I alternate every other layer. 1095, 15n20, 1095, 15n20, etc.
I clamp them in a vice and then weld the stacks together at the corners and one through the middle. The middle one is necessary because when heating in the forge it obviously heats from theoutside in and the temp differentials will cause the middle to bow outward and separate the pieces in the center. I want them all as tight as possible.
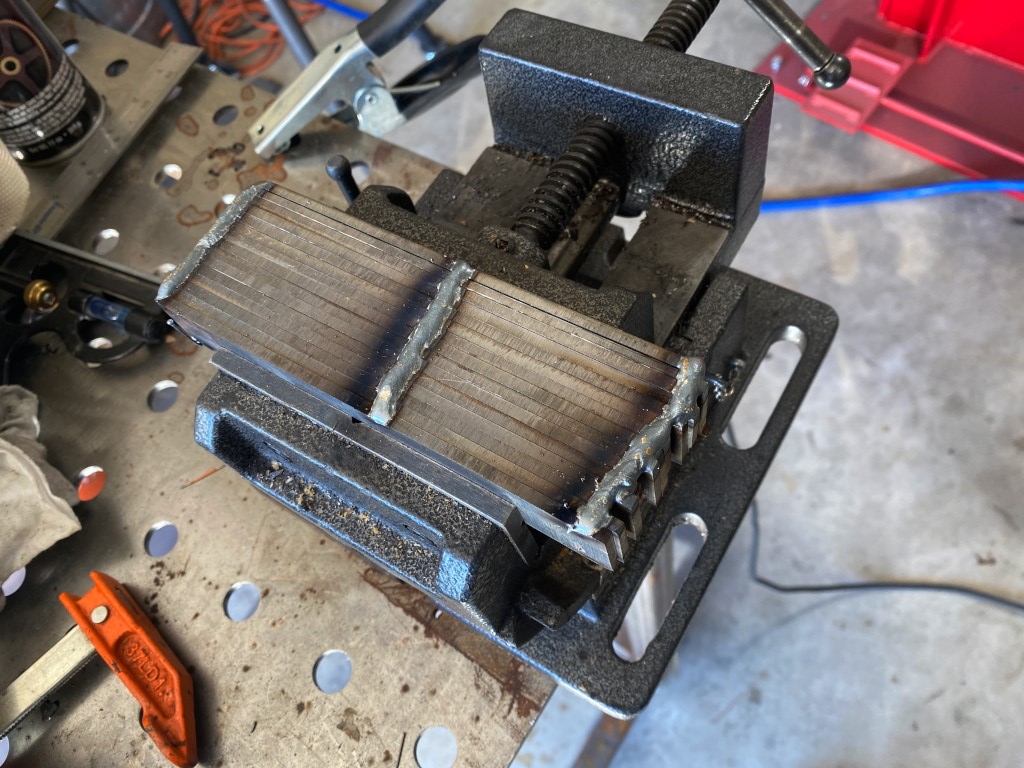
4 lovely stacks
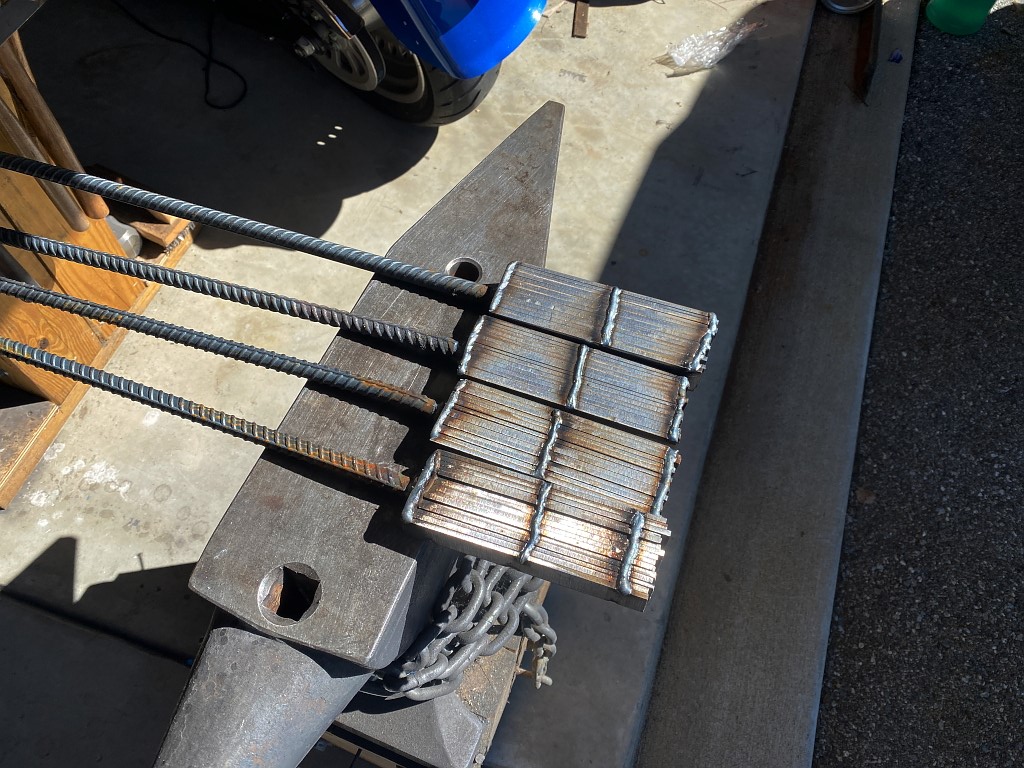
To make them easier to work with, I then weld a piece of rebar to each one to use as a handle. The stacks are too large to use tongs at this stage. The handle makes life a lot easier.
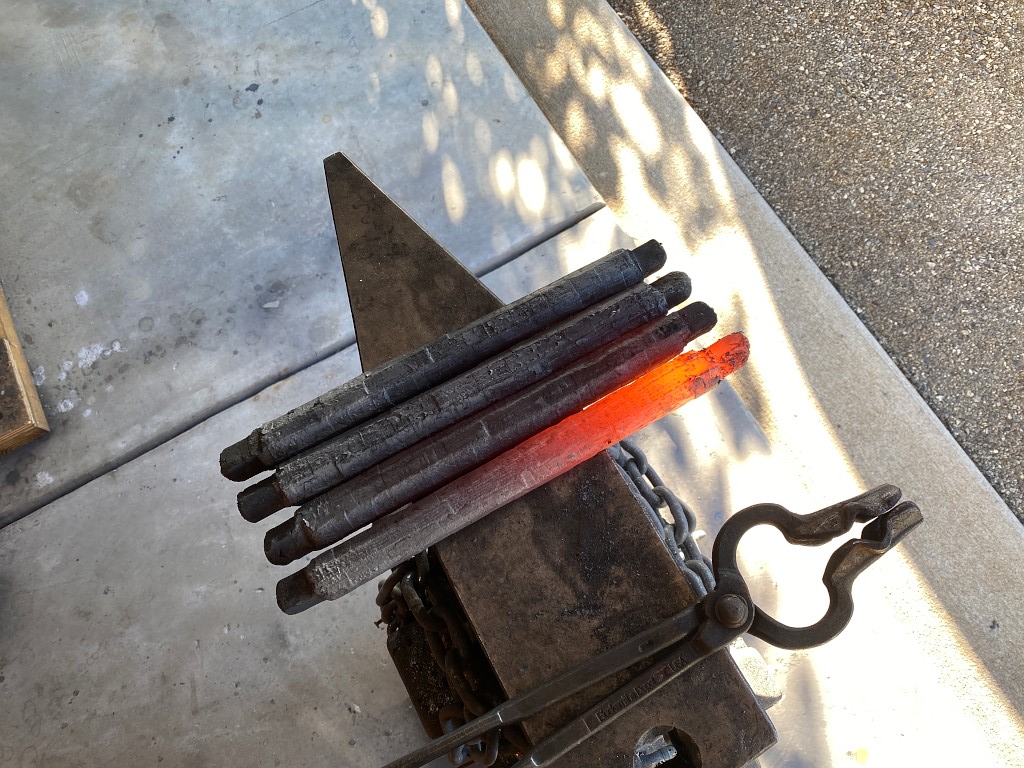
I can only fit 3 at a time in the forge so one has to wait…

Below is a video of one of the 4 stacks. I edited together 3 heats. a “heat” is simply going into the forge to get hot. While forge-welding damascus it has to be forged very hot to prevent the layers from de-laminating, so it goes back in the forge to heat back up.
Up till this year I did this with a hammer on the anvil. It took a solid day to draw out one single billet, fold it, and draw it out again. during that time I lost half of the steel to scale on the floor because I had literally dozens of heats. Because of that, as a practical matter making damascus on a regular basis just wasnt going to happen.
This 50-ton hydraulic press changed all that. You can see exactly how much time it took to draw it out once. Maybe 2 minutes of forging time, and 10 minutes heating in the forge. So the video here is about 15 minutes of real time. I edited out the heating time.
The first heat is critical. you’ll note I just barely compressed the stacks and then took it away. That initial compression is what fused the layers. Its necessary to keep forging at the very top of the heat at this stage so right back into the forge after that initial setting of the welds.
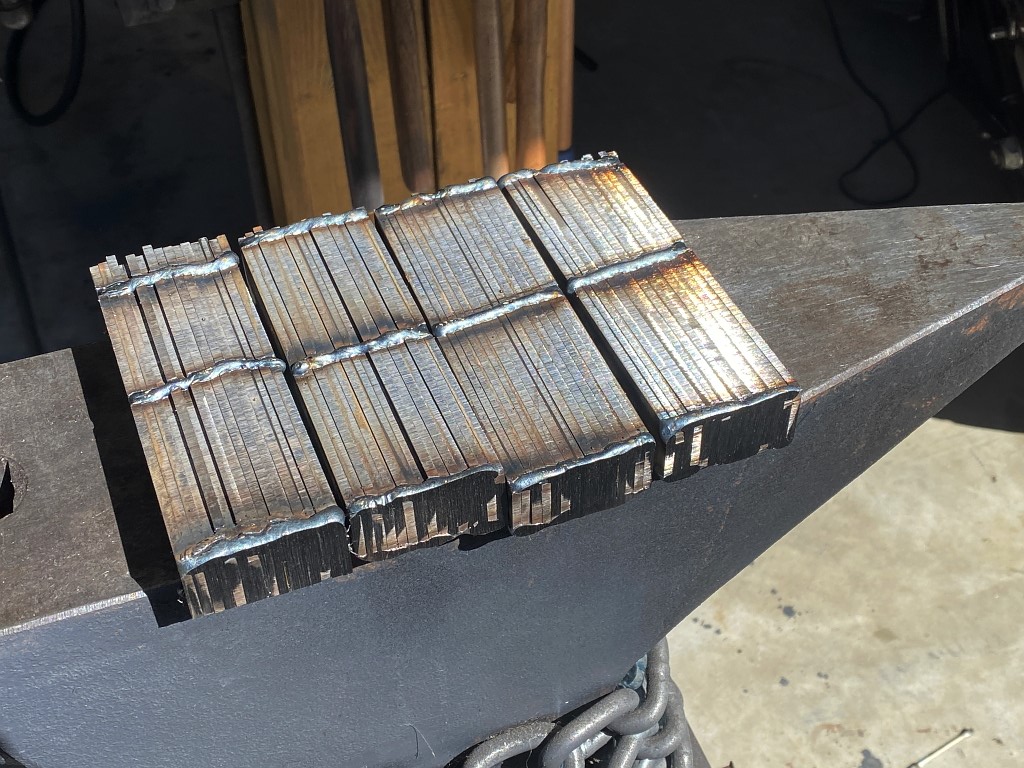
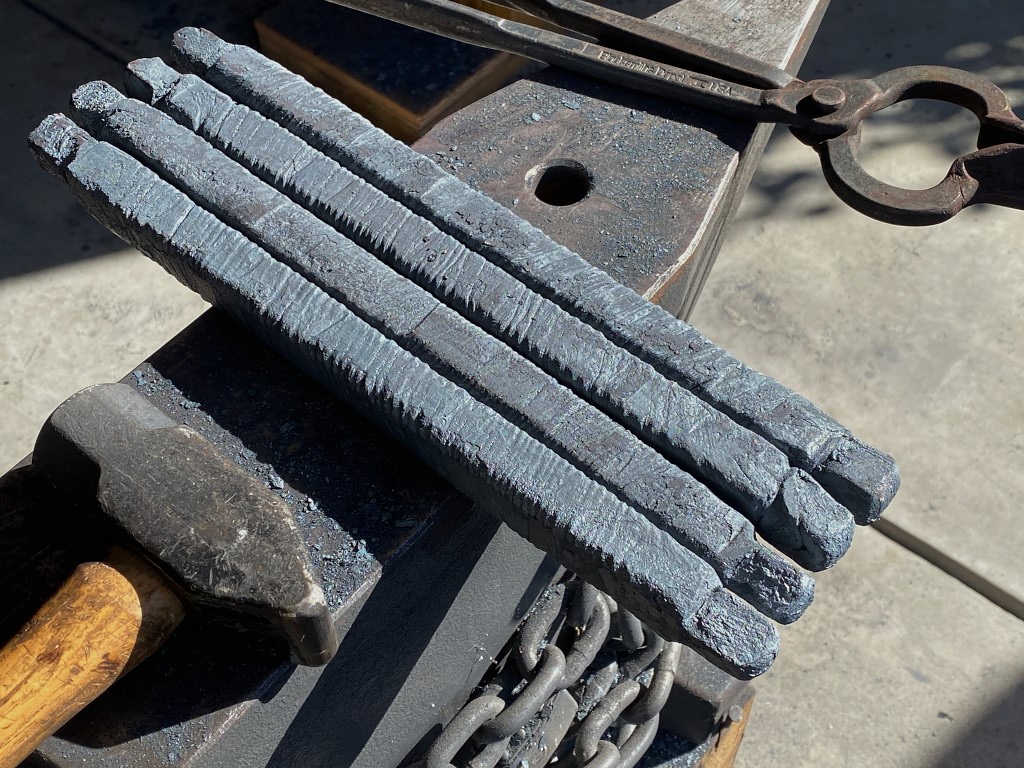
So after doing what you saw in the video to all 4, I’m left with 4 bars, about 11″ long. At this point they are no longer stacks. The forging process fuses the layers together into solid pieces of steel. the layers are still distinct in there. they are not mixed because the steel didnt get hot enough to become liquid, but they did fully fuse together
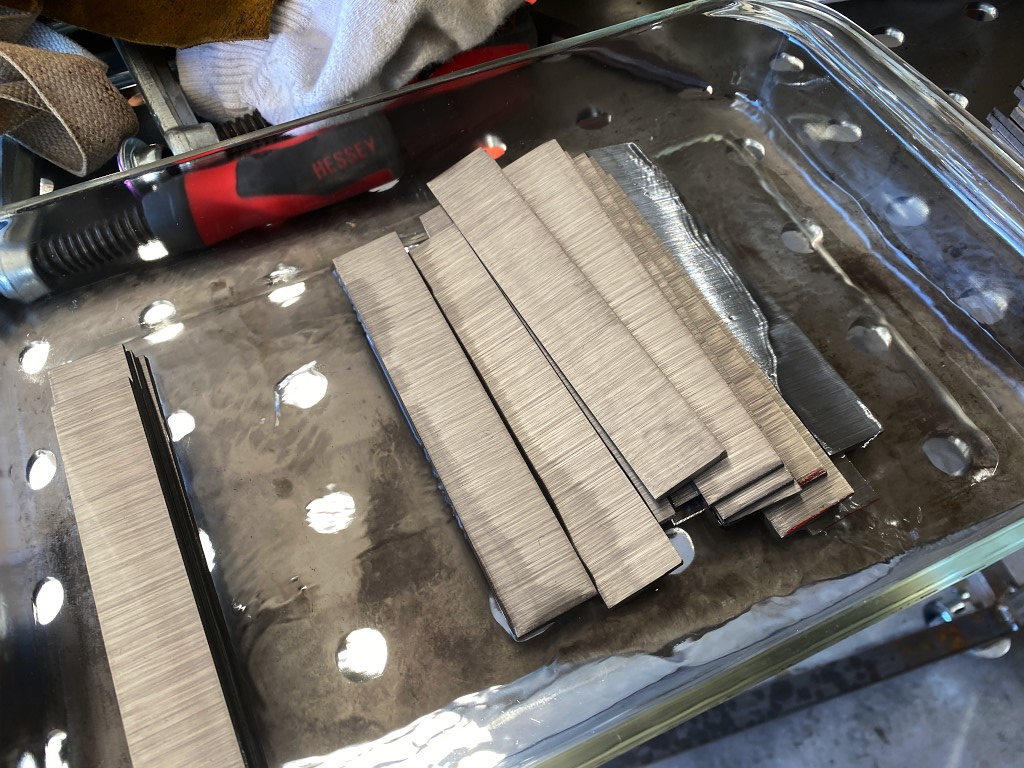
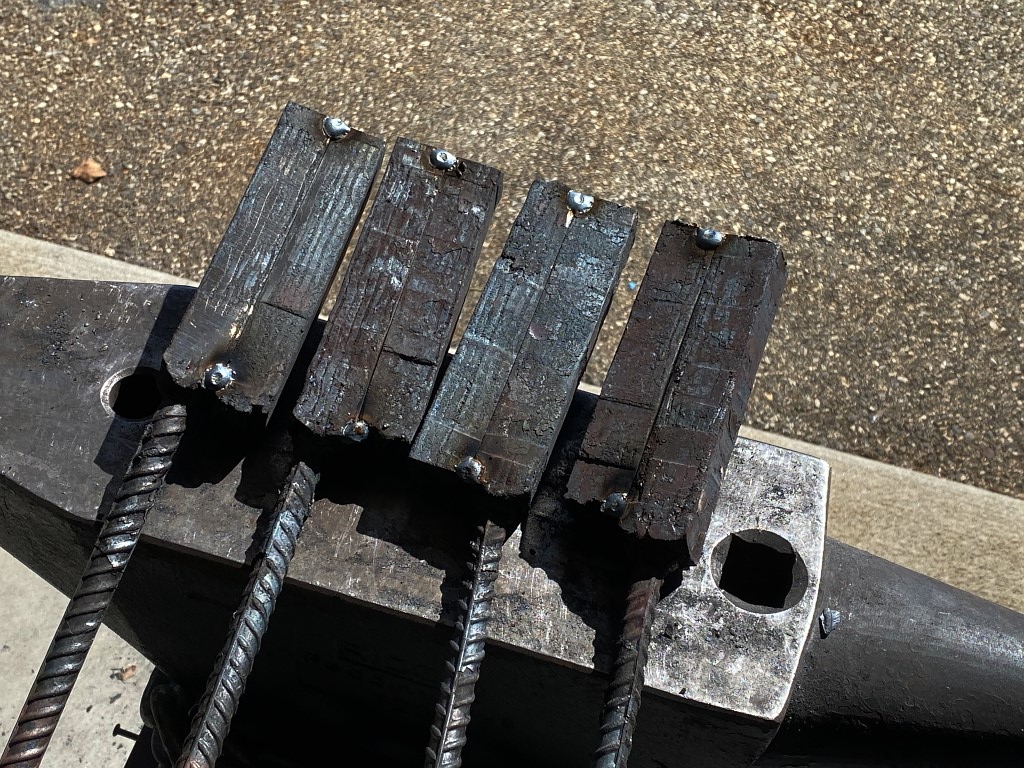
Next, I ground all the scale off of one face on each bar revealing clean steel.
Then I cut each bar in half and folded them over and tack-welded them together like this. The clean faces are inside against each other. Then I repeated the initial process and forge-welded these all together. Of course now they are 30 layers each instead of the 15 they started with.
Once I set the welds I then drew them out again in the press as I did before so I had 4 square-shaped billets all roughly 11-12″ long.
Some folks would keep repeating this process and doubling the layer count. 60. 120, 240, etc. and crow about hopw their whatever-it-is is 300 or 600 or 1000 layer damascus. the problem is that while the number is impressive, i think the higher layer counts become so fine that they lose visual appeal. for my money, 4 bars of 30 layers twisted is a very good balance….
Once I had them drawn out into squares, then I turned them on 45-degree angle and forged the corners in, so now I’m left with octagonal-shaped bars. the reason for this is because a square shape, when twisted, would shed a lot more scale, and also would create much deeper crevices. The crevices can become what are called “cold shuts” when the bar gets forged back to a square shape after twisting. A cold shut is when scale or other debris becomes trapped inside the steel when forge-welded. It prevents the steel in those places for fusing into one homogeneous mass, and can create weak spots, and visible flaws or defects in the finished piece. the closer to round you make the bar, the more shallow and less consequential any crevices that form while twisting the bar become.
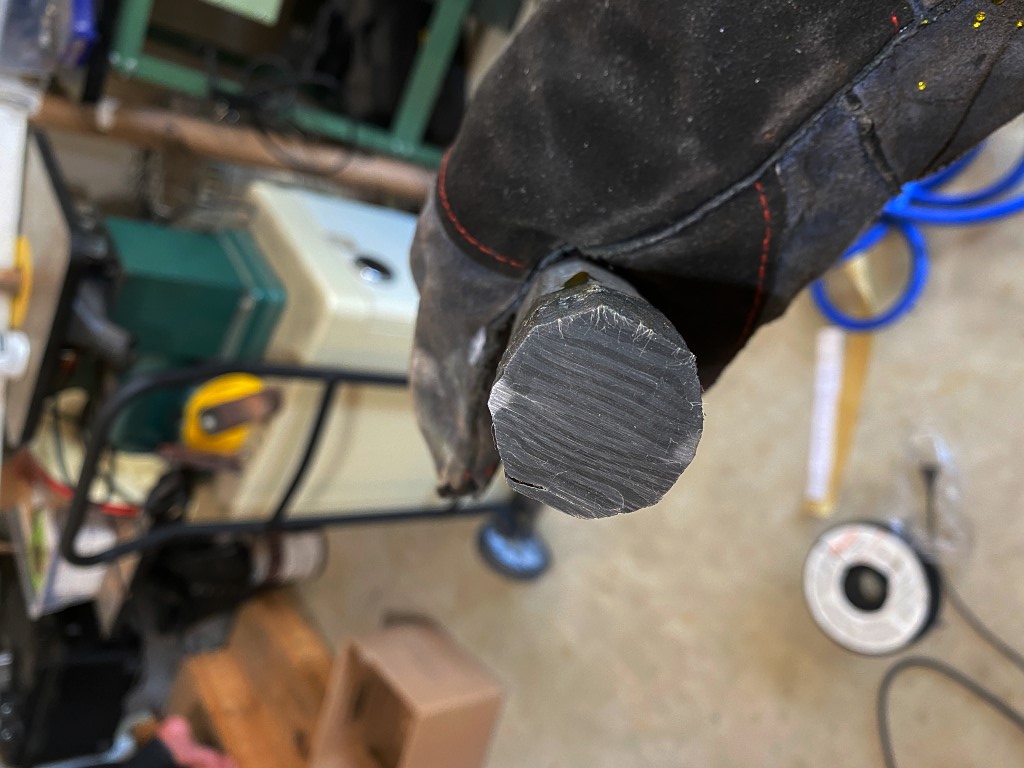
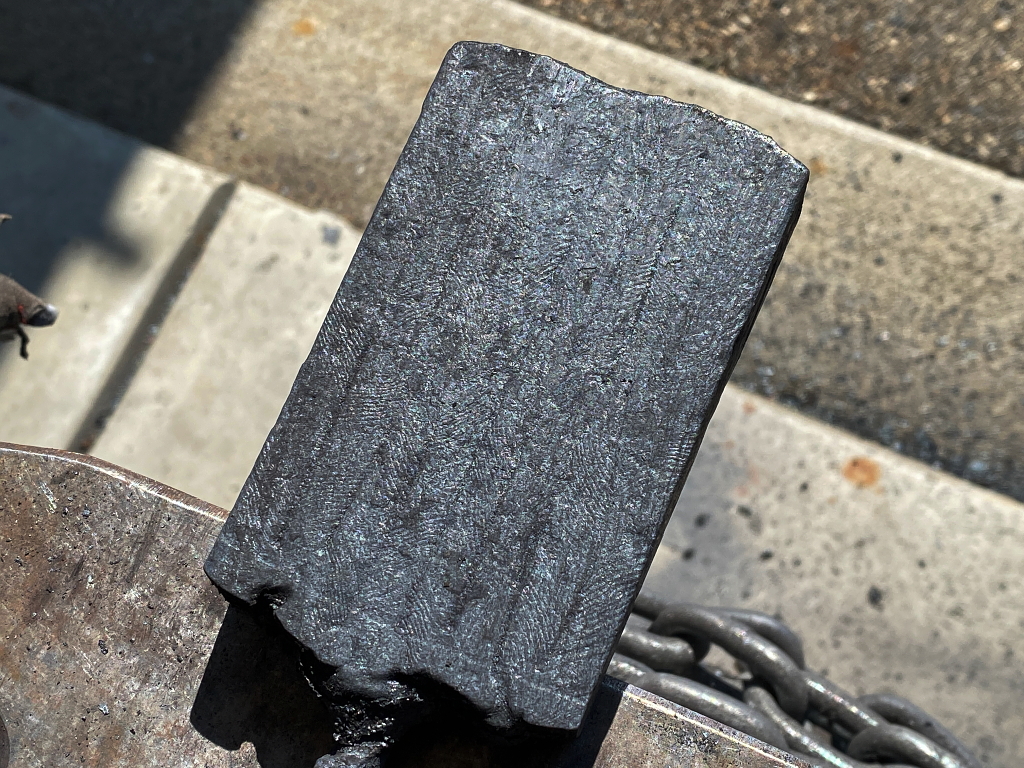
I ground the end off of one here. You can see its solid metal. No layers visible. Except that little split near the edge. the ends are always a bit messed up, but they get cut off and discarded anyway…

however, a quick dip in the ferric chloride shows the layers are indeed there, although slightly distorted from the steel being molded around. So this was the end of day 1, and it took about 8 hours. The forging part goes pretty quickly with the press, but grinding and cutting and cleaning all take FAR longer and are pretty boring, dirty jobs.
first thing I did was forge the shorter pieces out to be the same lengths as the longer ones, and re-forge the ends of the bars into square shape. This is because I’m about to twist them and I need square ends to clamp in the vise, and hold with my “twisting wrench”. The twisting wrench is a large pipe wrench with a 3′ steel pipe welded to the top end
So here is video number 2″ this is how I twist the bars. The mysterious other figure is my son Jake. I’ve done this by myself, but its a lot harder. The mumbling I’m doing is counting. I wanted a full 8 twists for each bar.
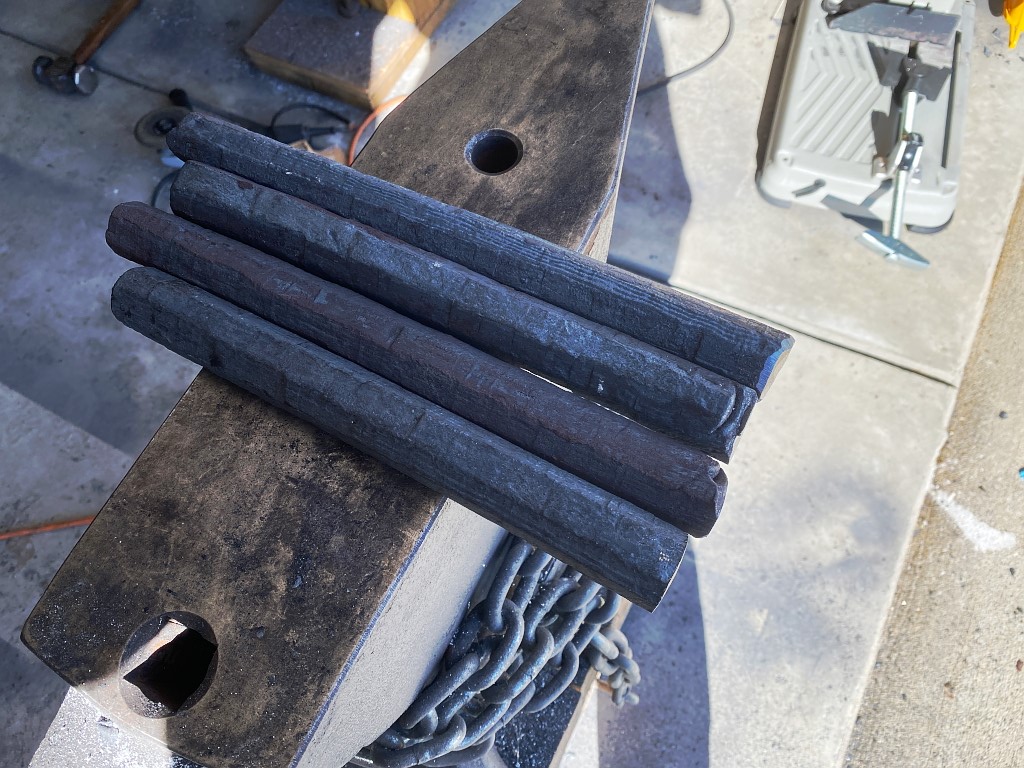
Now I have 4 bars all twisted. Note that two are twisted clockwise, and two are counter-clockwise.
No flat layers in the bars now. each bar has 30 layers. started with 15, then cut and folded, doubling to 30.
So 30 layers of alternating steels, all twisted 8 full revolutions. To put a finer point on the subject of forging the bars into octagonal shape, the ridges on these bars would be much more pronounced, and the crevices between them much deeper, if the bars had been left square. When forging back into a square shape, those crevices become cold shuts. You CAN grive through them to get rid of them, but you waste a lot of material, and a lot of time doing that. Its more economical of time and material to take the extra time earlier to forge them into octagonal shape before twisting. This doesnt keep scaling up though. Going a step farther and trying to forge into 16-sided shape doesnt yield any more significantly improved outcome.

Next I forge the bars back into a square shape. Now I have 4 square bars about 15″ each, not counting the end pieces which will be scrapped anyway. The ends get narly.
I arrange them alternating the rotation. Clockwise, counter-clockwise, clockwise, counter-clockwise.
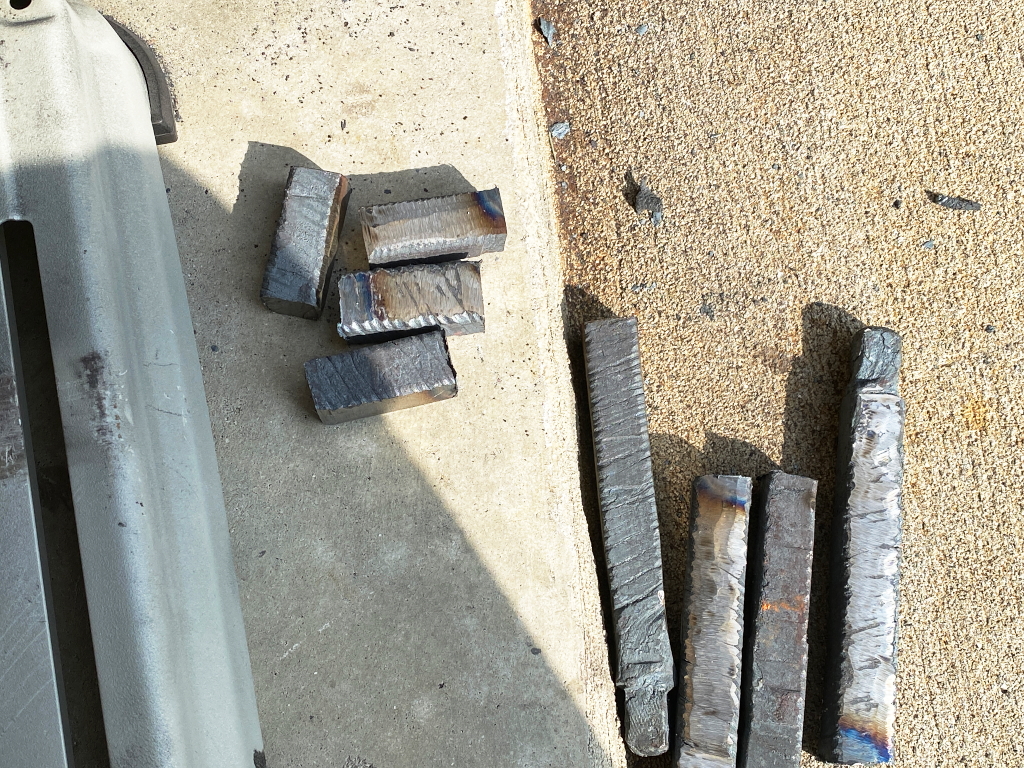
At this point the process diverges into several projects. The first chunks cut off here will; become a neck mounting plate on a guitar and an 8″ chef knife…
The 4 little pieces here went on to become a tomahawk which I forged for my son.
The remaining 4 longer bars shown here were forged down flatter, and then each was cut into two pieces, giving me a total of 8 pieces.
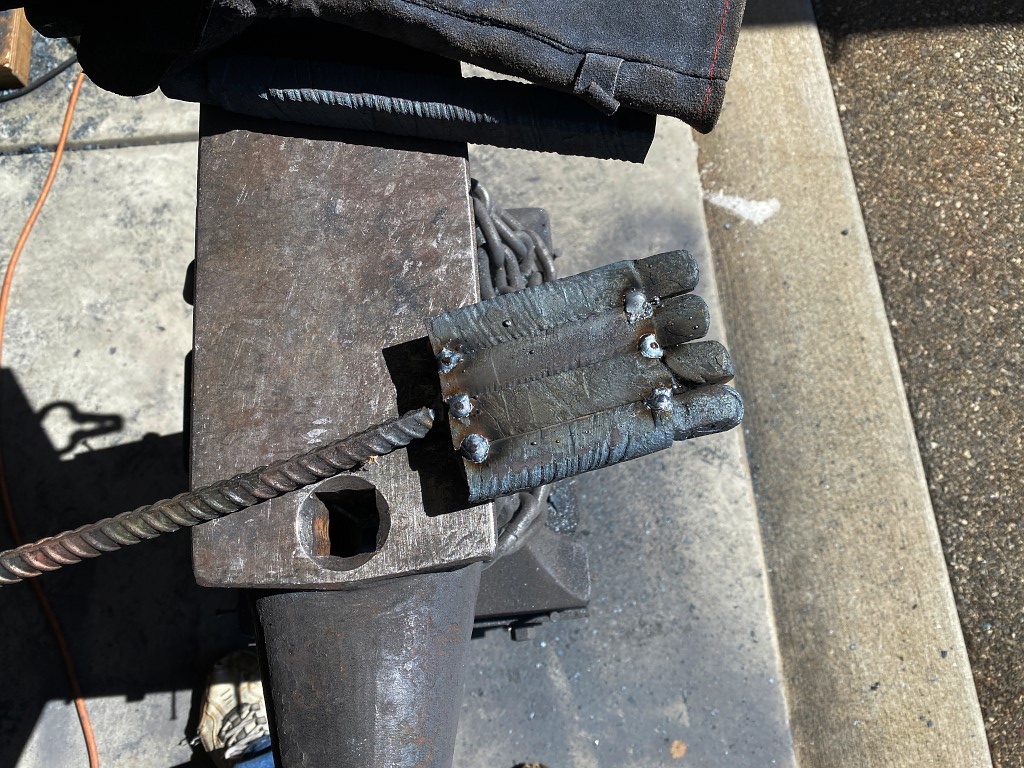
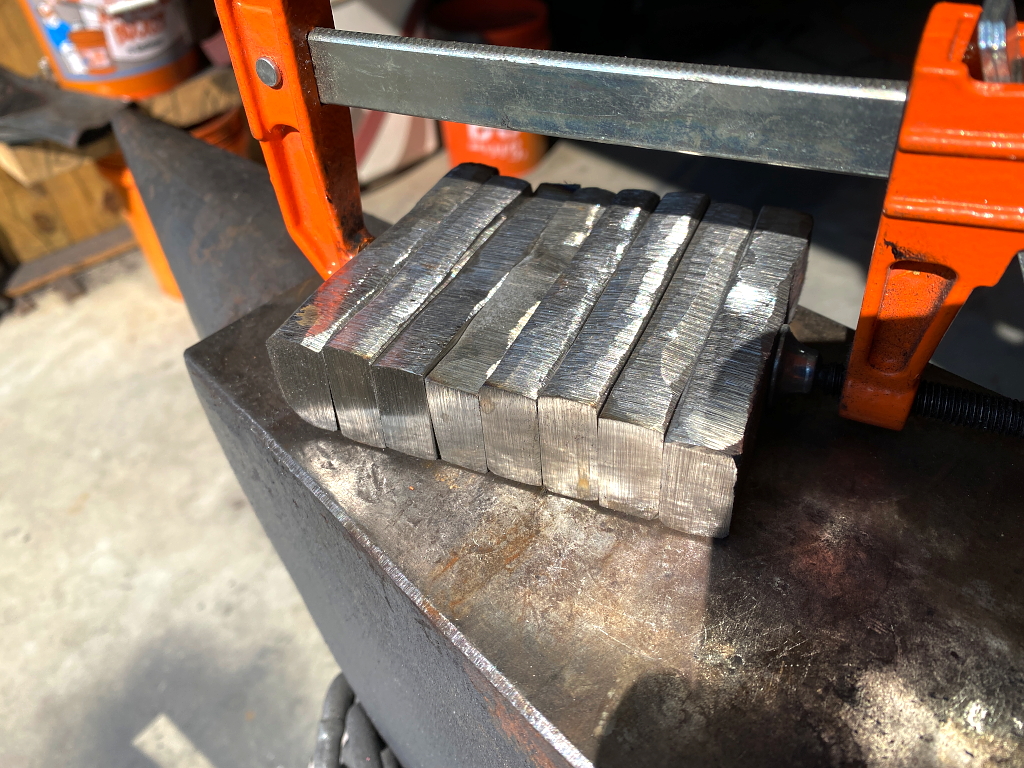
Here are the 8 pieces after being ground clean and totally flat. Ive clamped them in order to tack-weld them together
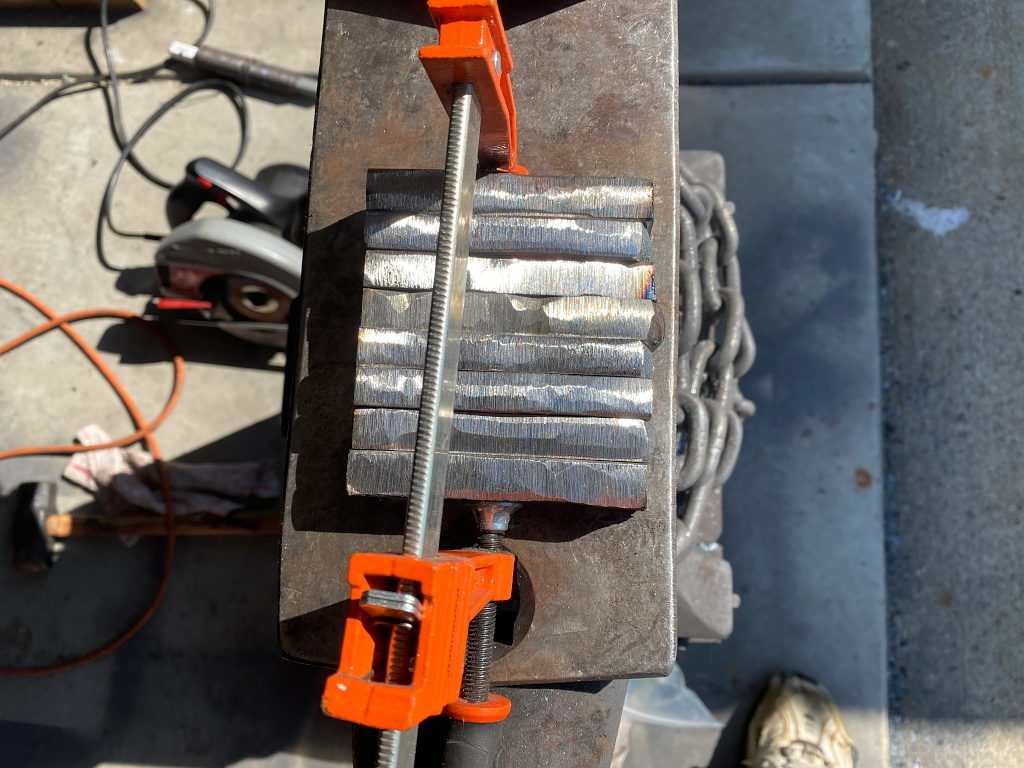
I wanted a nice tight fit here. I also had to be very careful. Once all the scale is ground off and things are clean its impossible to tell which direction the twist goes for each piece, so its very important that I arrange them in order, and then keep that order while grinding and cleaning each piece. Thats key to making turkish twist. You saw earlier how two bars were twisted clockwise, and the other two counter-clockwise. Each of the 8 pieces here has the opposite twist of the adjacent pieces. If you drop them or mess them up at this point it would be a challenge to figure out which twist a piece has.
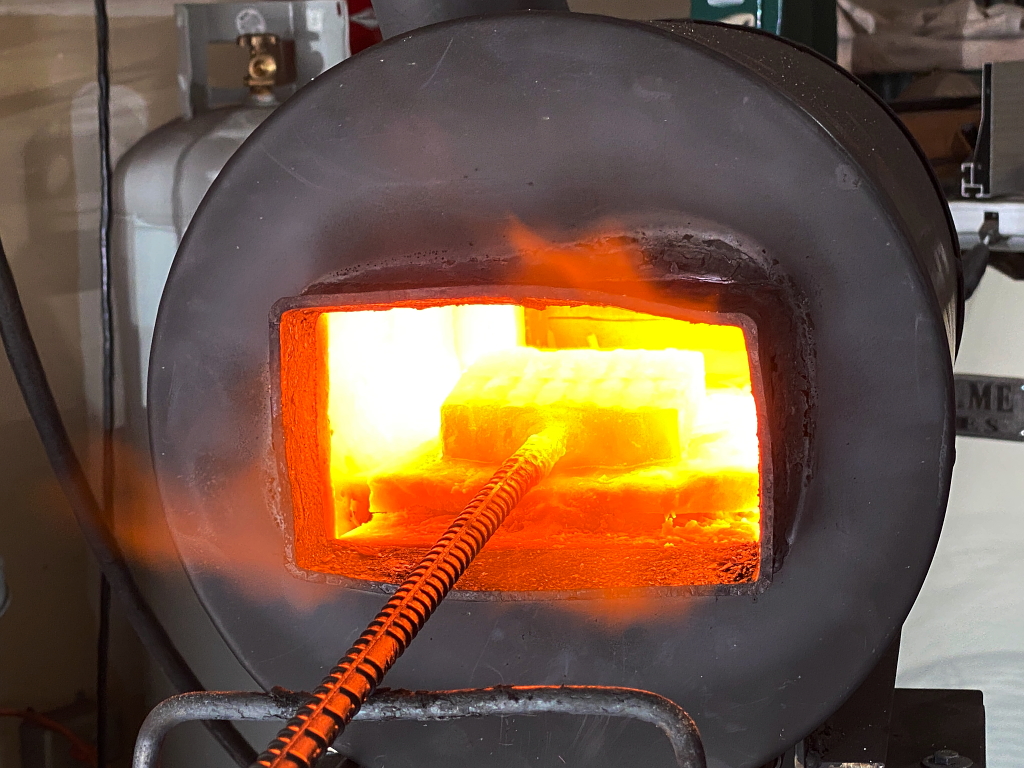
Into the forge, and then the press to forge-weld them all together.
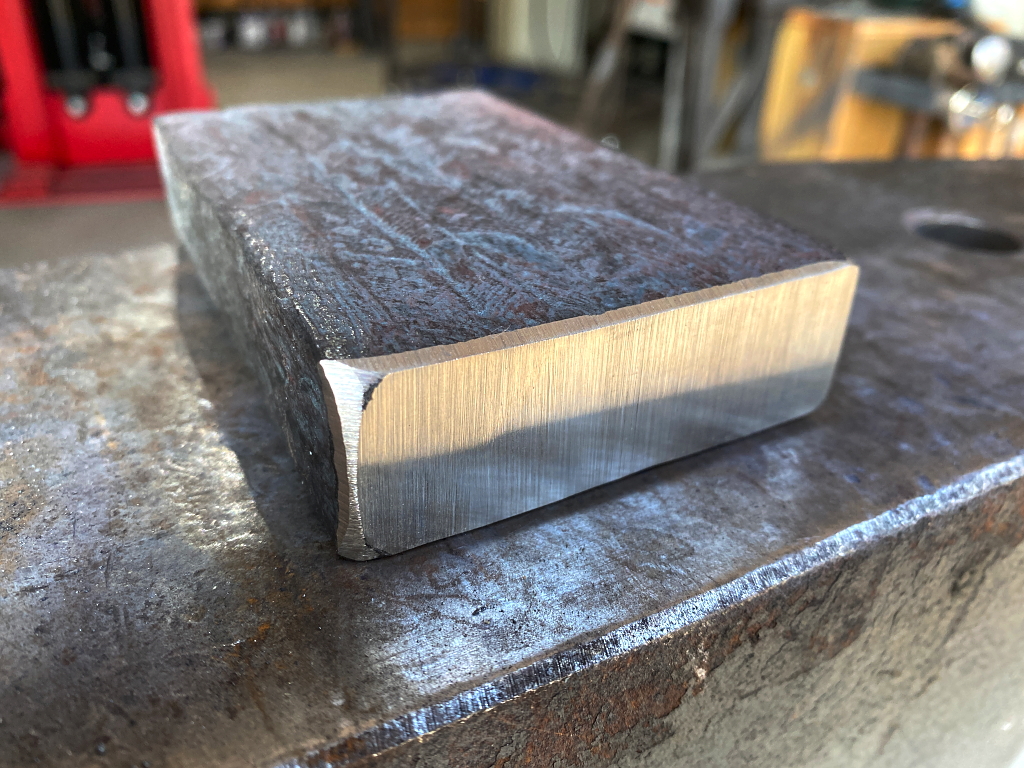
and here is the finished billet. if you look carefully, the scale on the surface shows the twist of each piece.
and grinding the end clean shows me that the forge welding went well. Its now one solid piece of steel.
NOW, after all that, I’m ready to start actually forging the axe
Here is the billet again after a bit of re-shaping. I forged it shorter and narrower in order to make it thicker. This is so I have more metal on the sides of the eye for greater strength.
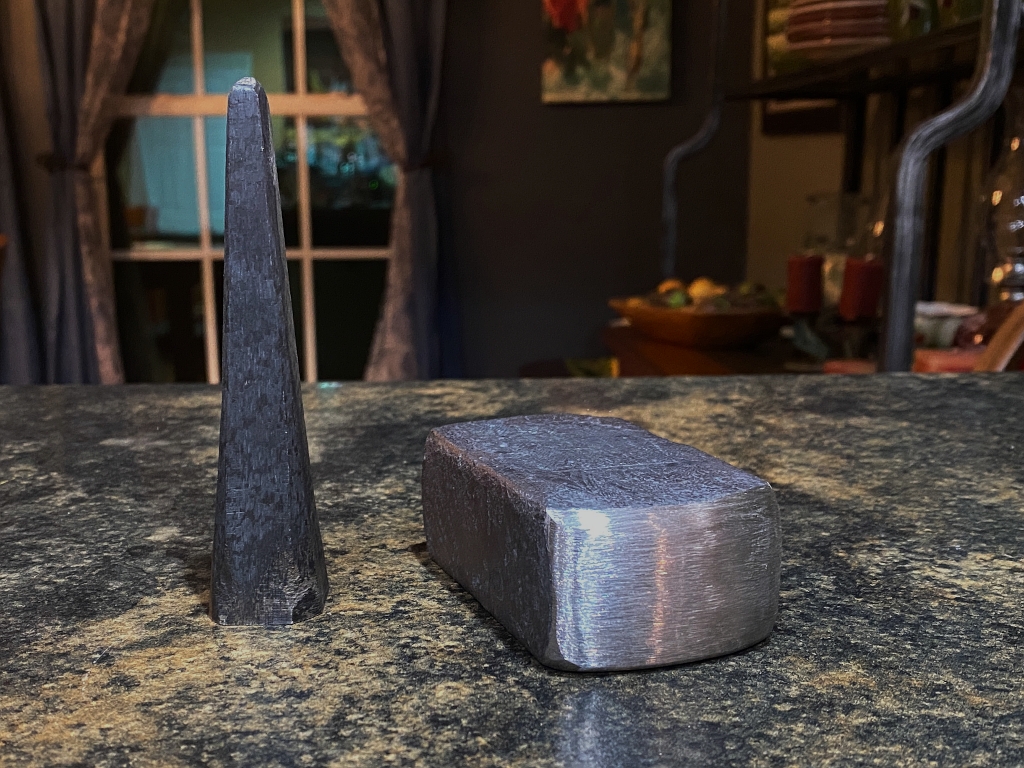
To the left is a punch I forged. This is for punching the hole through the billet for the eye.
Heres the punch installed in my hydraulic press. Formetly I punched holes with a hand-held punch and a hammer. This is a lot faster.
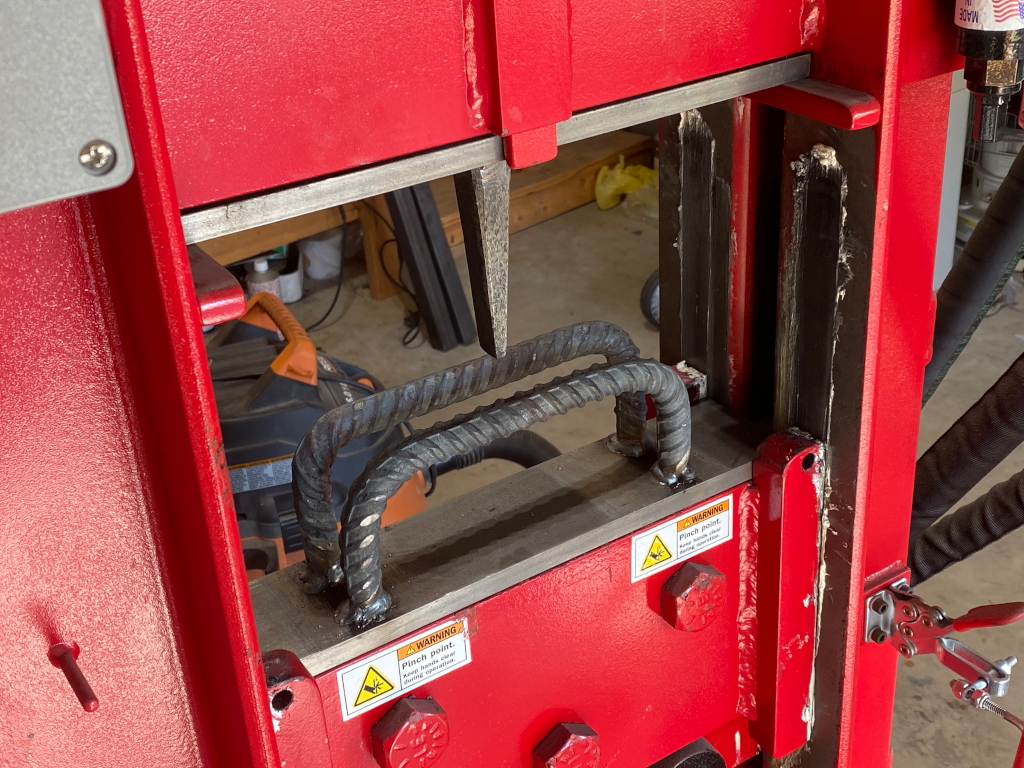
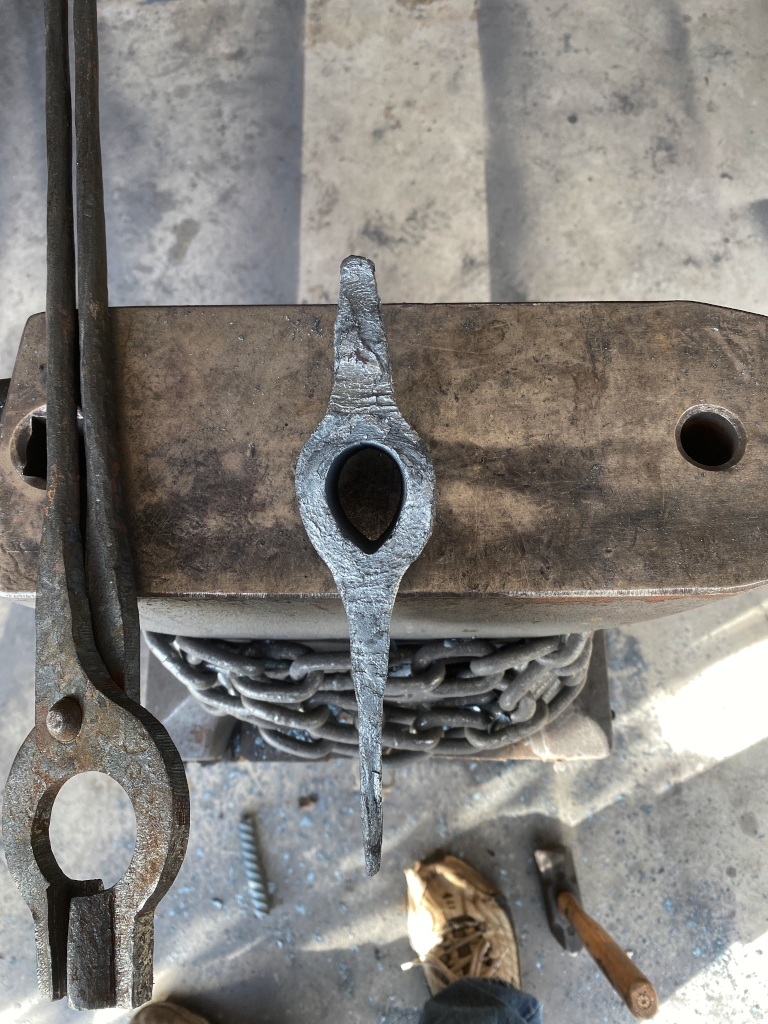
Punching the actual hole. As you’ll see, this is a small rectangular hole, which will need to be “drifted”.
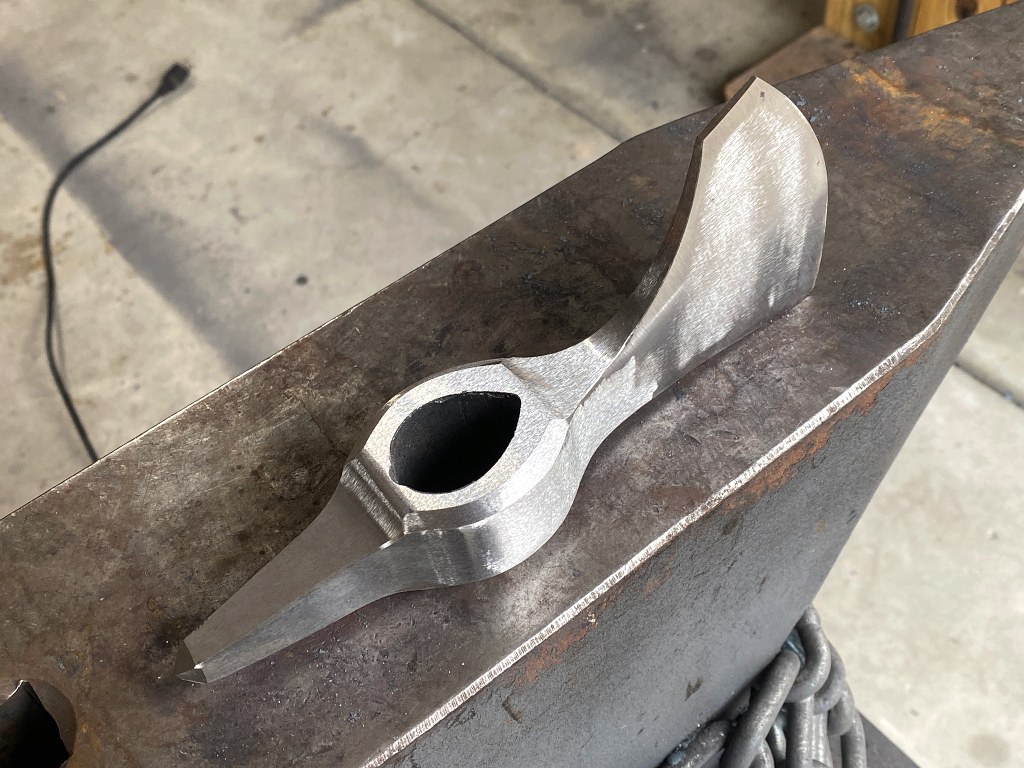
The eye is created by driving a tool called a drift through the hole with a hammer a little bit at a time while the billet is at forging temps.
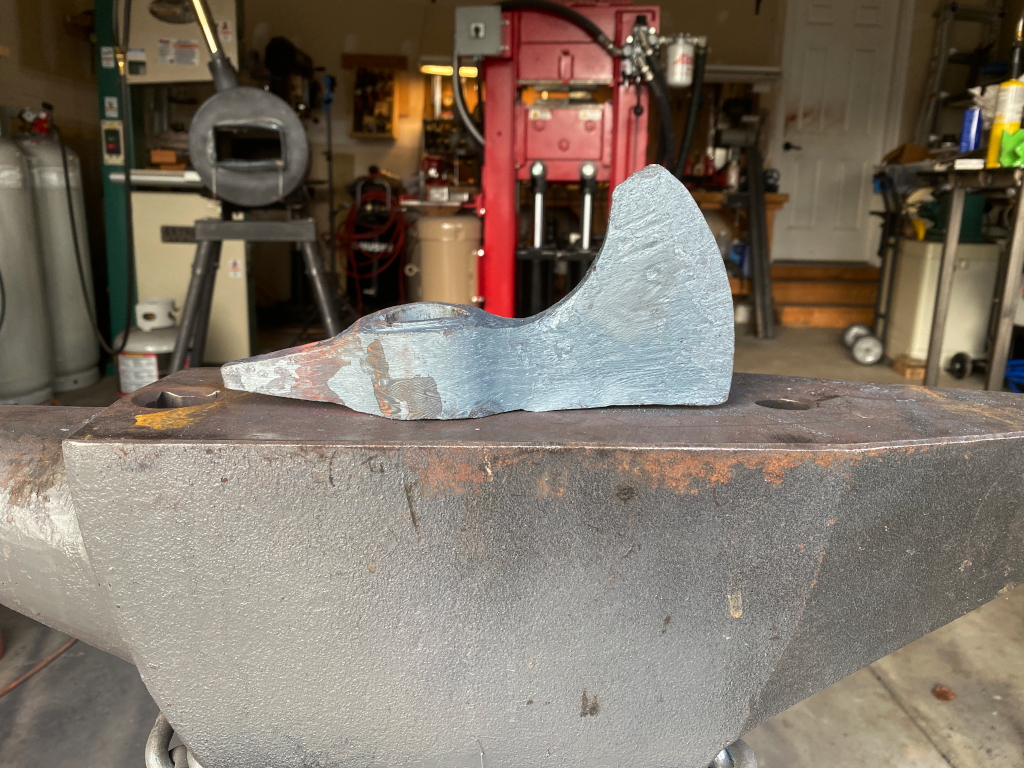
The drift expands the hole and forms it to the proper shape. Here you can see the finished eye. the blade and spike are rough forged after the eye using a hammer and anvil
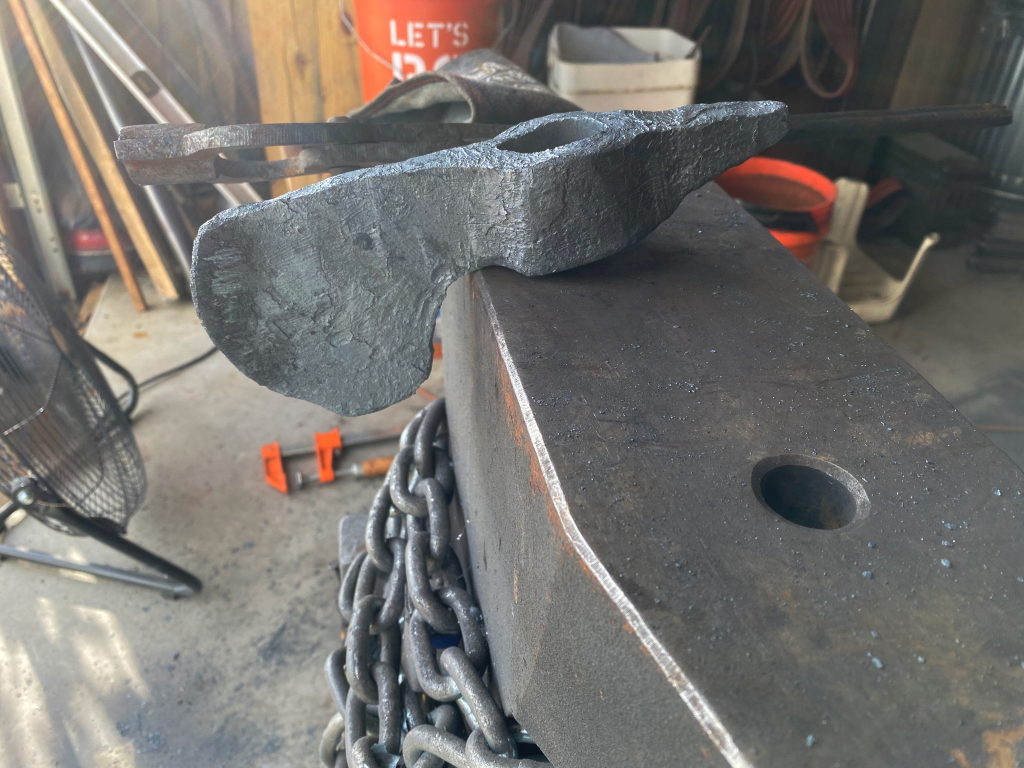
Here the scale has been ground mostly off and the profile is shaped.
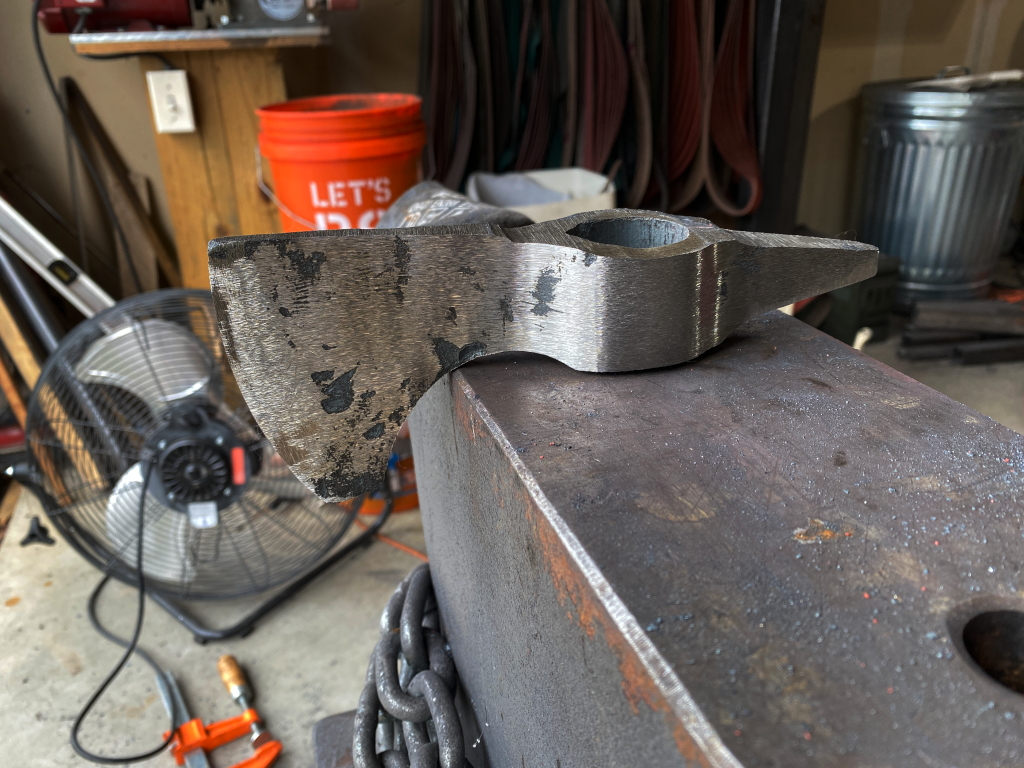
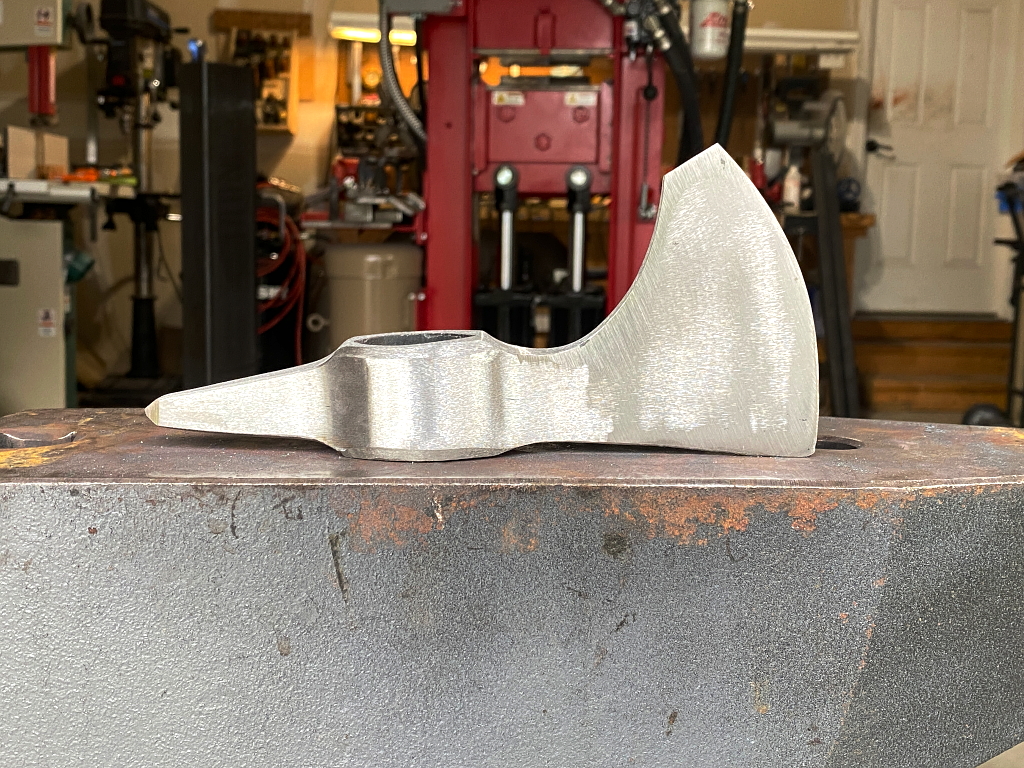
After shaping the blade was a bit narrow, and the cutting edge only 3 3/4″ long, so I popped it back into the forge, heated it up, and then hammered a bit more width into the blade. We are now at 4 1/4″ with a more pleasing (to me) curve.
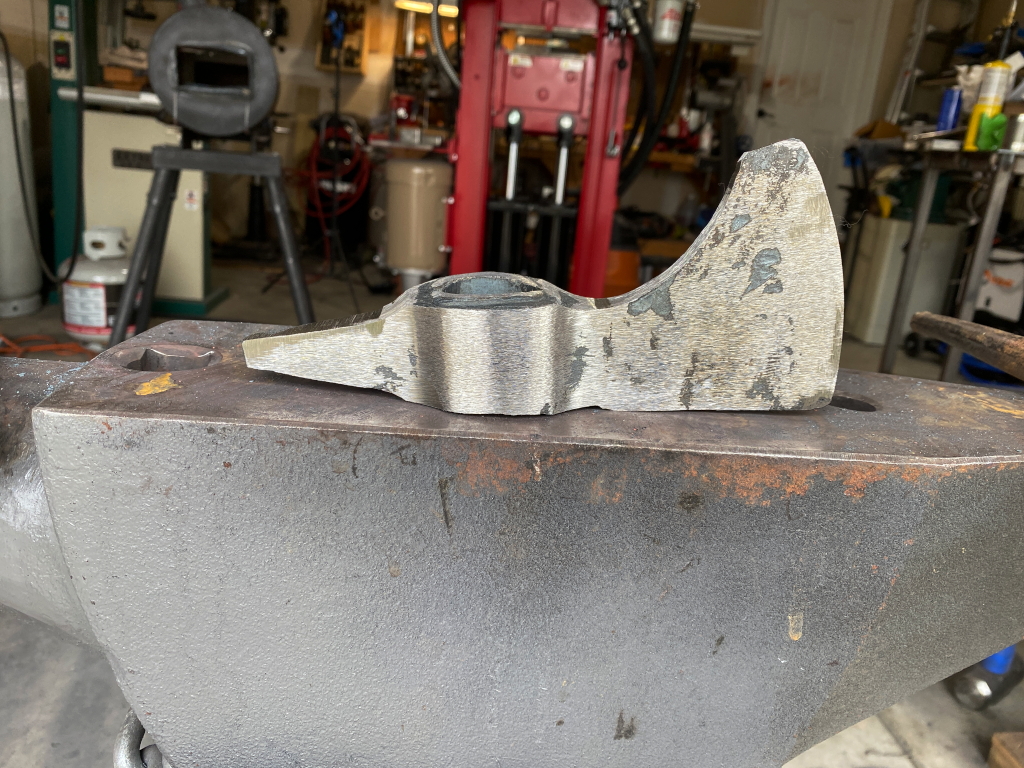
Next, clean off the scale again and refine the profile and grind to the final shape and dimensions.

Next its time to heat treat. This is a multi-step process.
First the head is heated to 1600 F for 10 minutes, then allowed to cool slowly to room temp. This process is repeated with decreasing max temps of 1550 F, then 1500 F, and lastly to 1400 F. this is called “normalizing” It shrinks and homogenizes the crystalline structure of the steel. This is crucial for the strength of the final product.
Once the normalizing cycles are completed, it is heated again to precisely 1475 F. and “soaked” at that temp for 15 minutes, and then quenched in parks 50 oil. The extremely rapid cooling causes the steel to form a crystalline structure known as martensite, which is super hard. Here is that quench…
Last is tempering. This is equally critical because the as quenched hardness of the sateel is around HRC 65 which is REAL hard. Its also real brittle. If you struck it against something hard at this point it would literally shatter like glass. Not a great quality for a battle axe 🙂
In tempering, I put the head into a 500. F oven for an hour and allow to cool to room temperature. then I repeat the process again. the result is that its no longer brittle, and I’ve reduced the hardness to around HRC 60. This is still too hard for a weapon that needs to withstand great impacts, but its great for the edge to be that hardbecause the edge needs to be able to cut through flesh and bone without blunting or deforming.
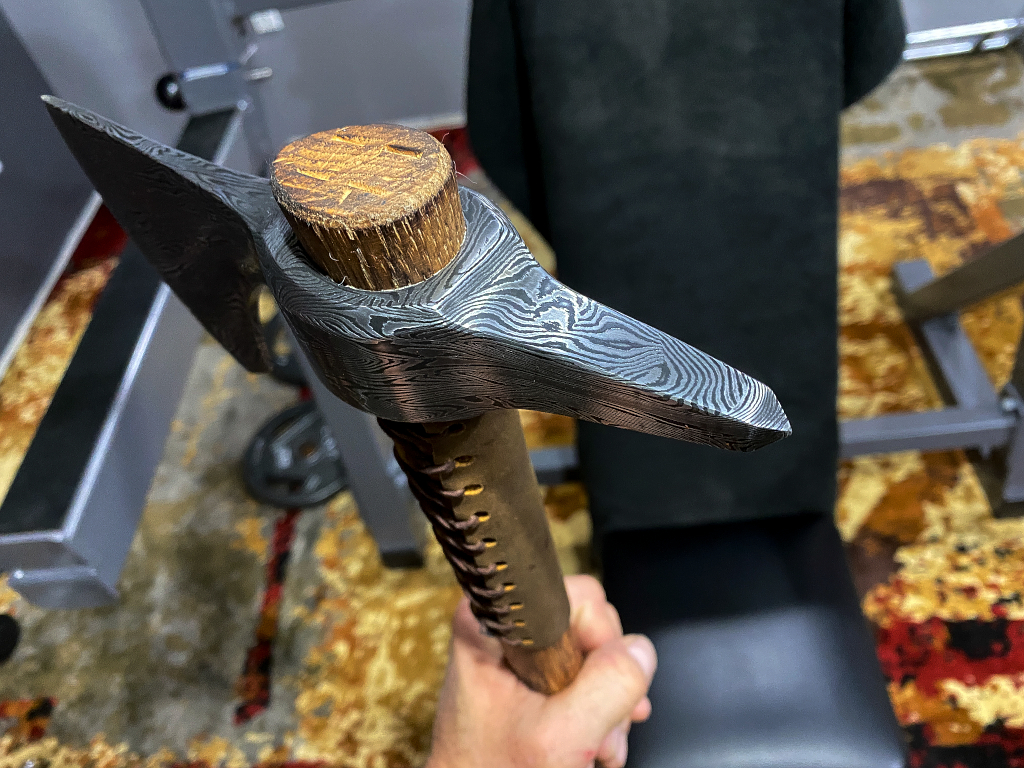
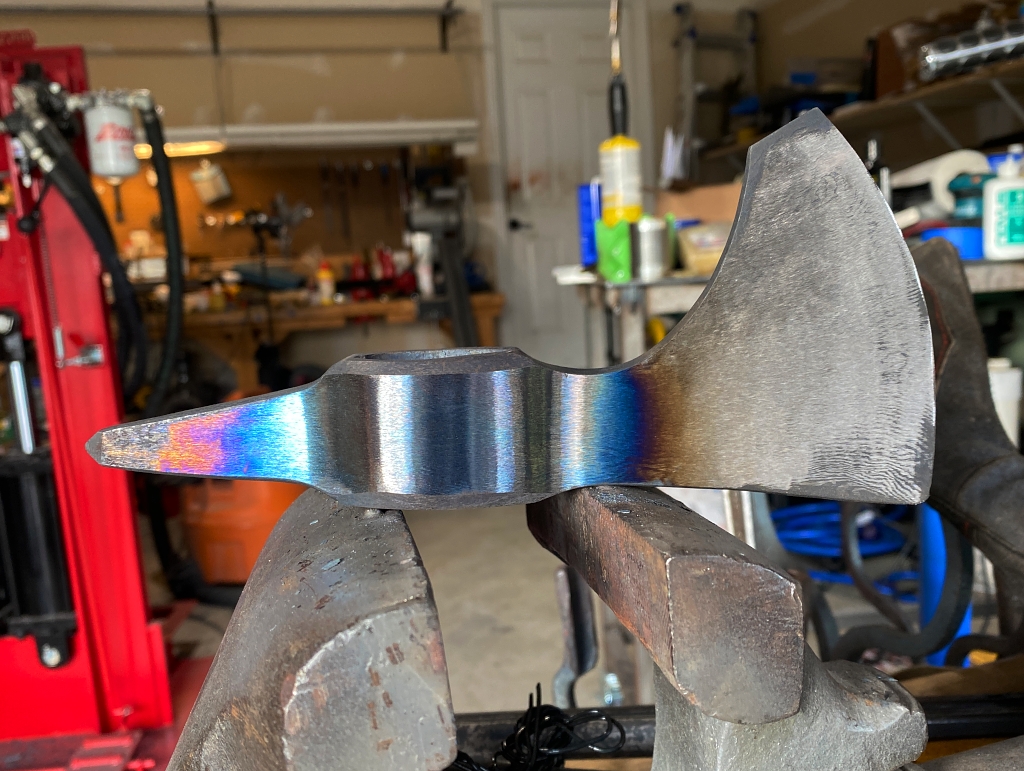
The solution is to differentially temper it. I use a torch and apply heat to the middle of the head. I watch the colors flow out on the steel. you can see this affect in the photo. As the color moves from straw through blue to extremely pale blue gray in the middle the hardness decreases. In the eye area its now in the 52-54 range, while at the cutting edge and spike tip its still at 60. the result is that the tip and edge will penetrate very hard surfaces without breaking or chipping, but the middle and body are very ductile and will withstand tremendous blows without cracking.
Its all in the heat treatment.
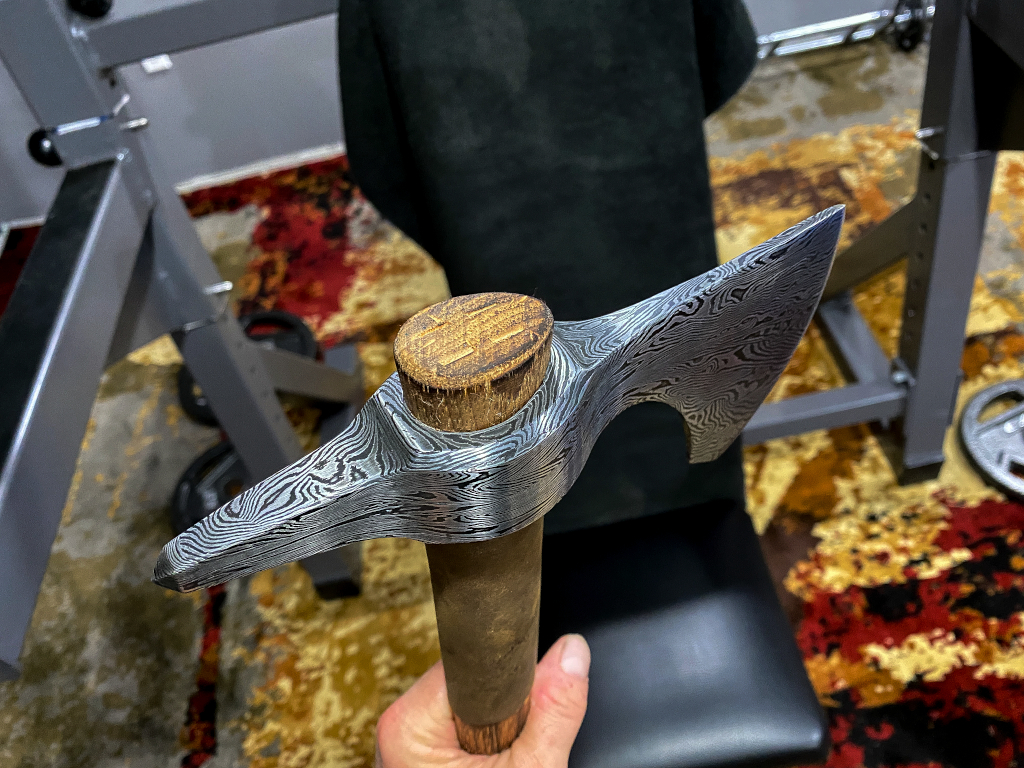
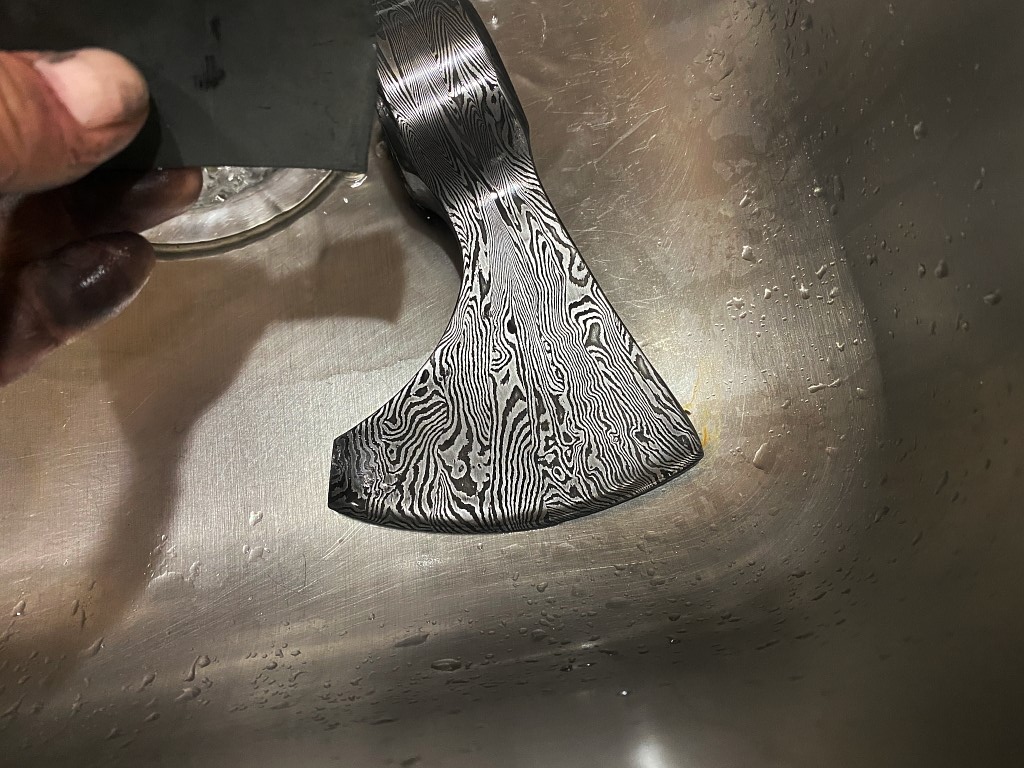
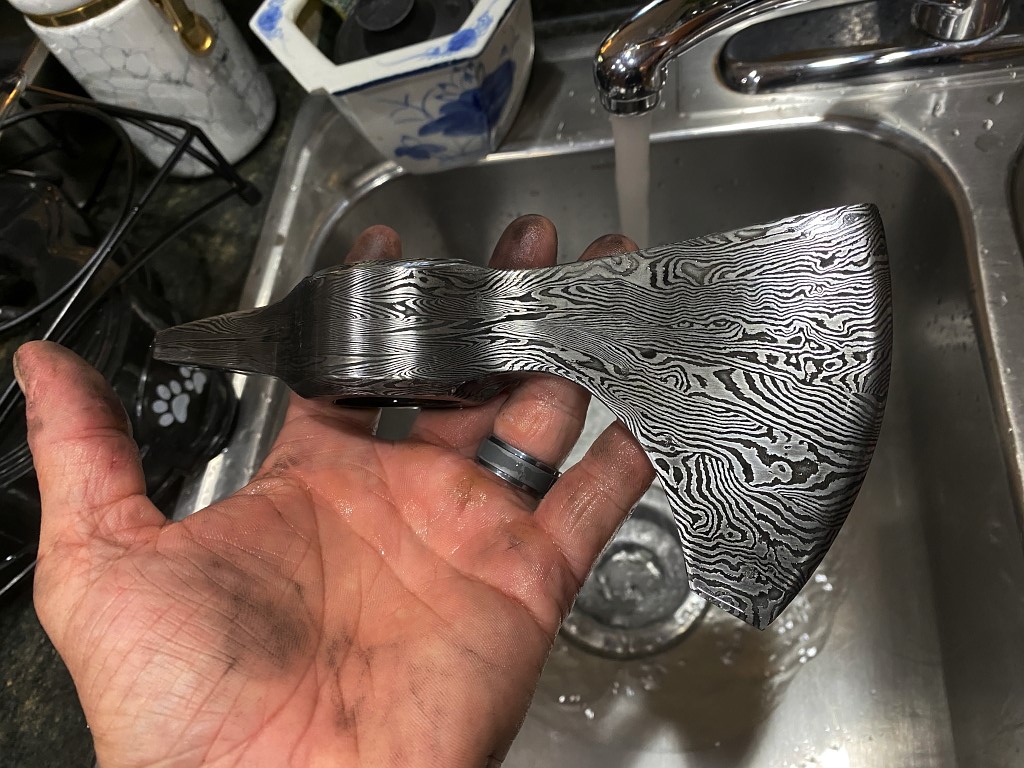
once its all cleaned up again and sanded out to abouty 800 grit, I soak it in ferric chloride. This is what shows the pattern in the damascus
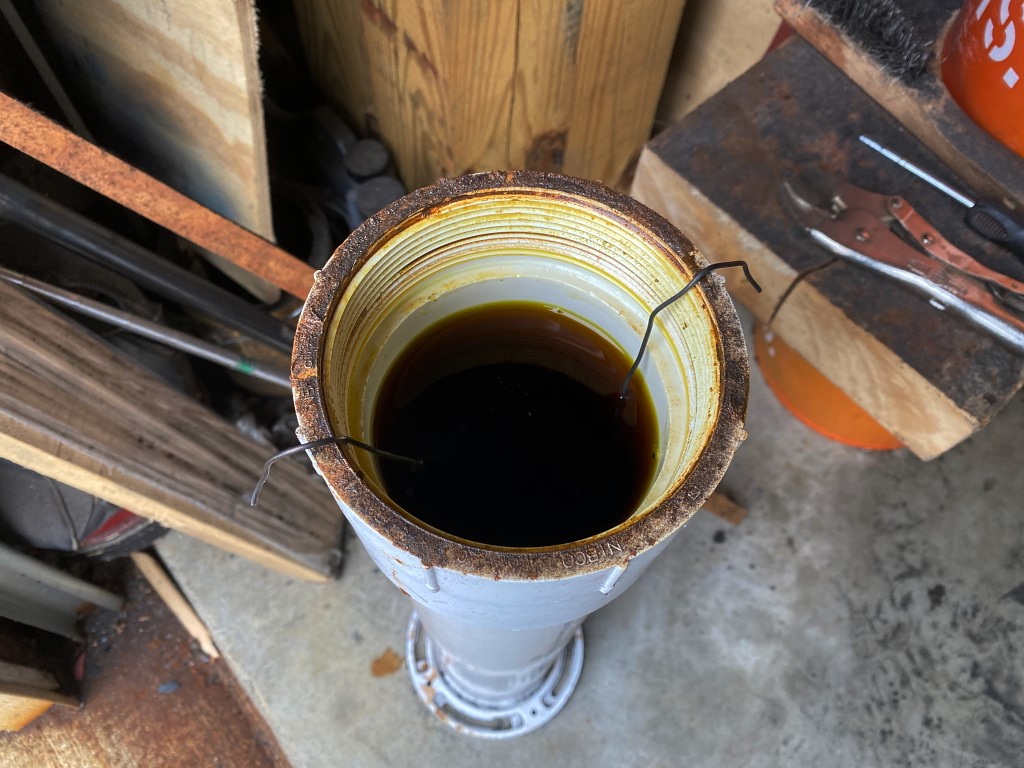
The whole thing looks black when you first pull it from the acid, but after neutralizing the acid I sand the surface with 1200 grit wet/dry paper and the oxidation wipes right off the 15n20 and brings it back to a bright, shiny finish. the 1095, which was etched much more deeply bu the acid, stays dark. This is what causes the contrasting layers.
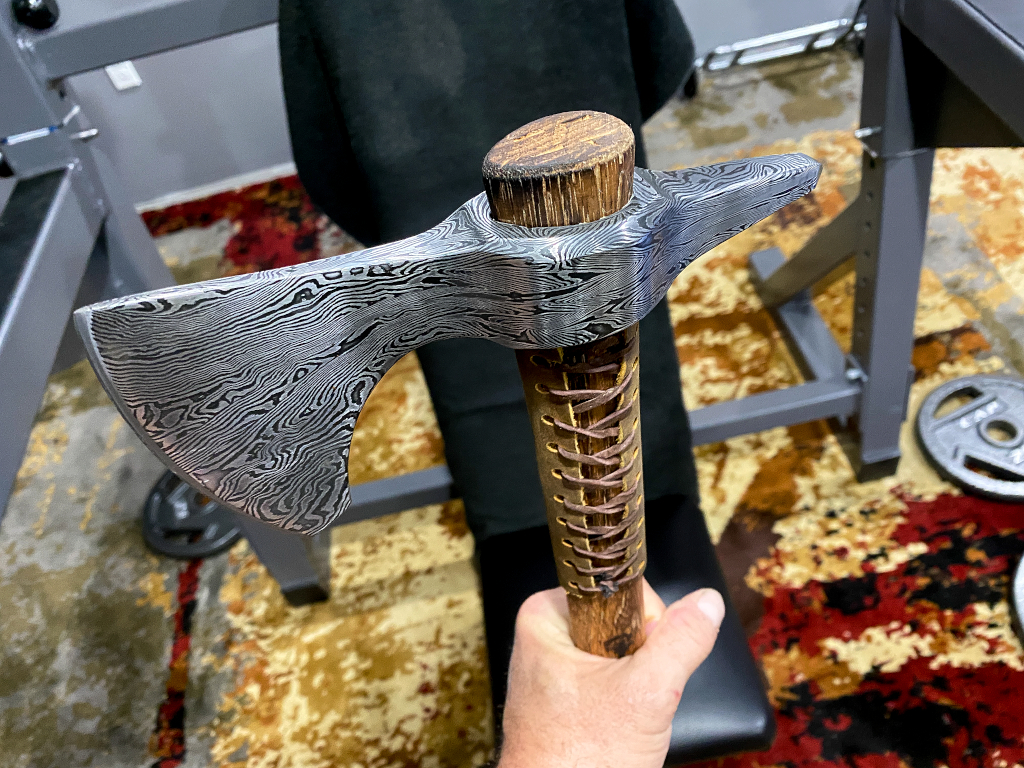
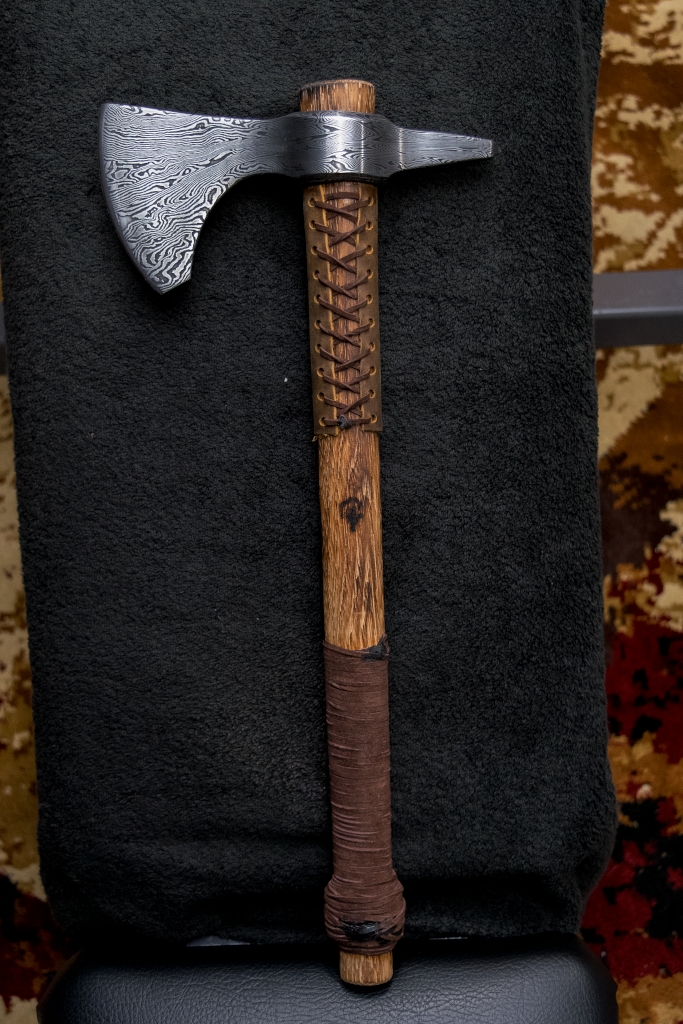
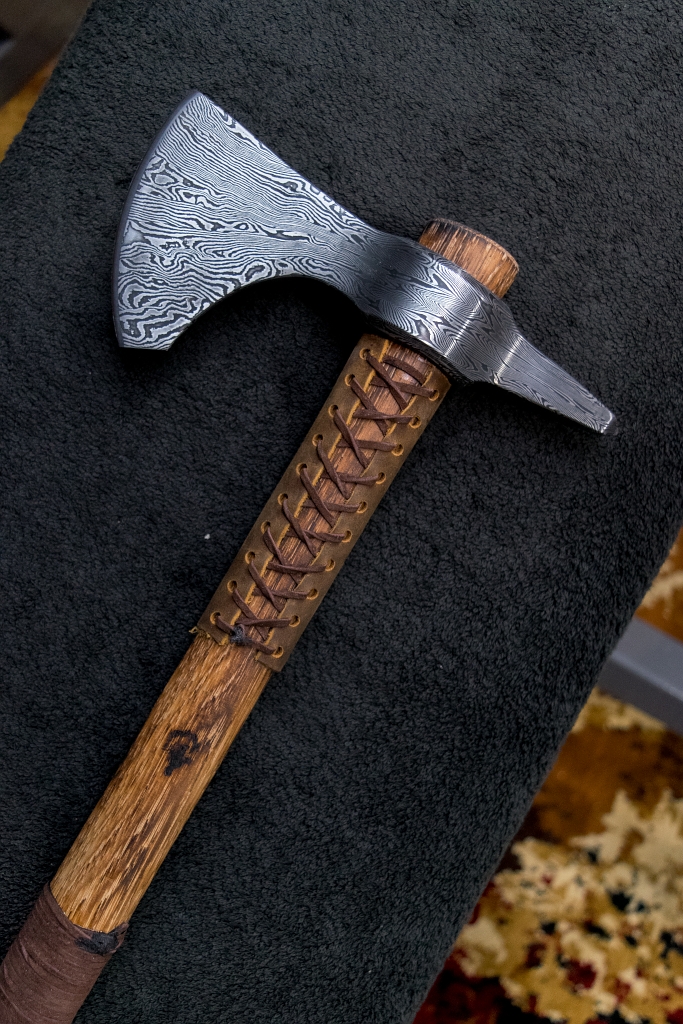
So the final touches added. A hickory handle, 19″ in length. The handle is shaped exactly the same as the drift I used to form the eye so its a very good, tight fit. Unlike a regular axe, which is driven onto the top of the handle, and then secured by driving a wedge into the top end, this is done more like a tomahawk. The eye is drifted with a top-down taper, so its wider at the top opening than it is at the bottom opening. The handle shaped the same way. The bottom end of the handle is then put through the top opening and hammered as far in as it will go, the handle size stopping it about an inch from the top. Its an ultra tight fit, and as the handle continues to widen toward the top end, it literally cant come off unless the top of the handle was literally compressed to the crushing point. A couple very thin wedges are driven into the gap from the bottom which prevents any possibility of the head sliding back down the handle.
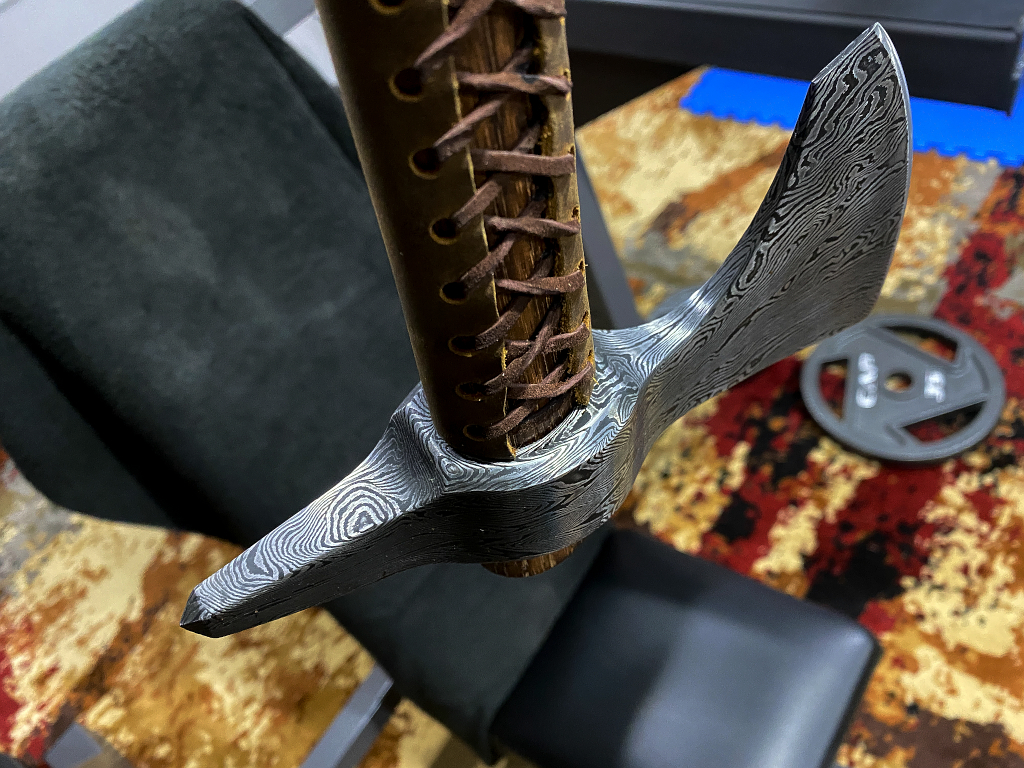
The leather cord wrapping and bottom swell give a very comfortable and solid grip and help the wielder to hold onto it while swinging it. An upper, thicker wrap to prevent damage to the handle in case of a missed strike. It all looks better too 🙂
I’m all about function first, followed by form.
My goal with this weapon is that if it should be suddenly transported back in time 1200 years, that it would stand up well (or better) alongside a similar weapon of that time period. I believe it would. Modern steels, and careful heat treating methods should yield a weapon that would actually outperform similar weapons of the period. At least with regard to the steel. Wood is wood. Its a good handle. No better I think than a handle of that time, but no worse either.
For modern times there are certainly better choices for weaponry than a one-hand battle axe, but if it ever came down to a mano a mano battle, this puppy would absolutely do the job.
Wall hangers are for pussies 🙂
Of course zombies have soft heads, so if it comes to that, this baby will really thin the herd 😉
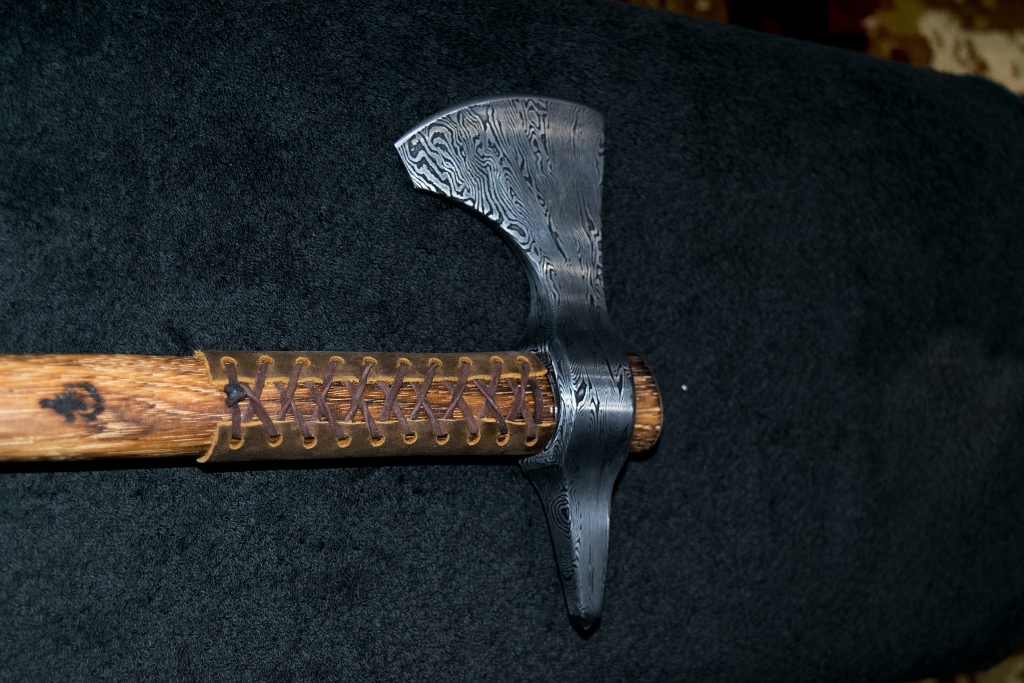
A couple off angles to show the top and underside…