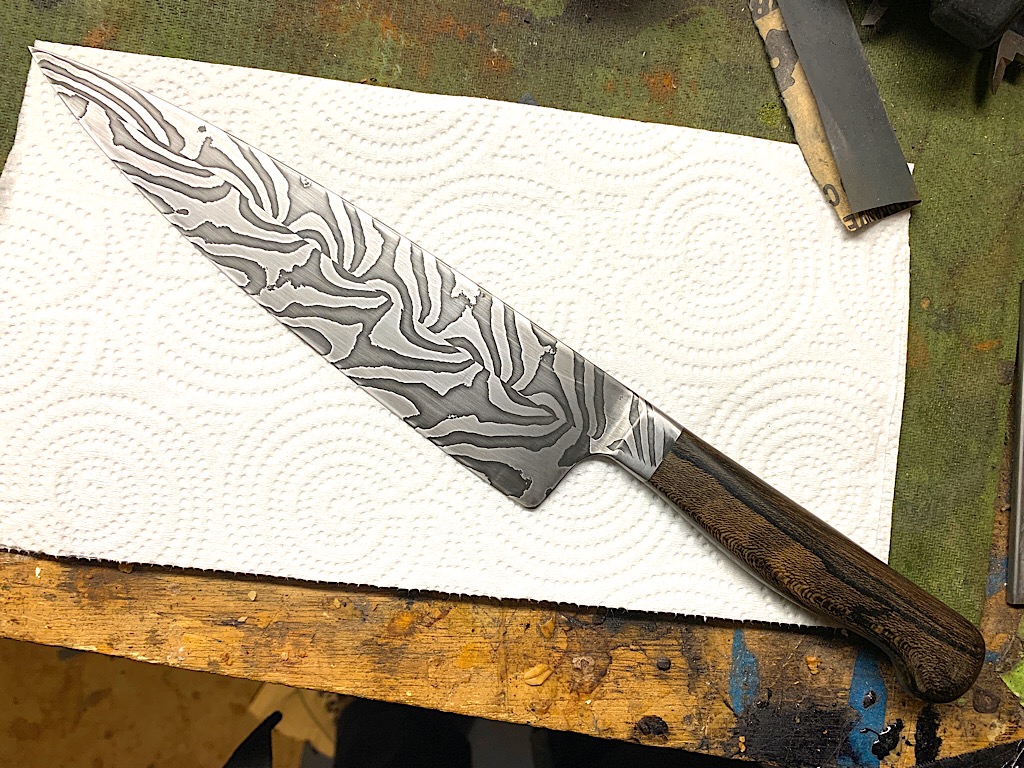
What we have here is the making of a twist damascus 8″ chef knife for my friend and former band-mate, Mike.
We’ll start with the making of the damascus itself.
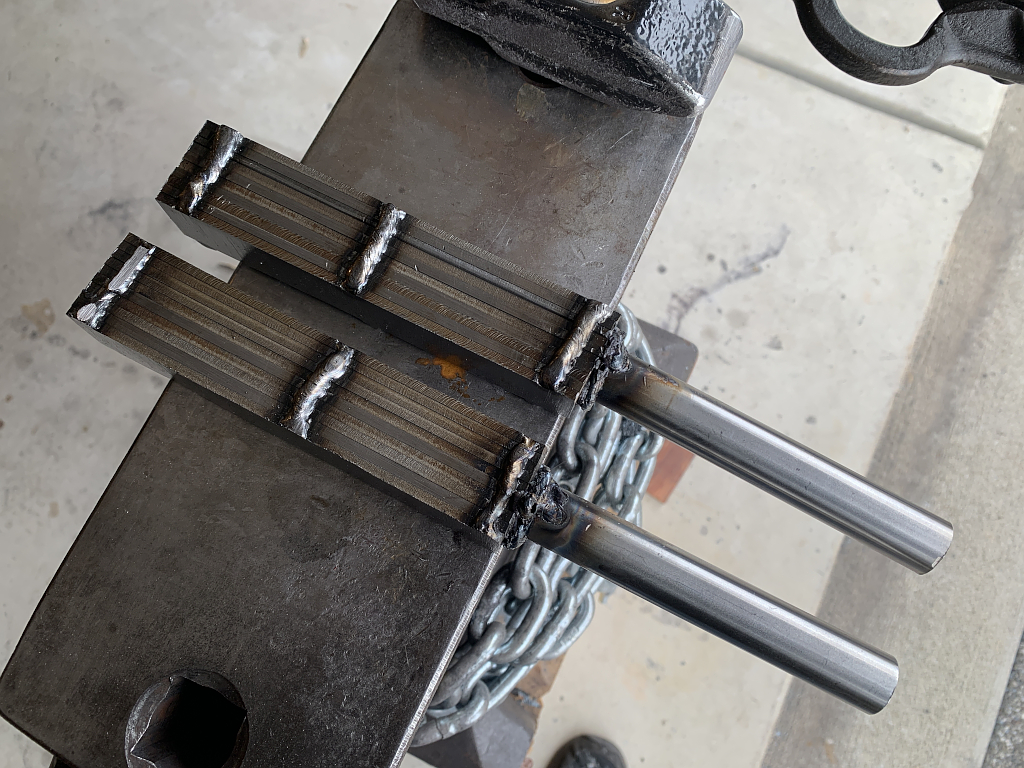
I’m using 2 kinds of high carbon steel. 1095 and 15n20. I arrange them in two stacks of 10 layers, with each steel type alternating every other layer. A couple quick weld beads hold the stacks together for forge welding.
The stacks are then popped into the forge, and heated to roughly 2300 F, which is hot enough to cause the layers to fully fuse together when hammered, so they become solid billets rather than stacks…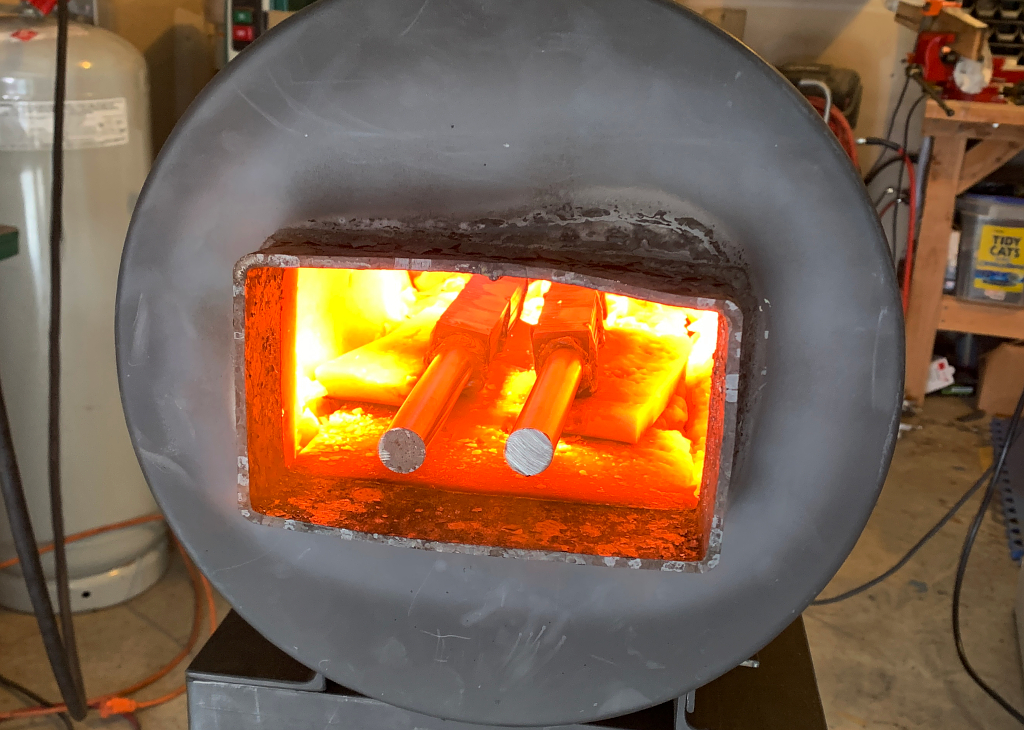
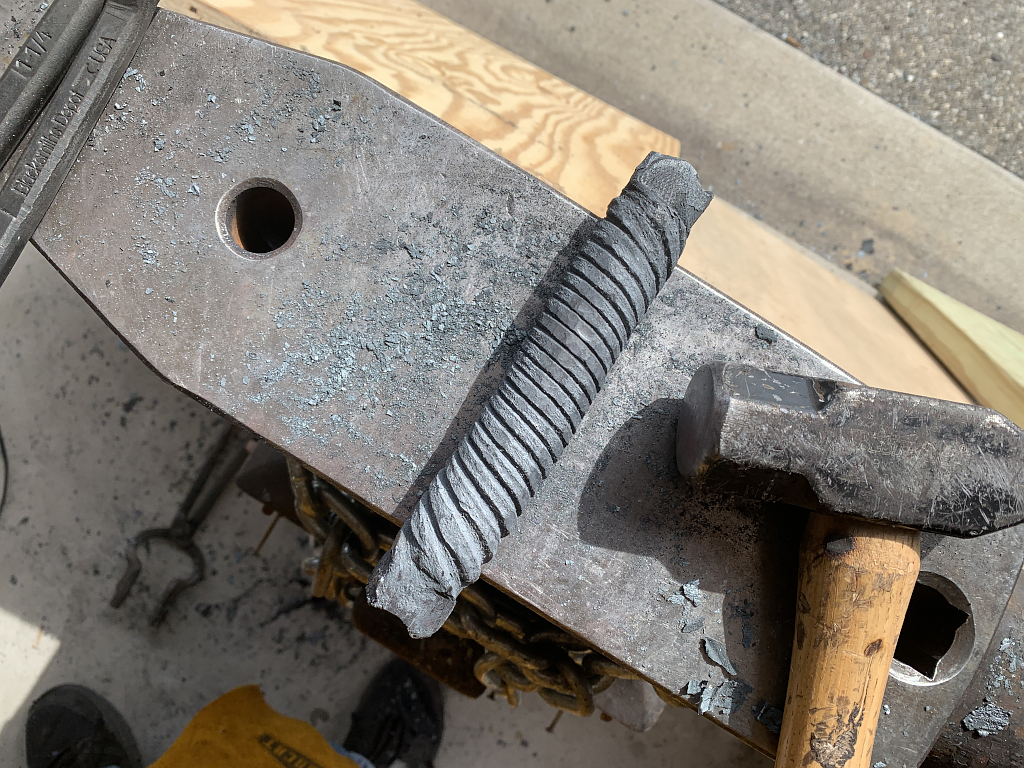
Then each stack, which are now actually solid square bars, are clamped in my post vise and twisted using a twisting wrench I made for this purpose.
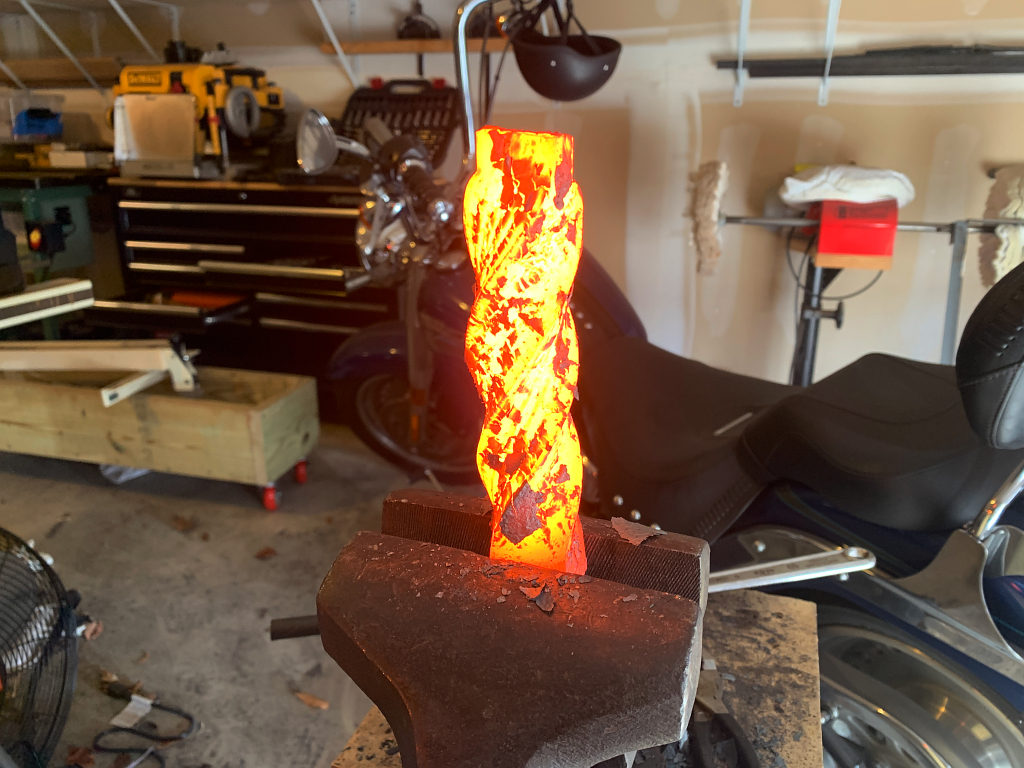
The bars are twisted roughly 6 full twists each…
One down, one to go.
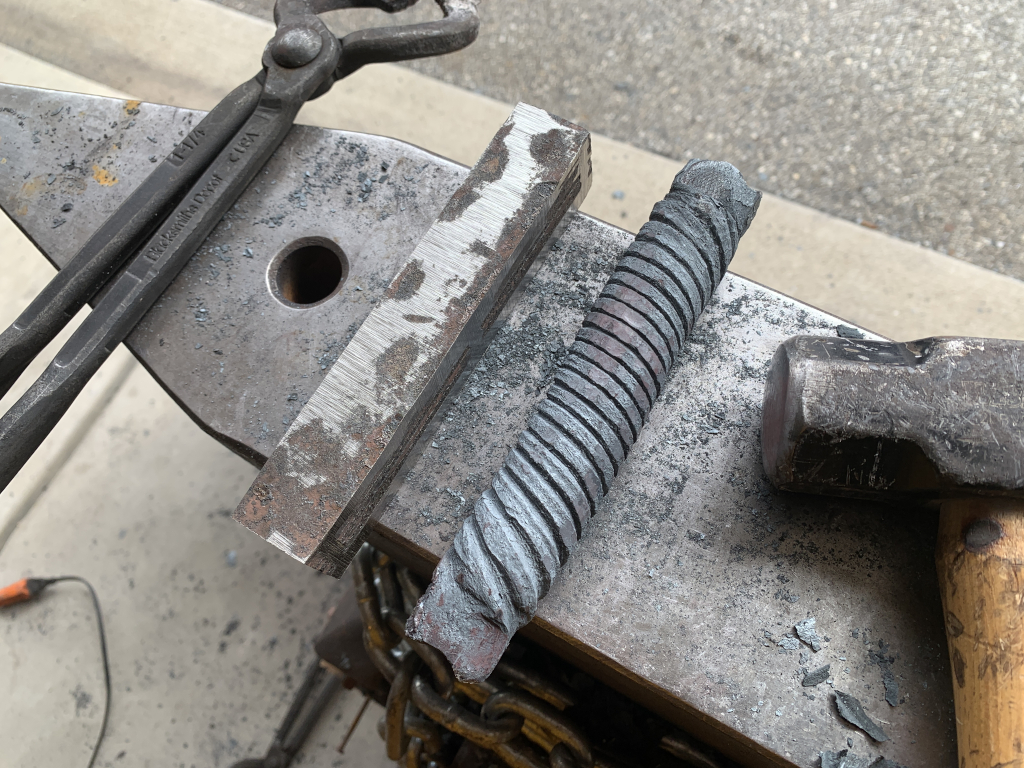
As you can see, one bar got twisted clockwise, and the other bar counter-clockwise, and then forged roughly back into a square bar shape.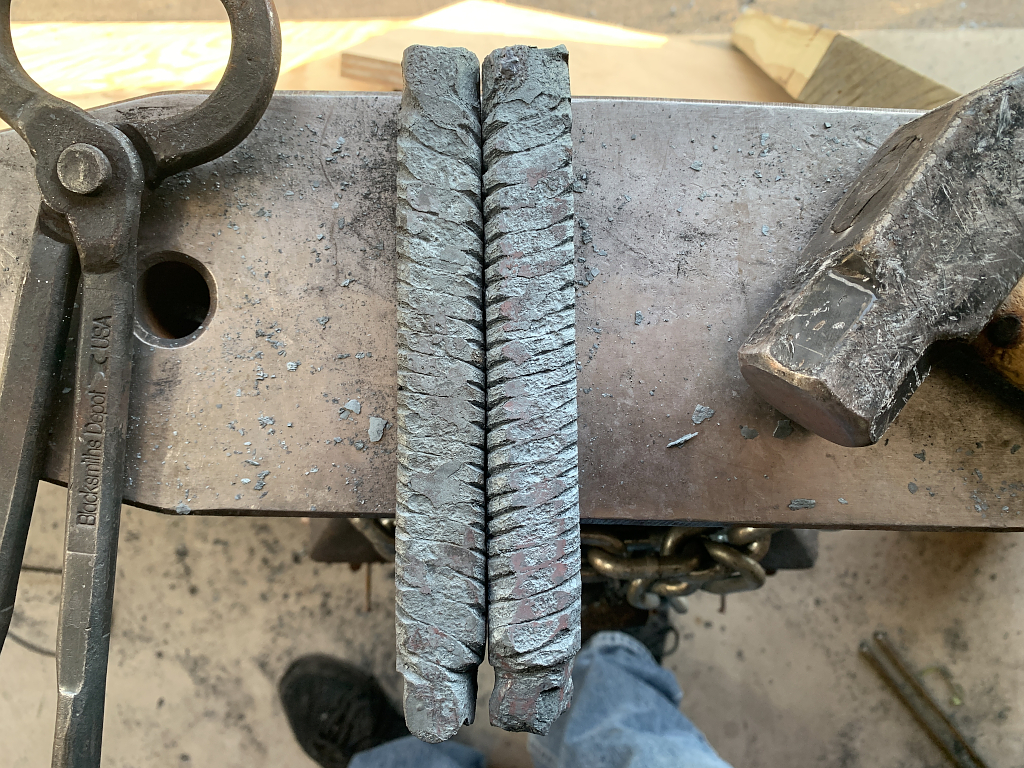
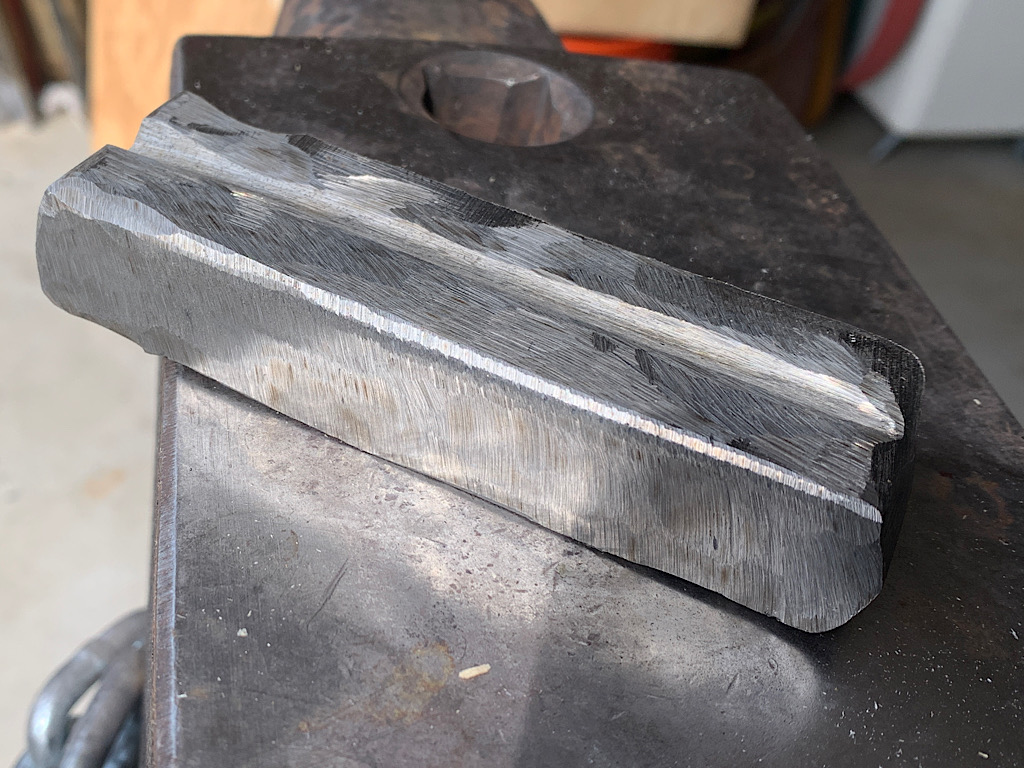
One face on each bar is then ground flat and clean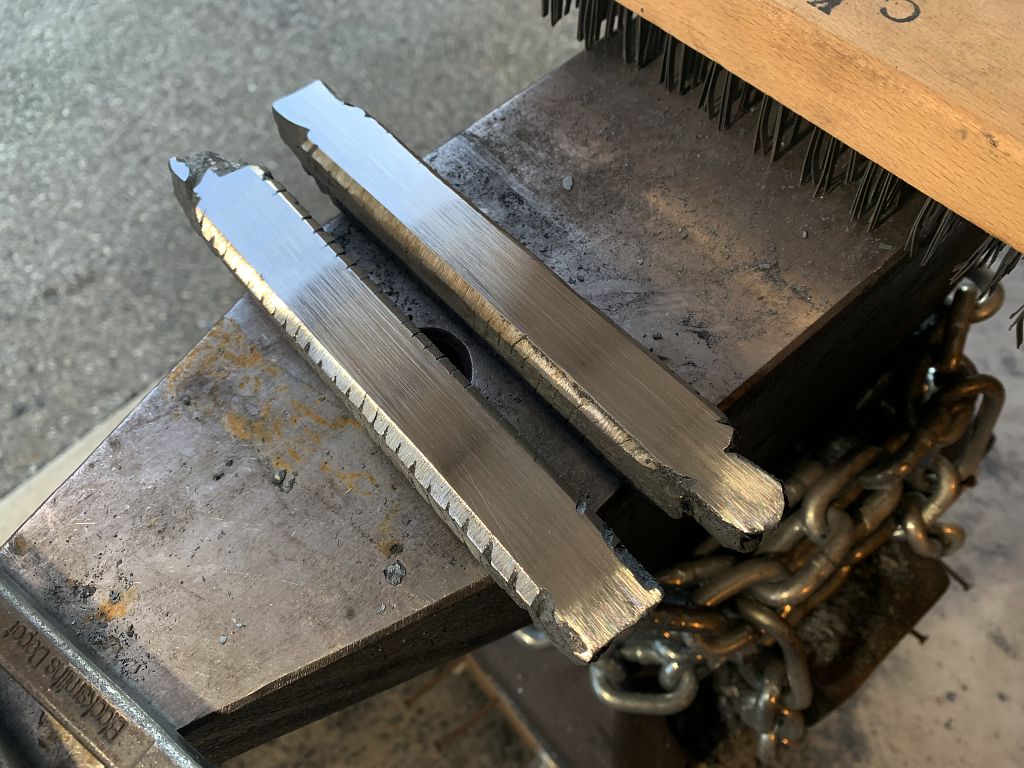
tack-welded together…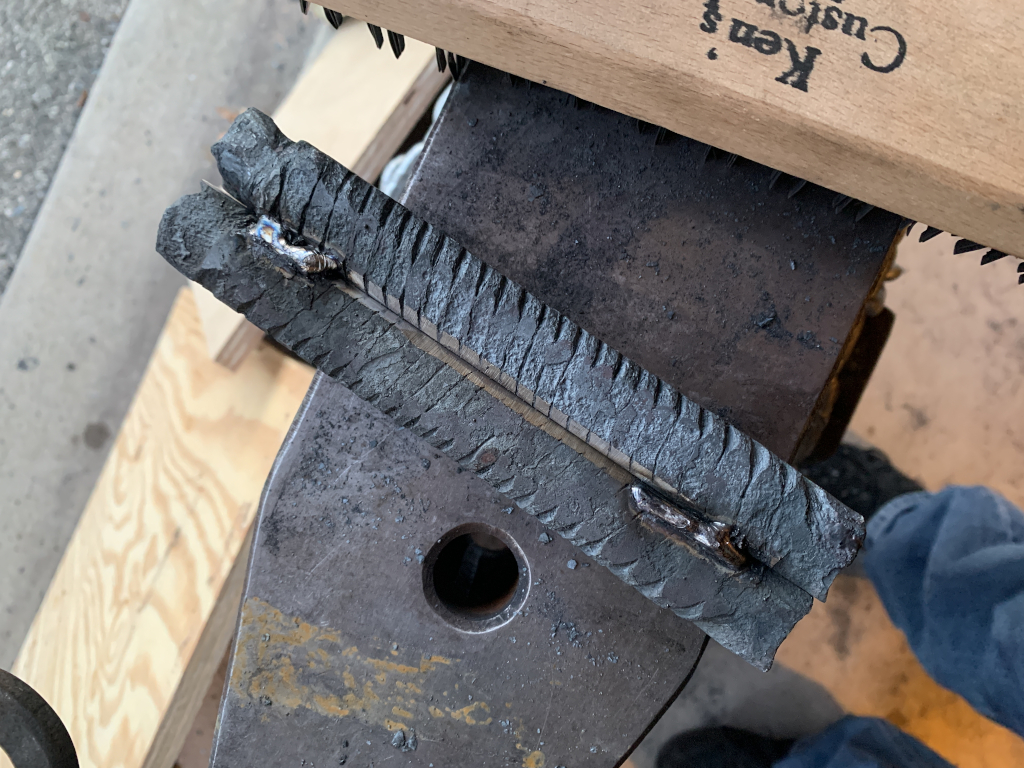
and then these two bars are also forge-welded into one solid piece of steel.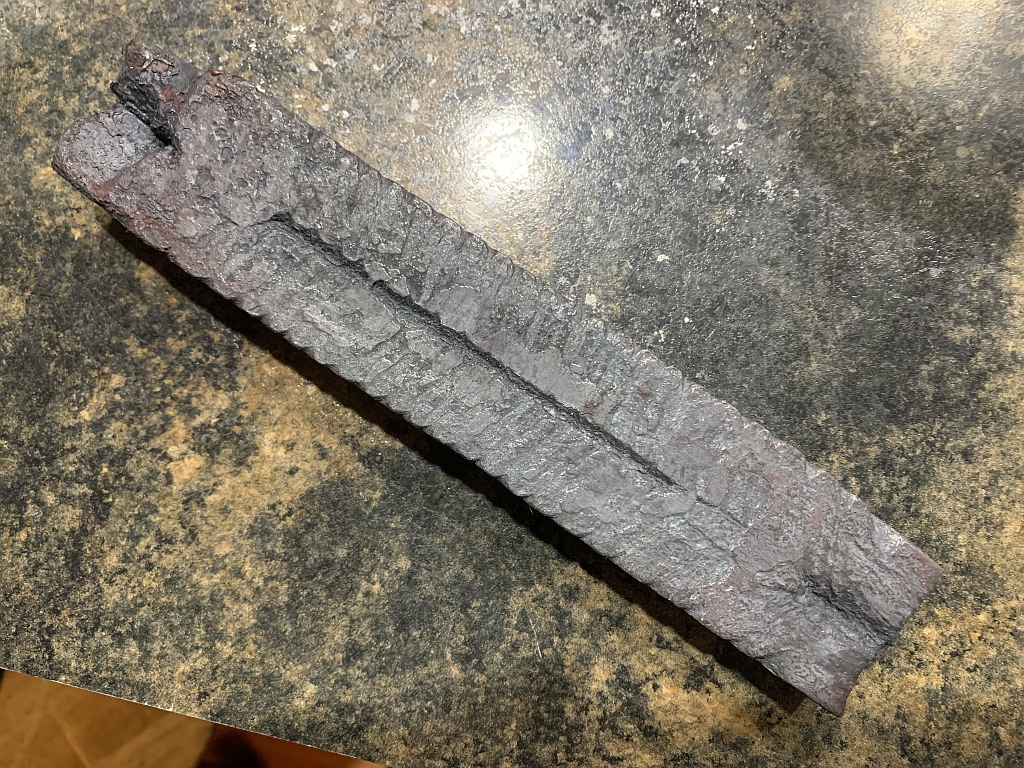
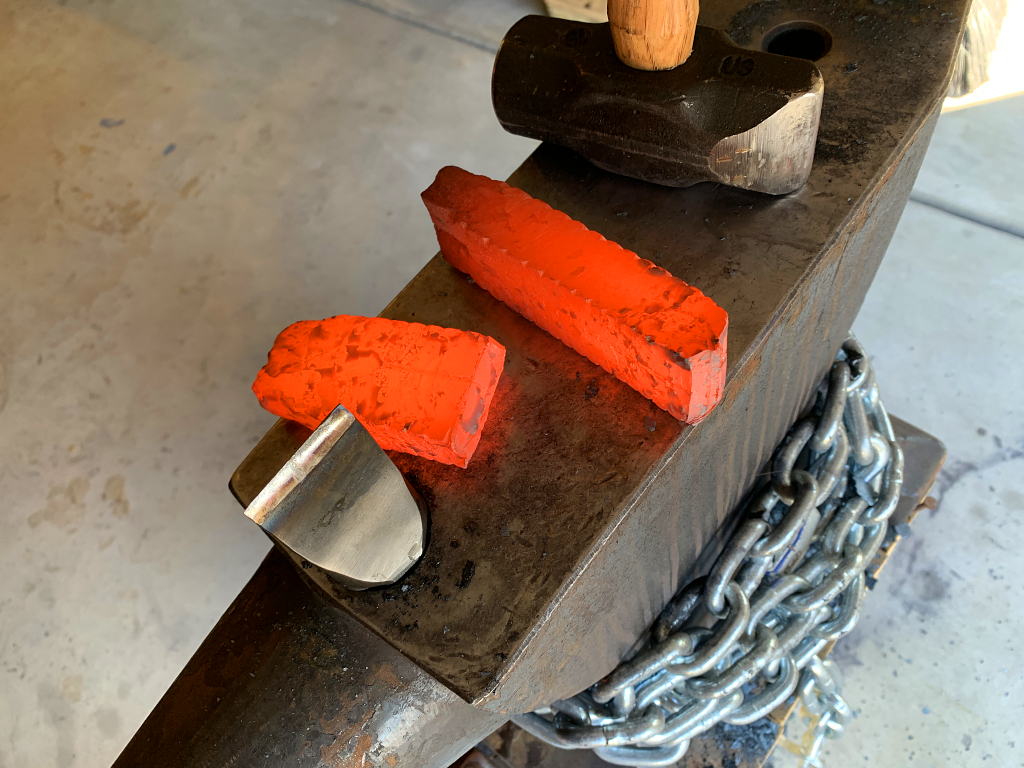
Here I cut off about 20% of the billet to use in a different project.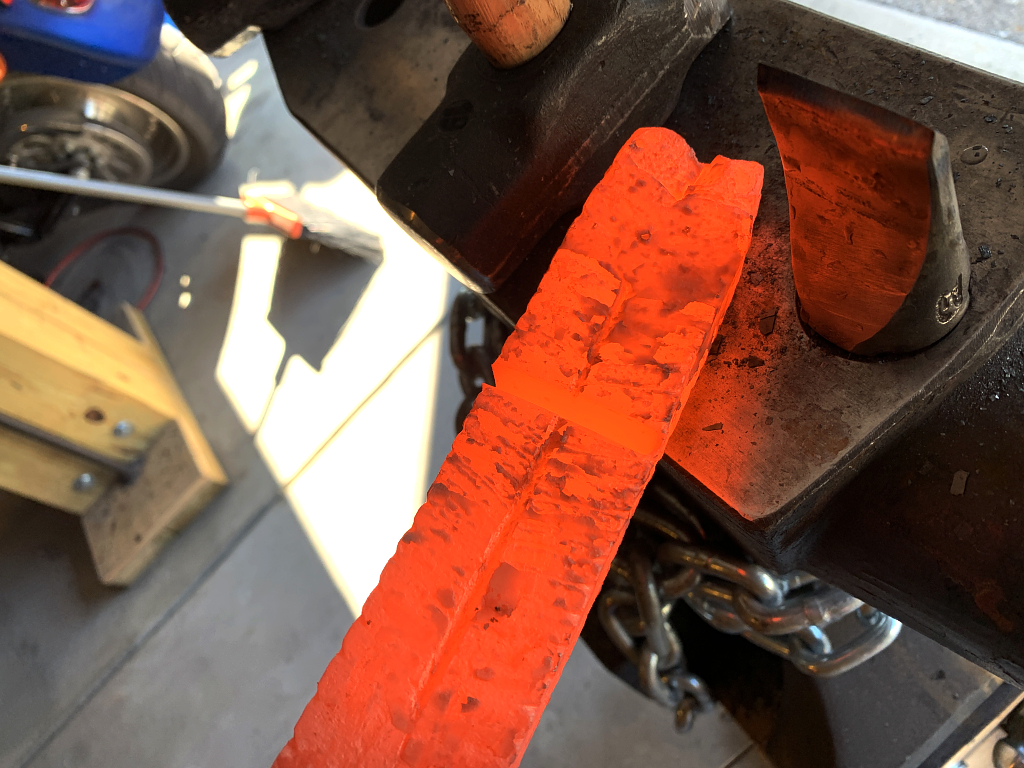
The remaining 80% is ground clean and free of forge scale. This is important because I need to see clean steel everywhere to know that the piece is fully forge-welded and that there are no delaminations, cold-shuts, or other inclusions that would be a problem when the billet is forged out into a blade. Given the length and thinnness of the finished blade, any minor defect in the steel would ruin the final product. In the case of this billet, we are good to go 🙂
I forge it out into roughly the shape I want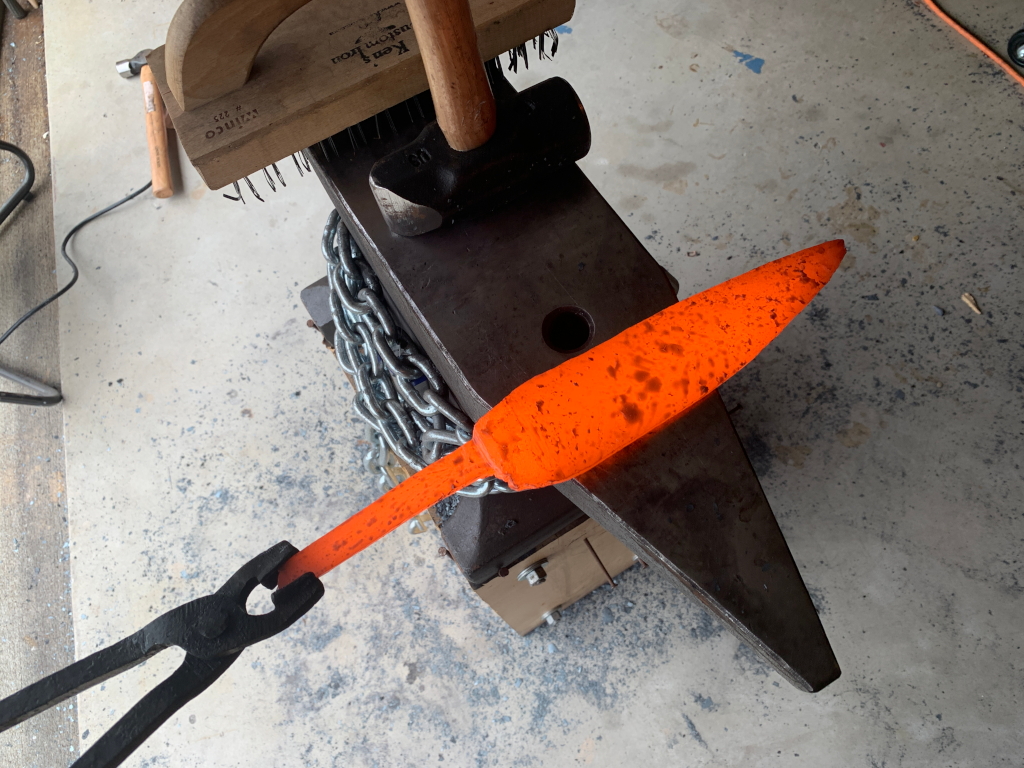
Multiple heats are needed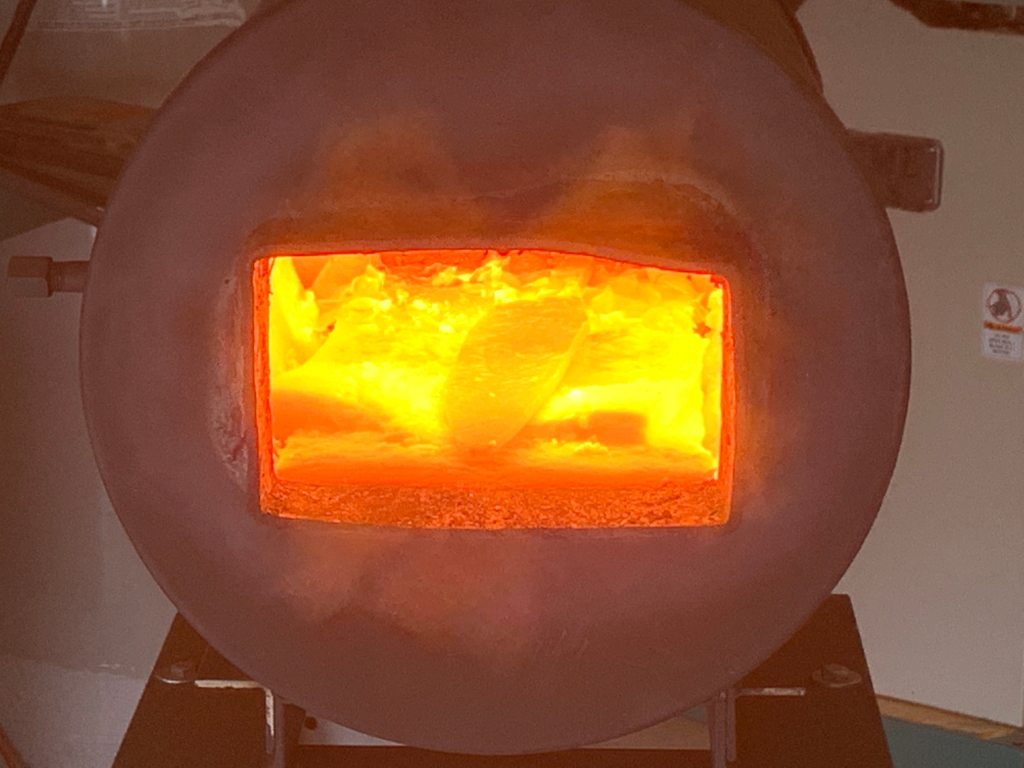
The goal is to get very close to final shape, but slightly too thick and over-sized so I can then grind it to final shapes on the belt grinder.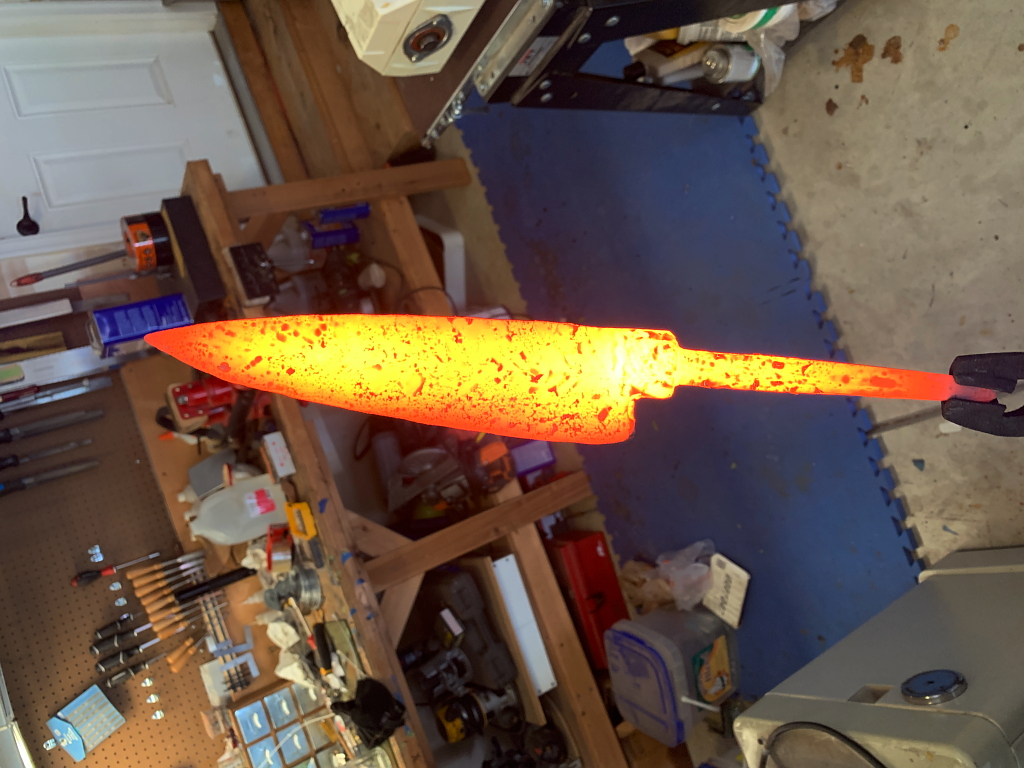
Once there, the blade is heated to 1475 F, and “soaked” at that temp for 15 minutes. This brings all the carbon in the steel into solution, and then the blade is quenched very quickly in Parks 50 quench oil.
This hardens the steel. Good knife blades have to be quite hard or they lose their edge literally after only one or two cuts.
One hardened, then the blade need to be tempered. This tempering actually reduces the hardness slightly, but also removes the brittleness of the freshly hardened blade. I wouldn’t do to have the blade shatter if accidentally dropped on the floor…
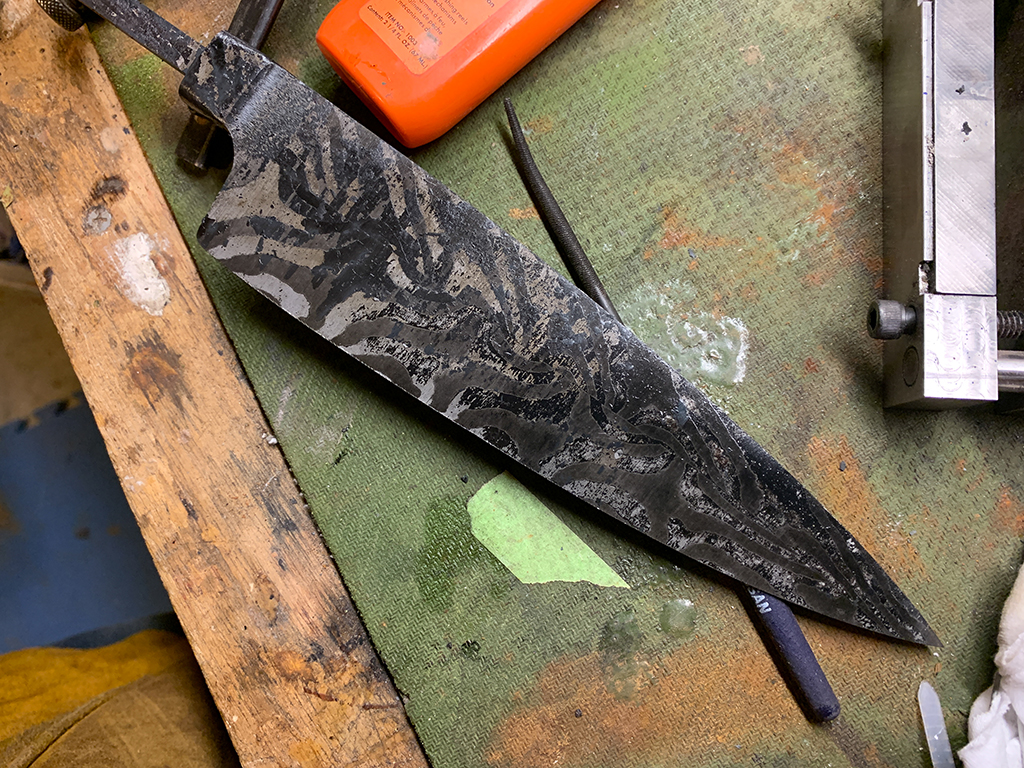
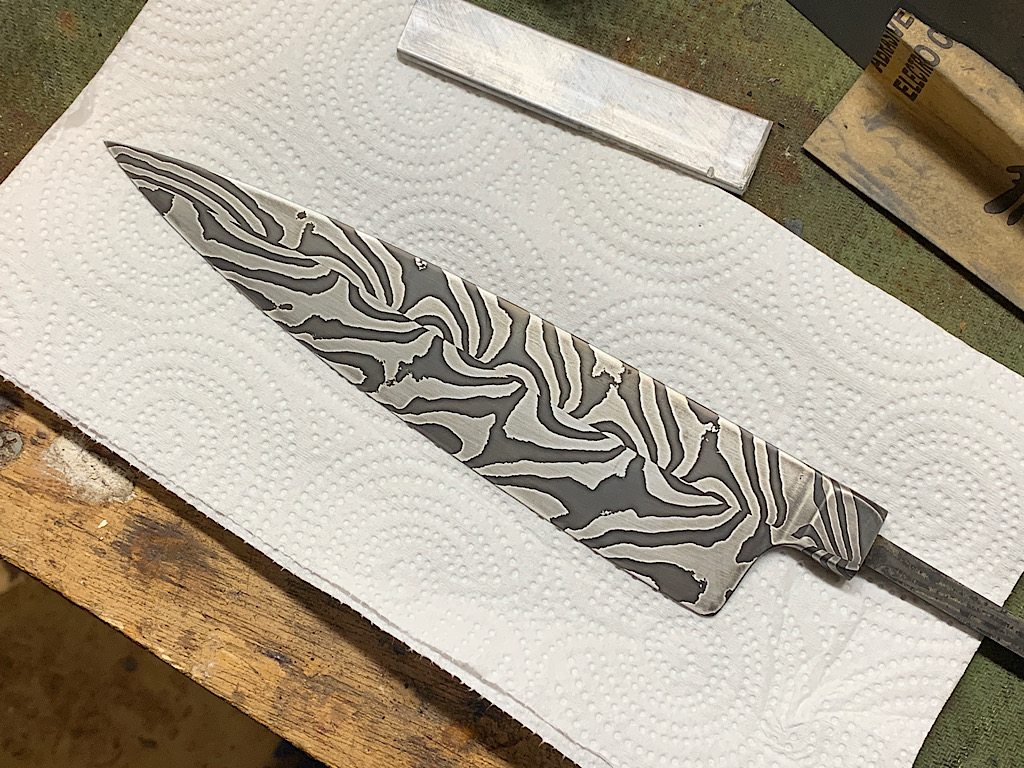
Decarb forms on the blade during the heat and quench allowing us a sneak peak at the final pattern. The interesting thing to note is that the visible pattern at this point is actually a negative, or reversed image of what it will look like when its etched. The lighter areas of the visible pattern at this point will actually be the darker part of the pattern in the finished blade.

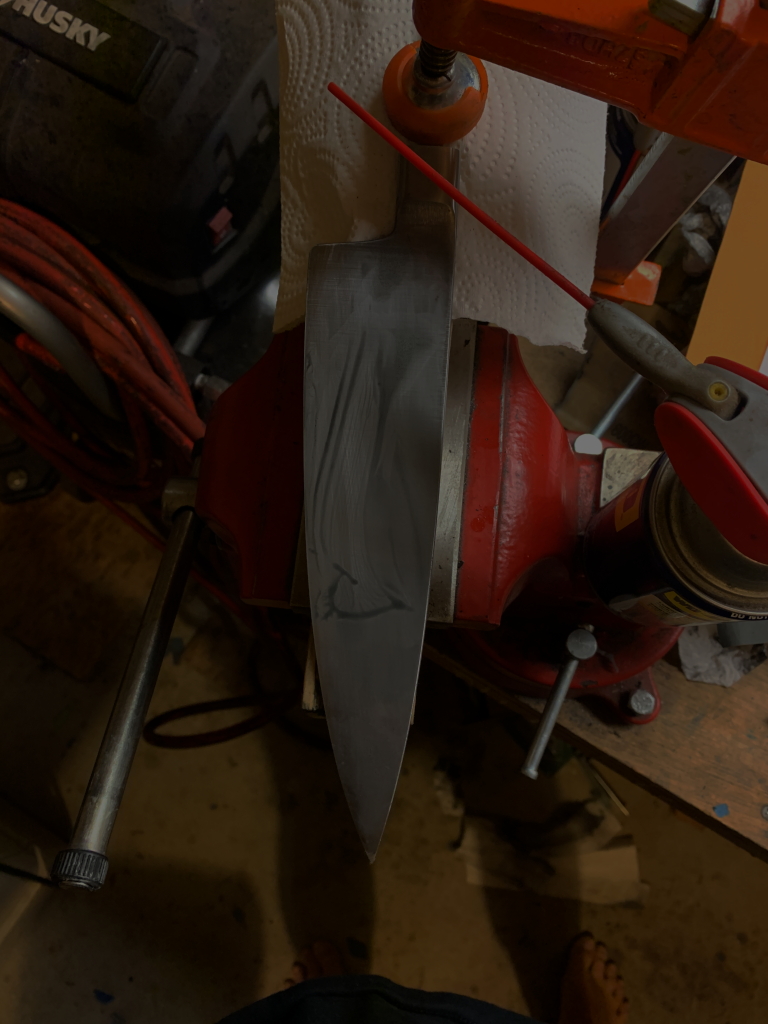
The pattern, indeed the entire top layer of steel is then immediately ground off on the belt grinder using finer and finer grits belt.

Then wet sanded by hand using WD-40 as lubricant bring the blade up to a uniform 800 grit finish.
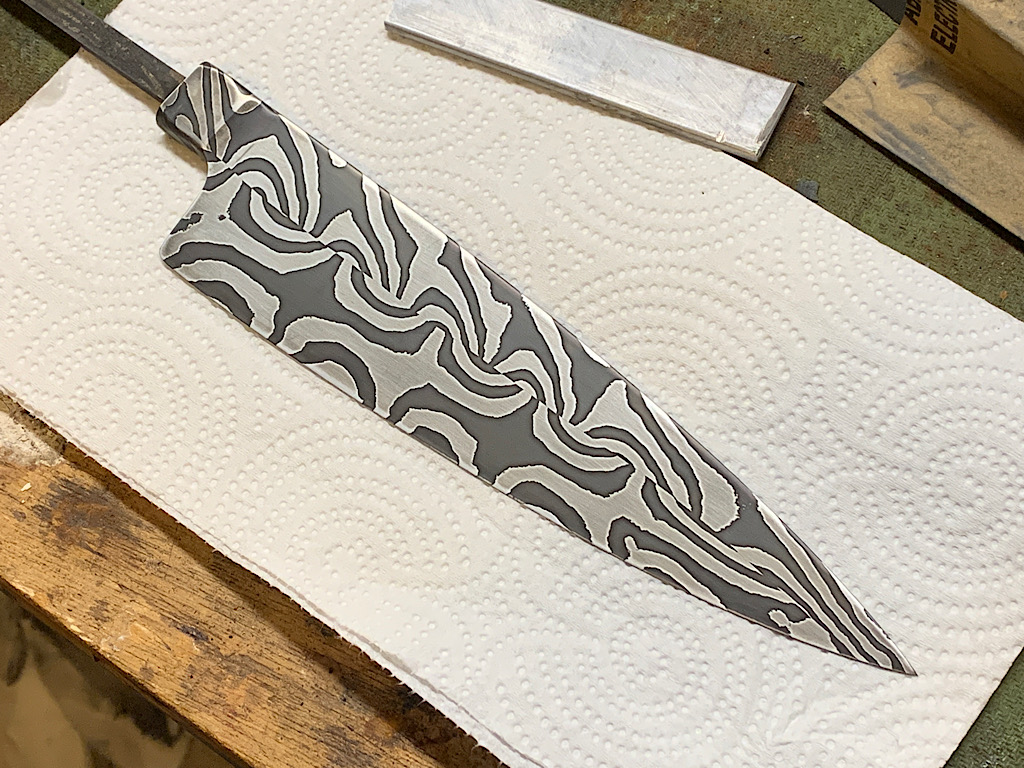
the blade is then immersed in ferric chloride, which causes the surface to oxidize. The 1095 steel oxidizes a lot more than the 15n20 which brings the pattern out in great contrast.
I didnt photograph the in-between stage here, but the entrire blade is actually black when it comes out of the acid, and then 1000 grit sand paper is used to lightly sand the surface. It removes the black from the 15n20, but the 1095 is etched deeper and so it remains dark.
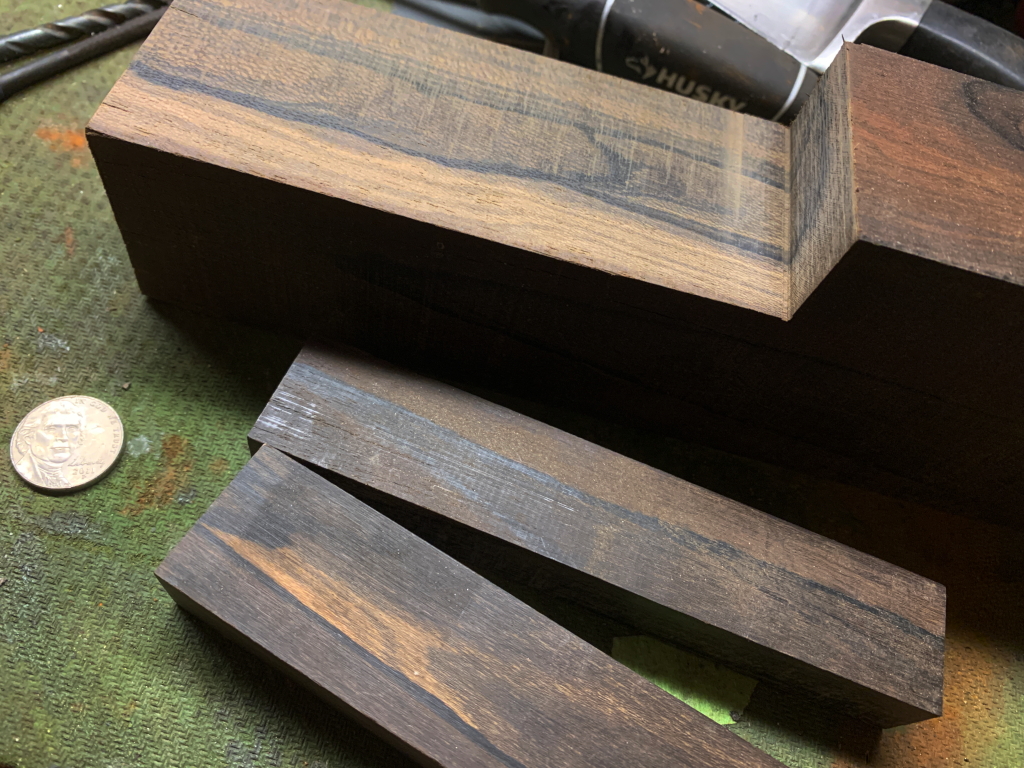
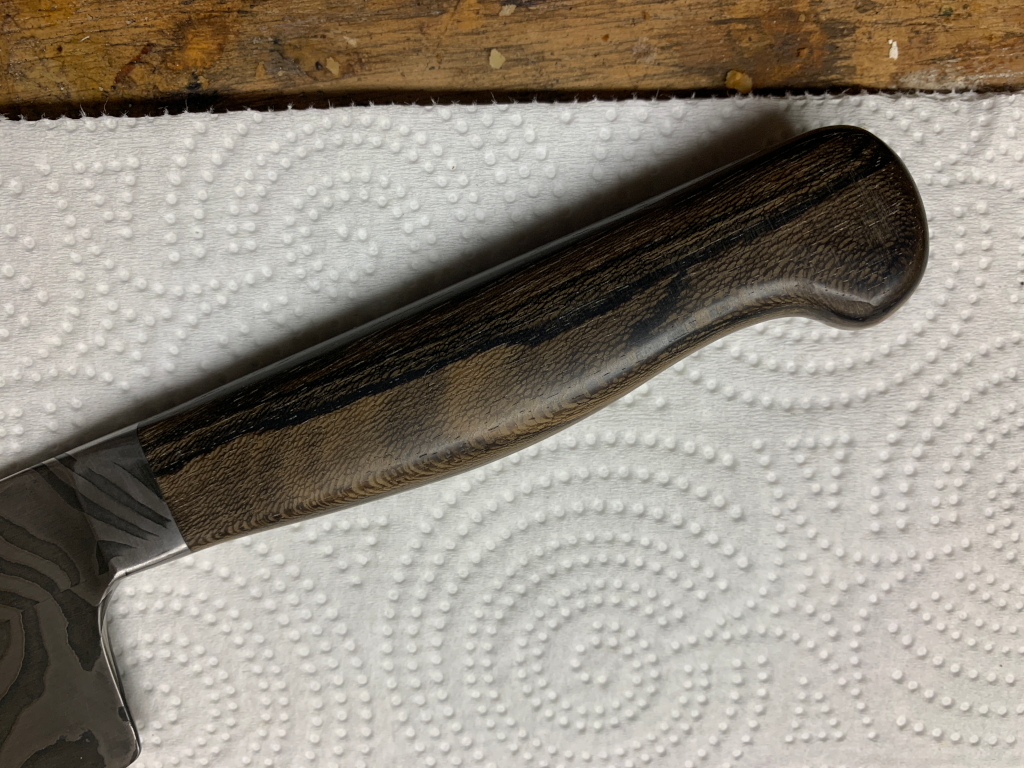
the last step is making a handle. This is a block of ziricote, which is a tropical hardwood with beautiful grain and figuring. A suitable sized piece is cut off and drilled to fit the tang.
Once a good fit is achieved, the handle is epoxied into place, and then ground and sanded to its final shape. The last step for the handle is that its lightly coated with Johnson paste wax and buffed to a hard finish. This will keep moisture out of the wood.
The very last step is sharpening, which is not shown here. Unfortunately this knife had a hard deadline for delivery and I was not able to capture the last few steps in as
much detail as I would have liked