Im making this set of damascus knives for my friend Kenny. He and I actually met over our shared passion for building guitars
When talking about knives and other items that are forged from damascus steel, you’ll frequently see or hear references to the number of layers, or “layer count”. These knives will be 100 layers. Theres no right number of layers. It really depends on what youre making and how you want it to look.
There are many different patterns possible, the most common are ladder, raindrop, twist, etc. They can have very different finished looks, but they all start out basically the same way. The smith stacks up pieces of two (or more) different types of steel. Generally these are different alloys of high carbon steel, but there are damascus items made from stainless as well.
For my damascus I use 1095 and 15n20. Both different types of high carbon steel.
So to start with I grind all the mill scale and dirt off the steel. these can cause bad welds between layers. Then I stack the pieces, alternating every other layer 1095, 15n20, 1095, 15n20, etc. I tack-weld it together and weld on a handle.
This stack is 20 pieces, each 1/8″ thick.
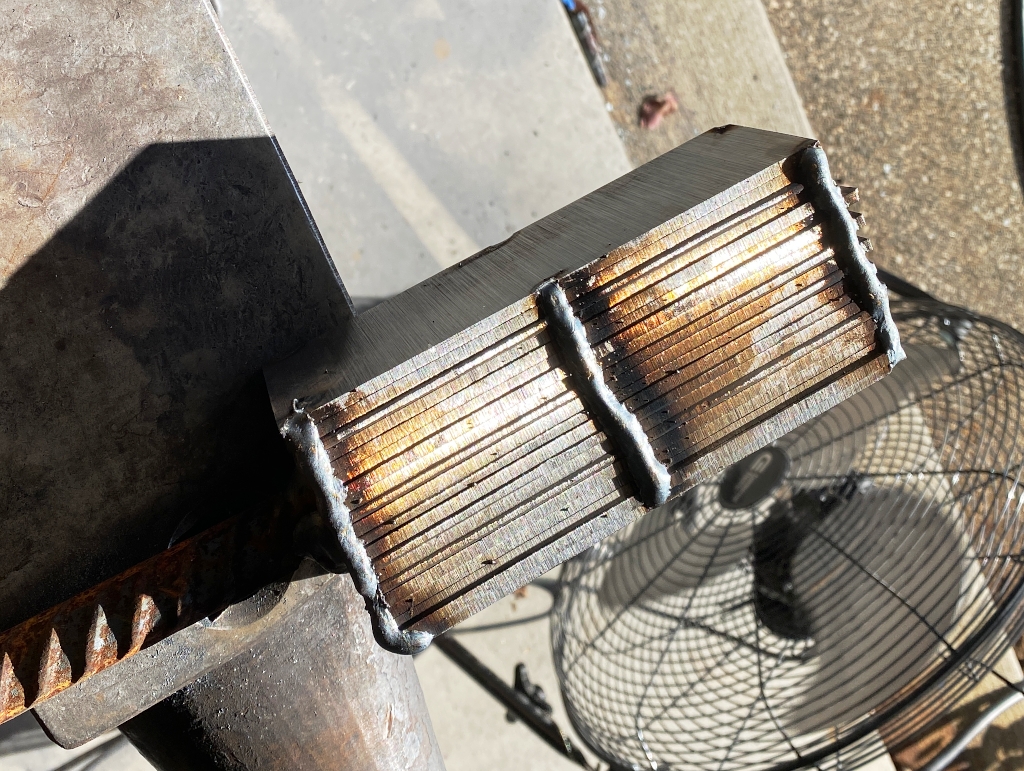
This stack gets forged together into one solid piece, and “drawn out” into a much longer bar, though not as tall.I use my 50-ton hydraulic press for this part.
I have made damascus using just a hammer and anvil, but it takes 20x longer, a lot of physical effort, and a dozen heats where you lose steel to scale each time. I can do low layer counts that way. I have a damascus bowie I forged entirely by hand here. The forging of the damascus billet takes a couple days all by itself before I make the knife from it. I prefer the press. Lets you get to the fun parts of forging a lot faster. 🙂
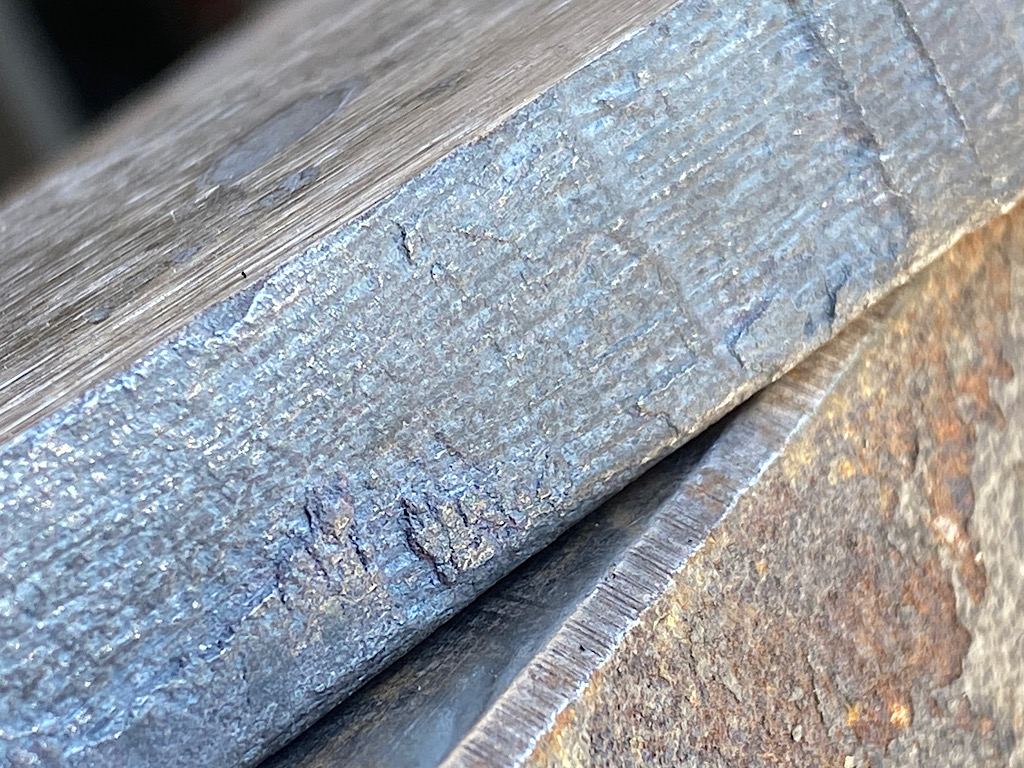
So the initial stack had 20 layers. The forge-welding fuses the layers into one solid piece, but since they dont get hot enough to melt into a liquid state, the layers remain distinct from each other.
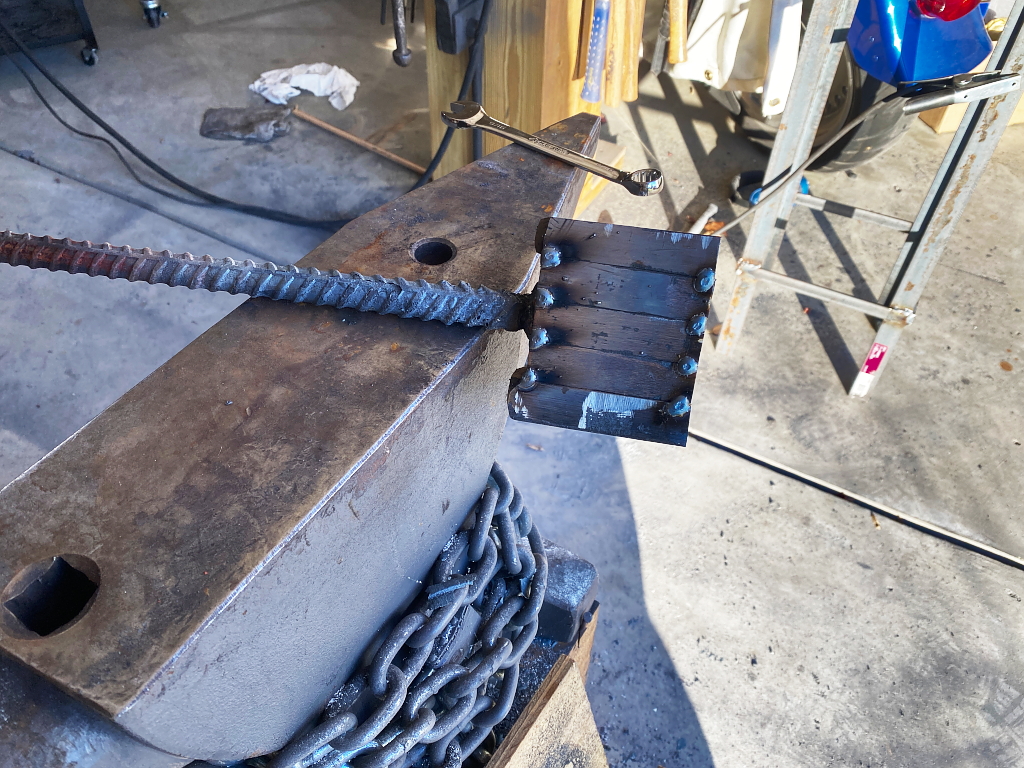
Once its full cooled off I then cut the bar into 5 pieces. I’ll grind all the forge scale off of these, and particularly the flat faces where they will be stacked up.
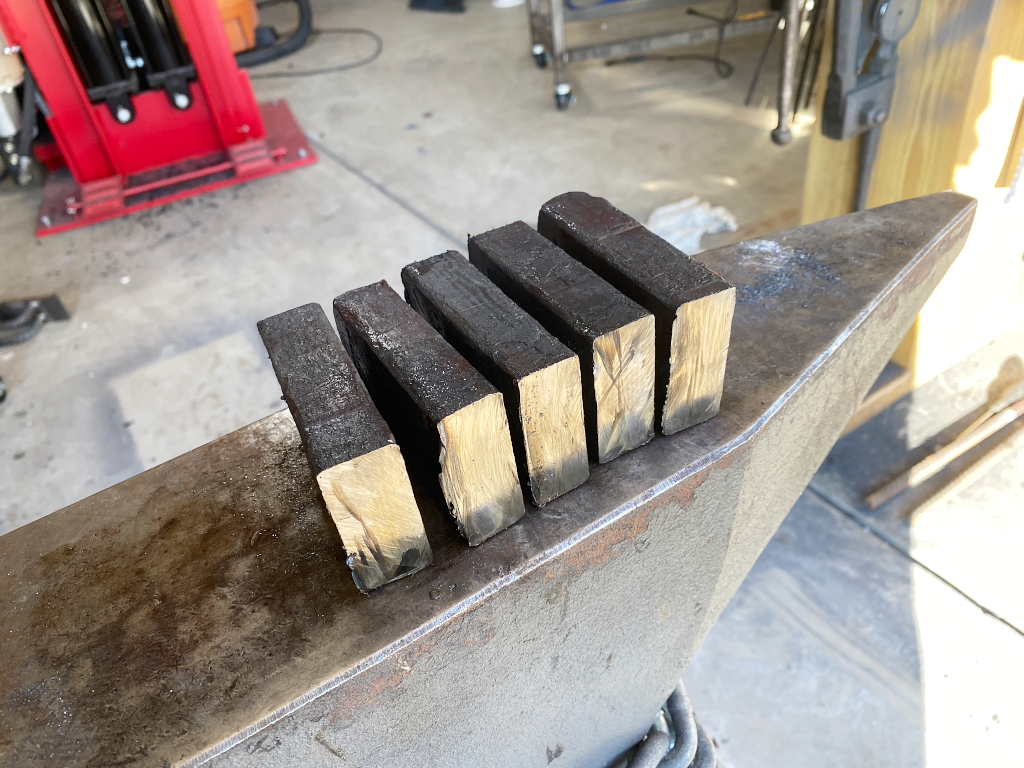
Then I tack-weld these into another stack, and re-attach the handle. 5 x 20 = 100 layers
into the forge again
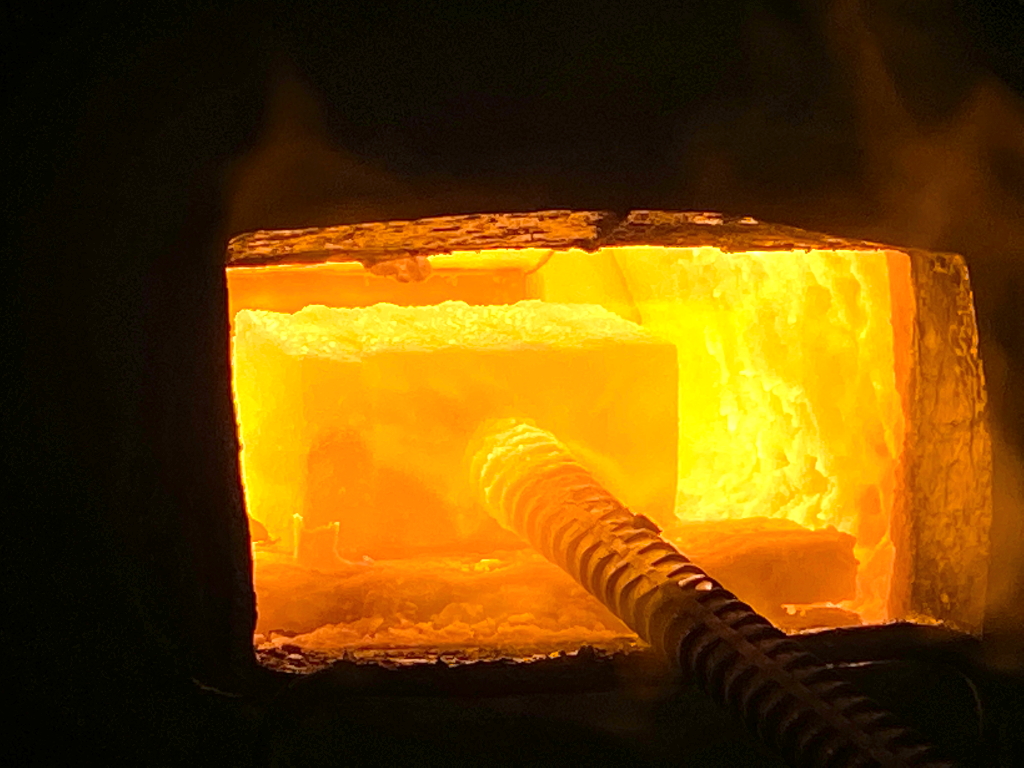
These pieces are forge-welded together just like before, and drawn out again into a longer, flat, solid bar. Now we are at 100 layers
Again I grind off most of the scale

At this point, it could be cut and restacked, and re-welded again if I wanted to. Simply cutting in two and reforging would produce a 200 layer billet.
Some smiths like to make huge layer counts. 500, 1000, etc, but for knife making, the more layers, the less clear and distinct the pattern becomes. I would say 100 layers is about the line for me. This is a personal taste thing.
From here the bar can be forged, twisted, ground, cut, and manipulated in many different ways to produce different patterns.
in this case I’m going to take most of this bar and forge it down to roughly 1/4″ in thickness, which will draw it out a lot longer. I’ll take 2 pieces of that bar roughly 10″ in length and make the knives.
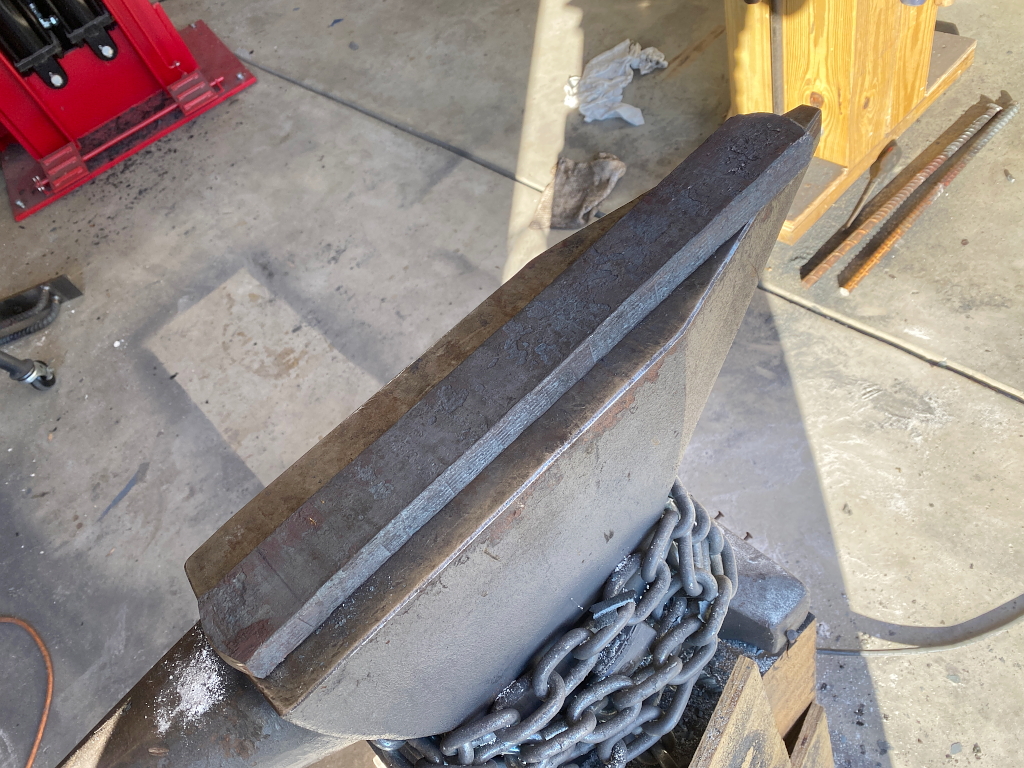
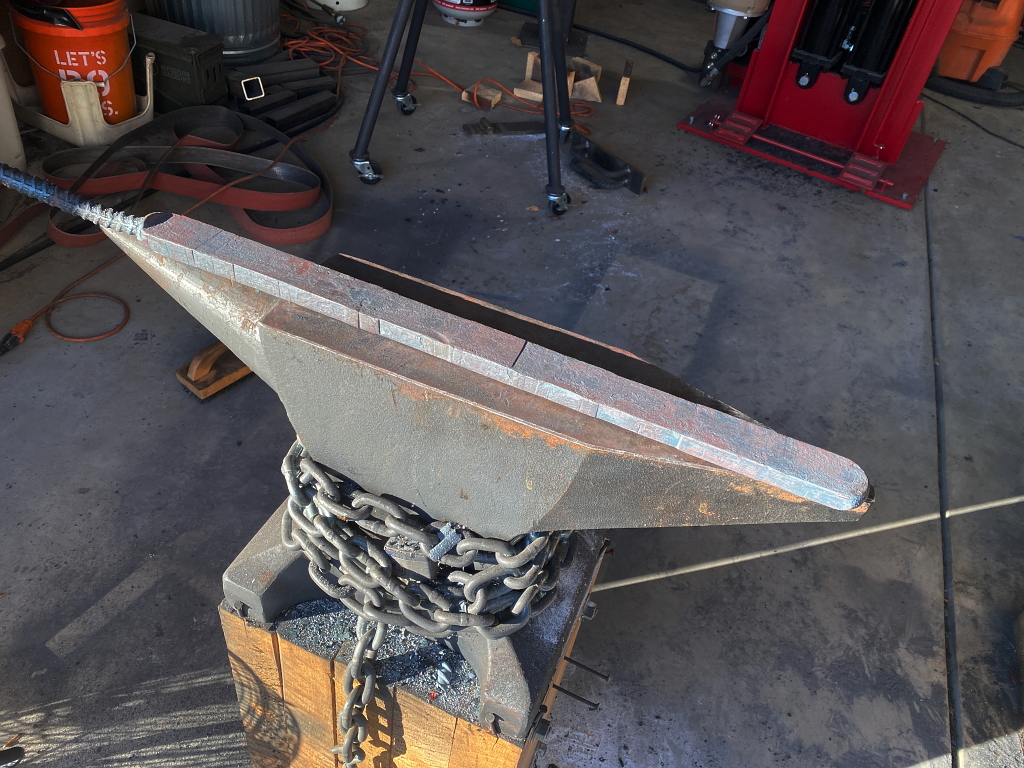
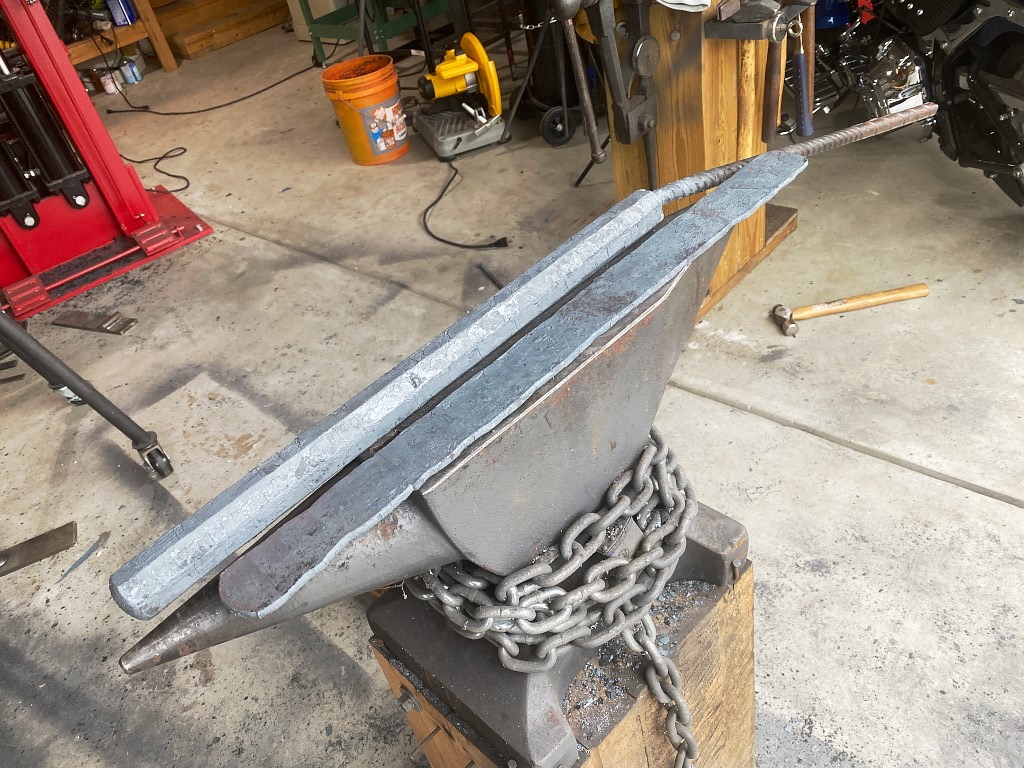
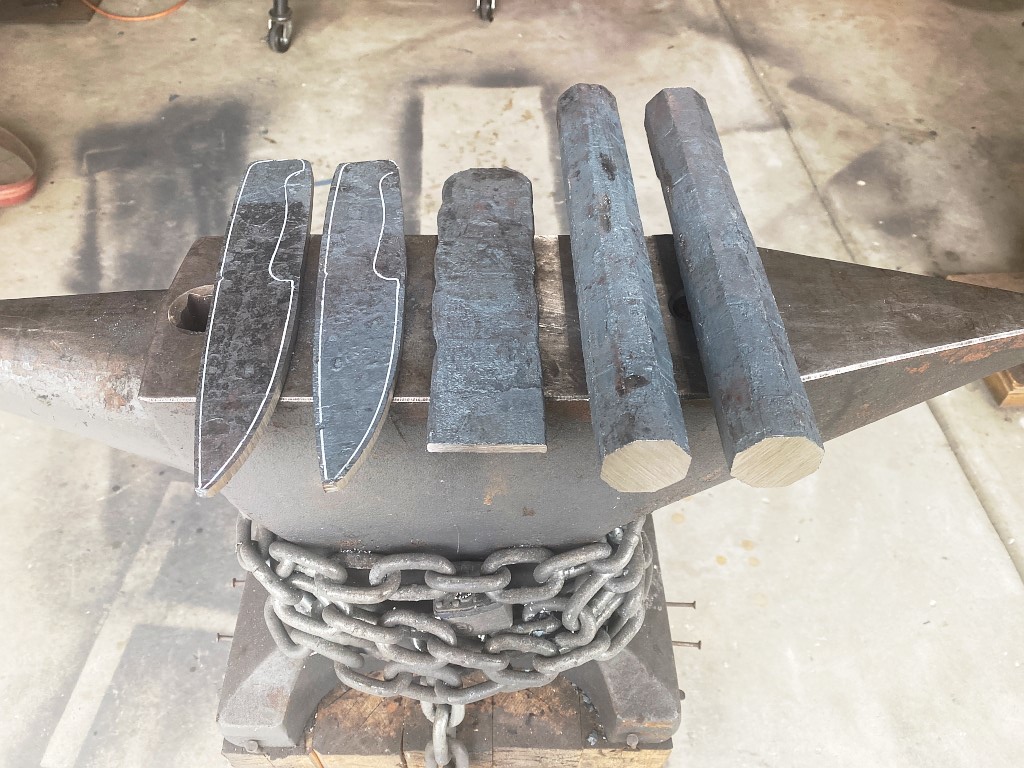
Here we are all drawn out and flattened down to 1/4″. The octagonal bar is for a different project but I was doing this forging at the same time so they both appear in the photo 🙂
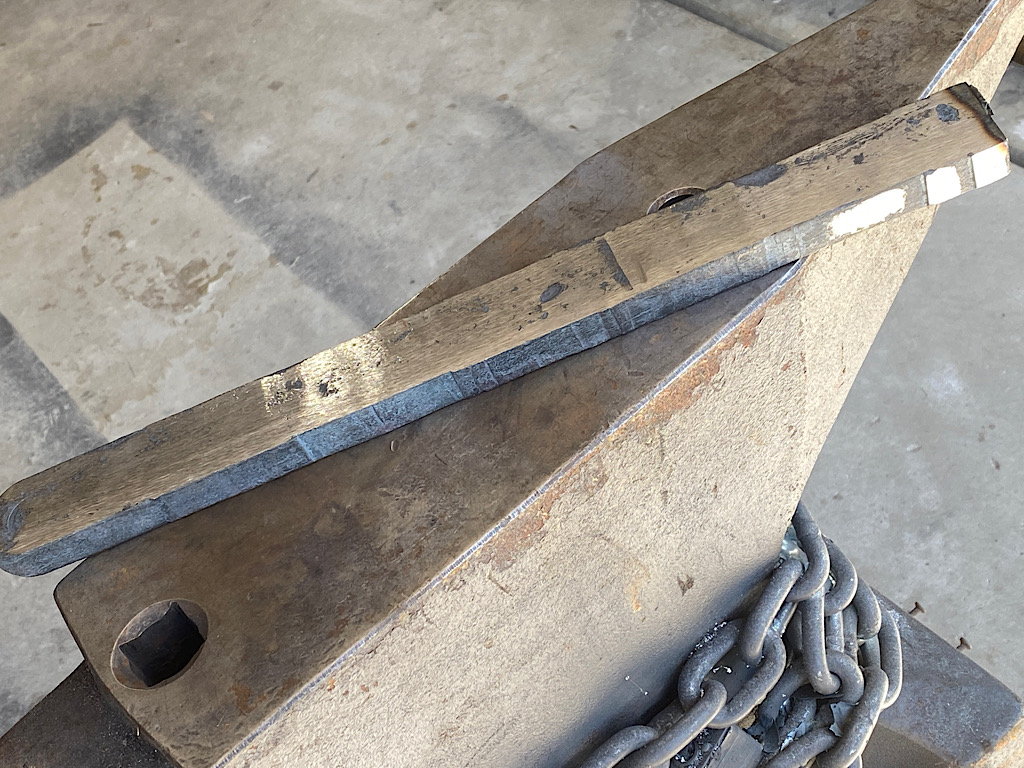
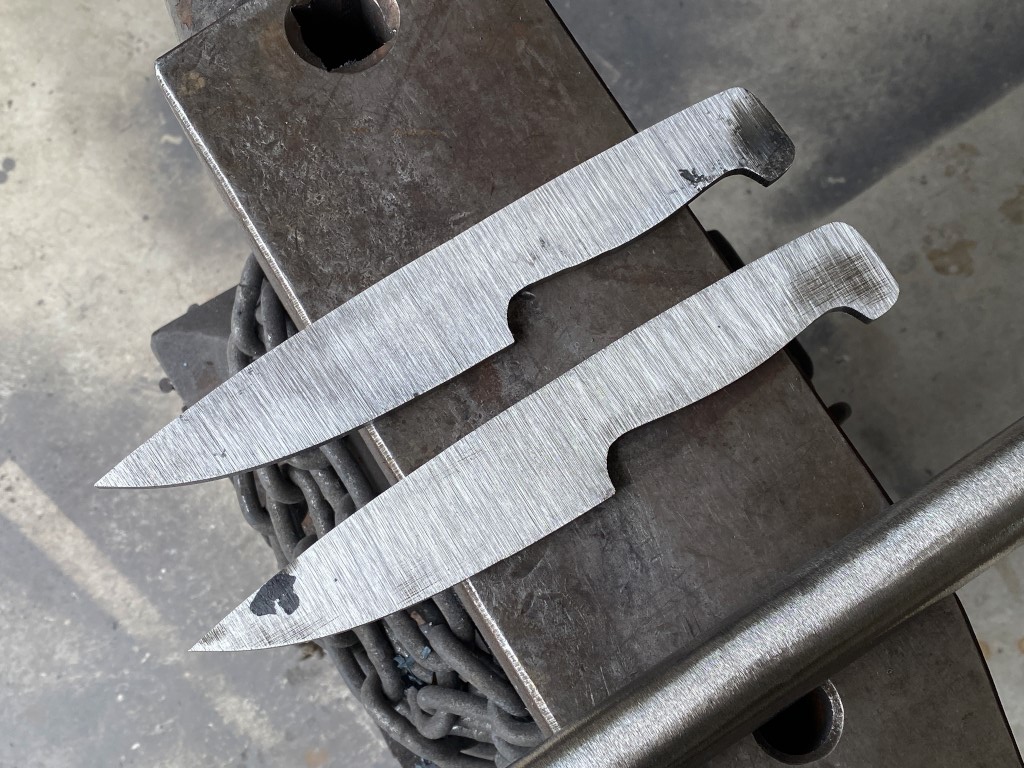
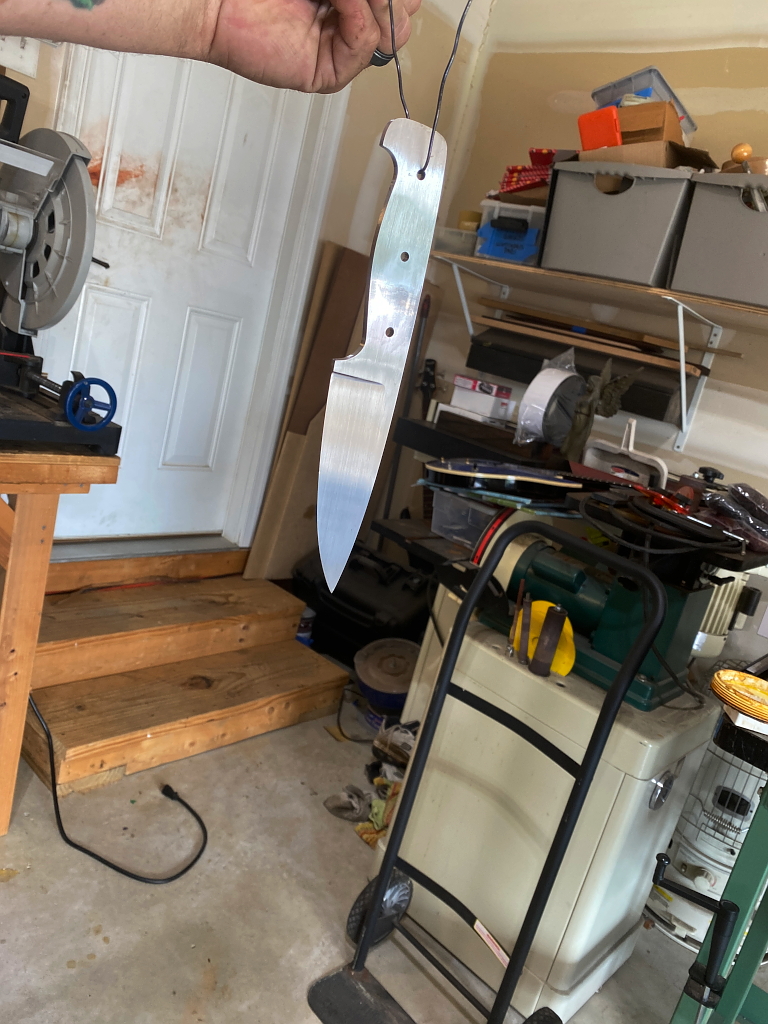
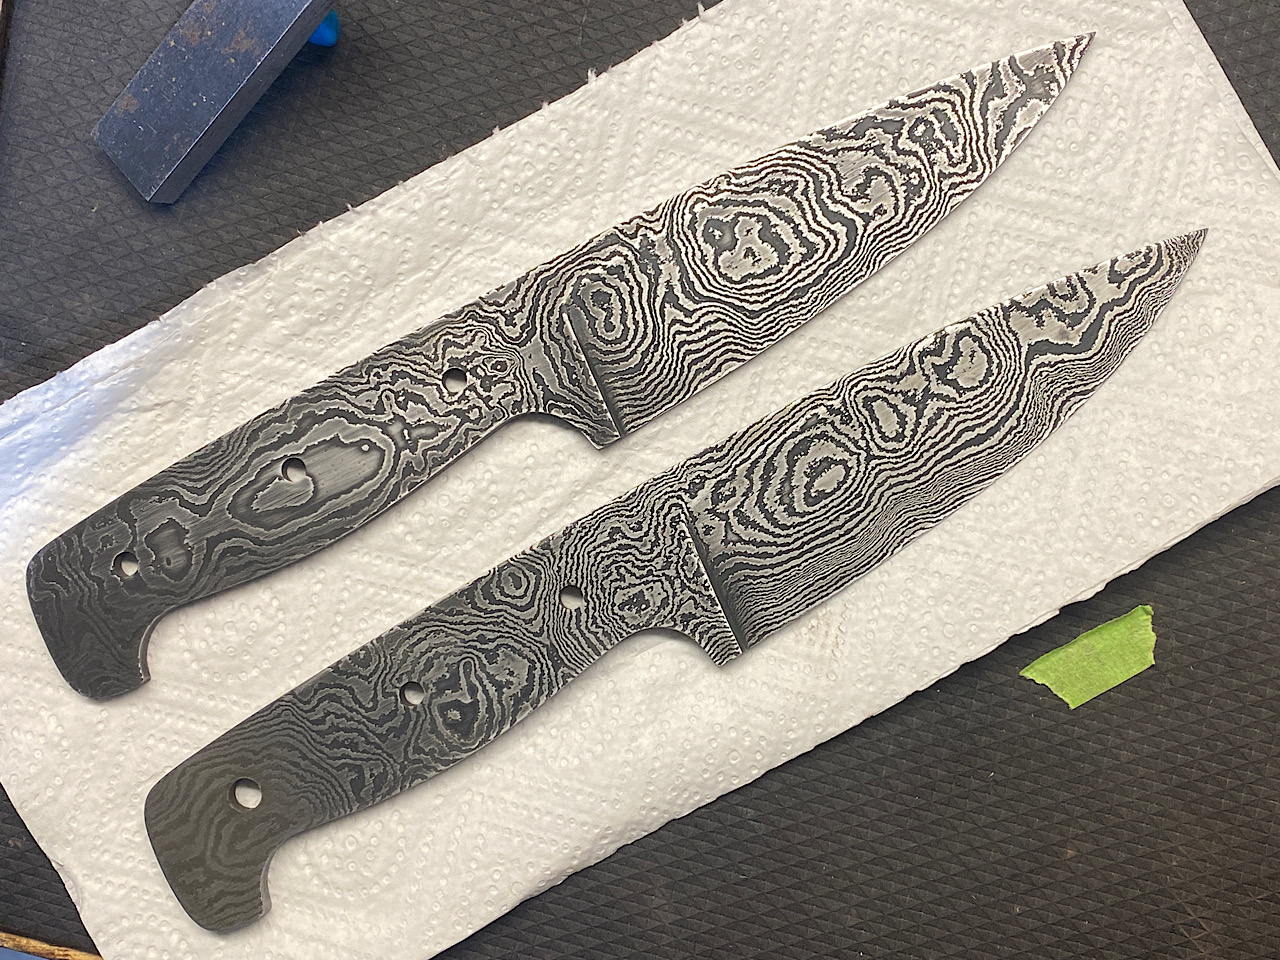
Here I cut the bar into 3 pieces, and drew the profile of the knives on the two that will be used and then ground away a lot of the excess steel. This is because my next move is to grind all the forge scale off the outside, and the scale is super hard to grind through. the less of it I have to grind off, the happier I am 🙂
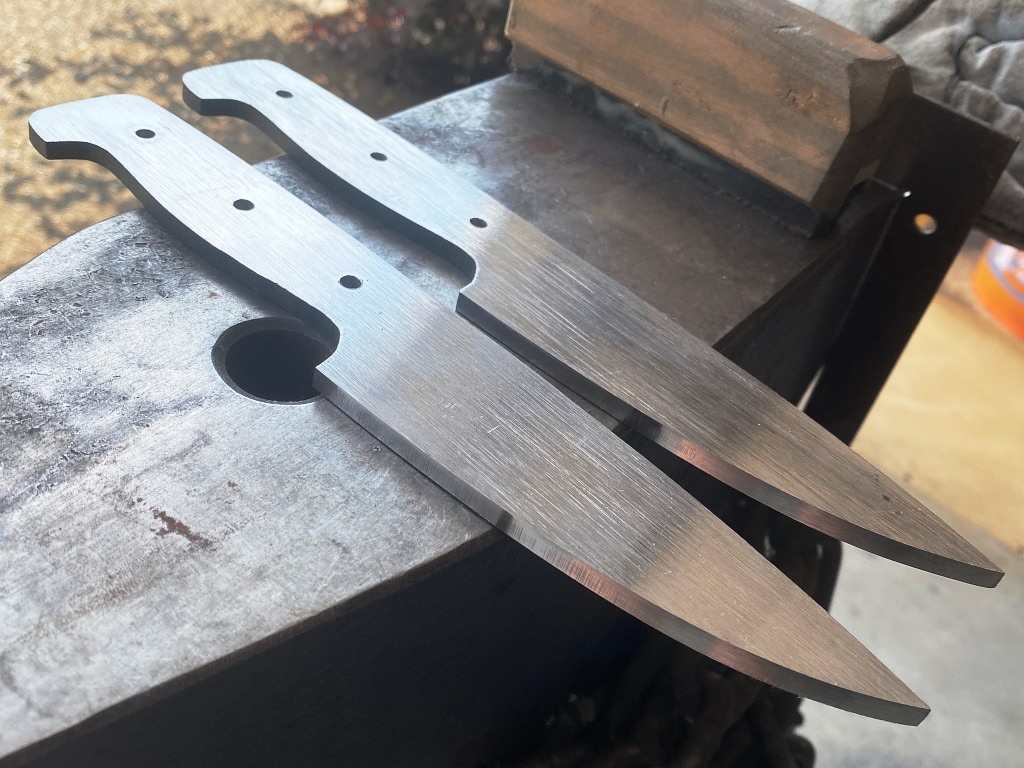
So 98% of the scale ground off and the knives ground to their final profile. At this point all forging is complete and I start the multi-step process called heat treating.
First I run the blades through thermal cycles. I dont show it because theres really nothing to show. I put them in my kiln and I heat them to 1700 F, then let them cool to room temp. Then heat to 1600 F and allow to cool to room temp. Again at 1500 F, 1400 F and 1300 F.
The process of forging the steel creates a lot of internal stresses in the steel, and a very large and uneven grain structure. The results of this can be weak points in the steel, and also can cause the blade to warp during the hardening process. The thermal cycling, also called normalizing, causes the grain structure to even out throughout the steel so its homogenous, and it also shrinks the grain size resulting is much more stable, strong steel.
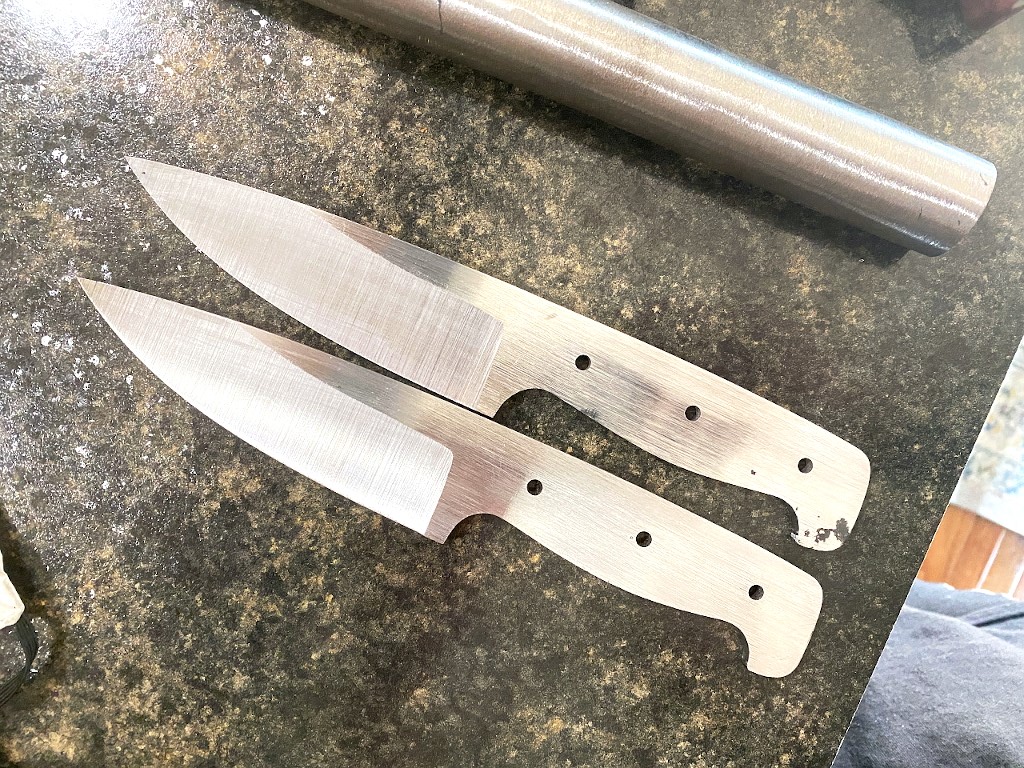
Once thermal cycles are complete, I grind the blades to a perfectly flat and even thickness end to end. My goal is a blade with the tang and blade base thickness of 3/16″, so I forge the bar initially to 1/4″. This leaves plenty of thickness to work with for all the grinding. 3/16″ is quite stout. Roughly 3-4 times thicker than a large chef knife, but the stated purpose of these knives is for survival or “roughing it”. They need to be able to act as weapon or tool, and take a punishment without breaking. You might need to chop through a tree branch, smash a coconut shell with the butt, or baton it through something hard. the heavy spine and take make sure it’ll survive the abuse without breaking or bending.
At this point I also drill the holes for the 3/16″ brass pin stock that will hold the scales in place. If you ever watched the show forged in fire you’ll note that its always good when you remember to drill these holes before you harden the blade 🙂

At this point I coat the edge of the blade with layout fluid and scribe a pair of lines down the center. These lines give me a target to grind to and assure my edge remains straight. I leave the edge fairly beefy at this point to assure it doesnt warp or crack during heat treatment

the bevels are ground up to about 120 grit.
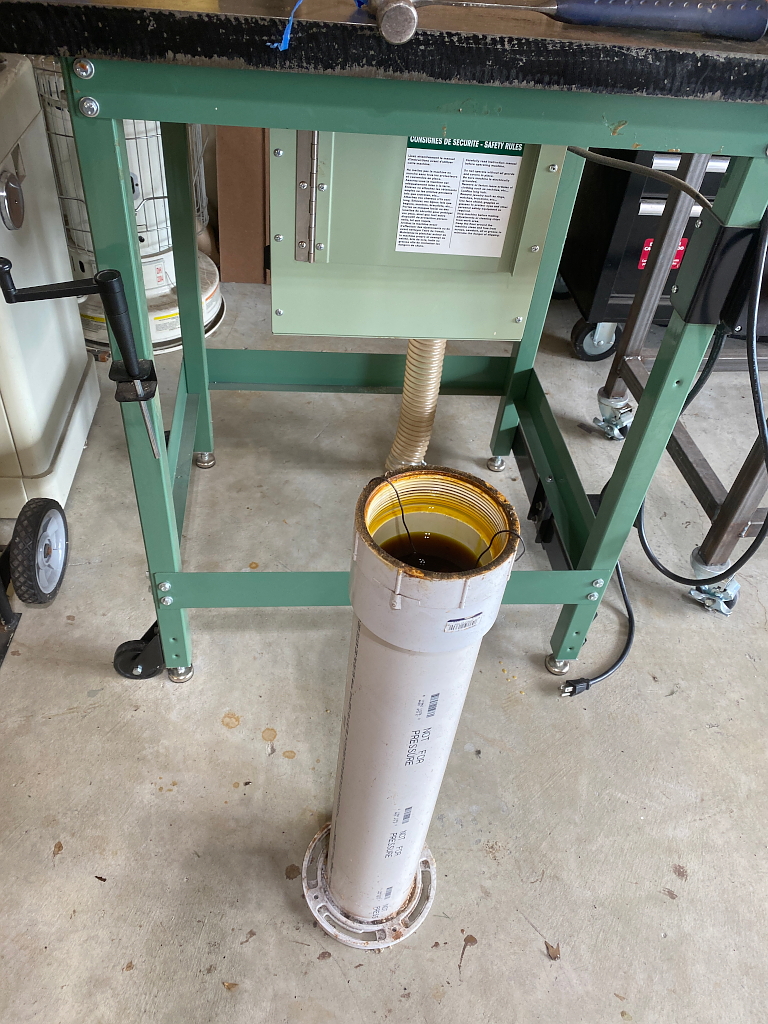
I dont have pix of it but at this point the next step in heat treatment is done. the blades are brought up to exactly 1475 F in my kiln, soaked at that temp for 15 min, and then quenched in parks 50 quench oil. This hardens the steel to about 65 HRC, which is actually way too hard 🙂
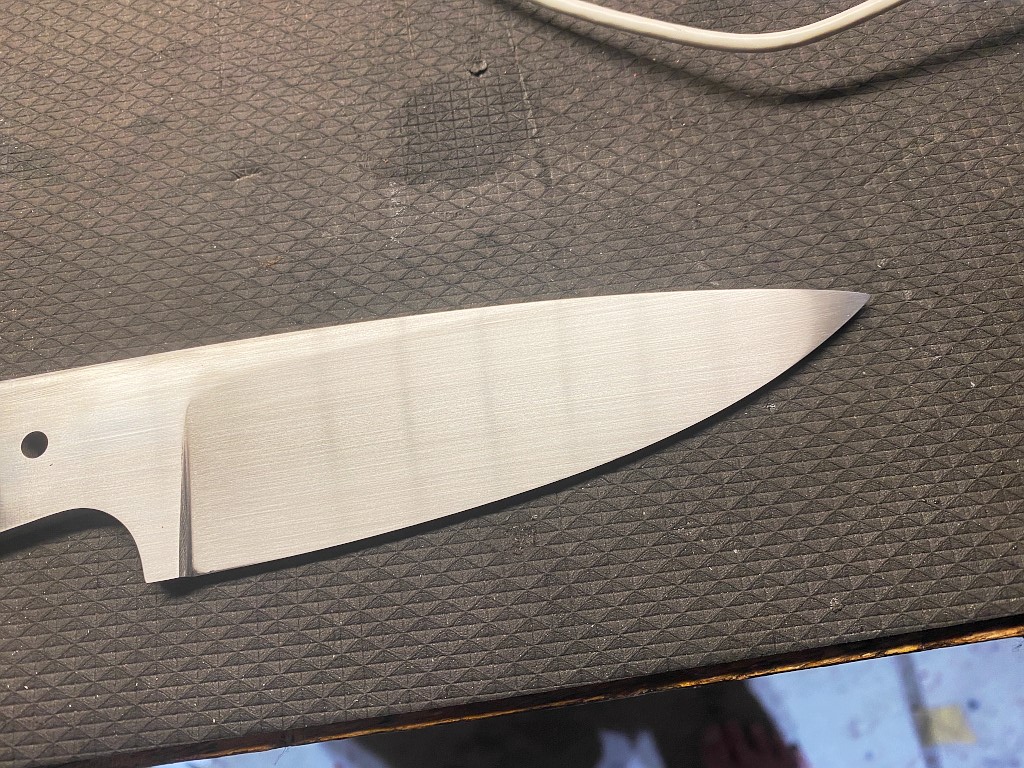
The blades are then tempered at 450 F. for two 2-hour cycles. This reduces the hardness to roughly 57-58 HRC which is about perfect for a blade that might need to withstand rugged use. The process also gives us a sneak peek at the pattern 🙂
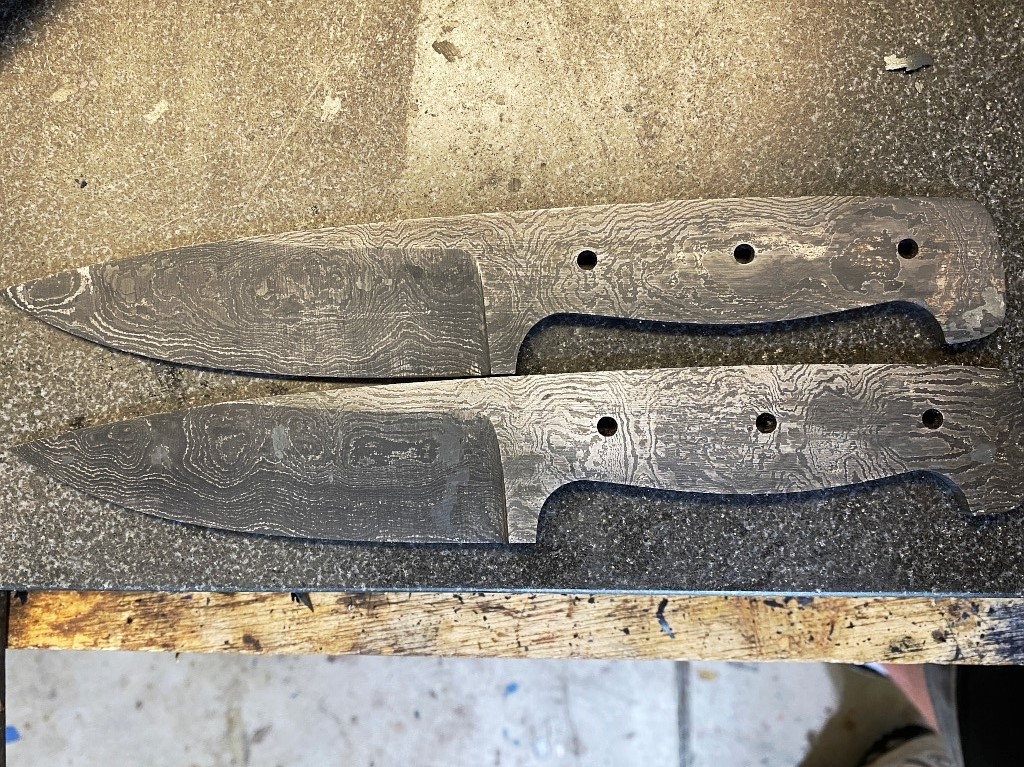
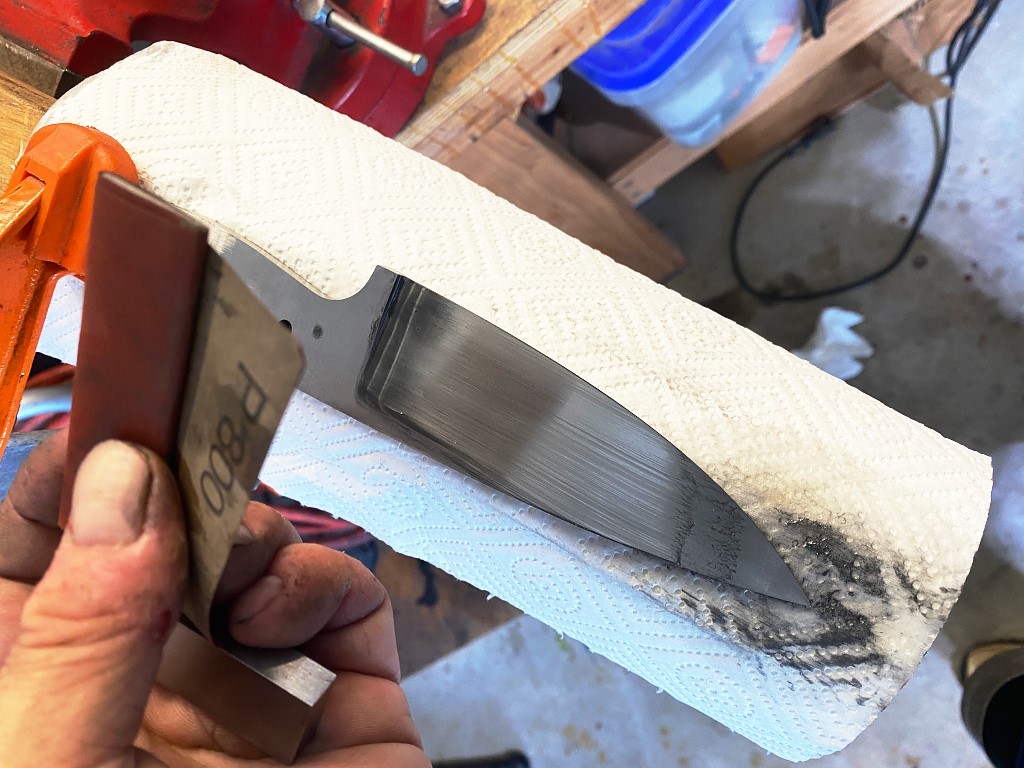
Next is the most tedious part of the knife-making process. Sanding the blades to a fine finish. For damascus this is 800 grit. I use wet/dry paper and WD40 as a lubricant for sanding. Let me tell you, sanding hardened steel is no joke. It takes a long time, going up through the grits, 80, 120, 220, 320, 400, 600, 800. For the two blades it look several days and my hands are quite sore when its done 🙂
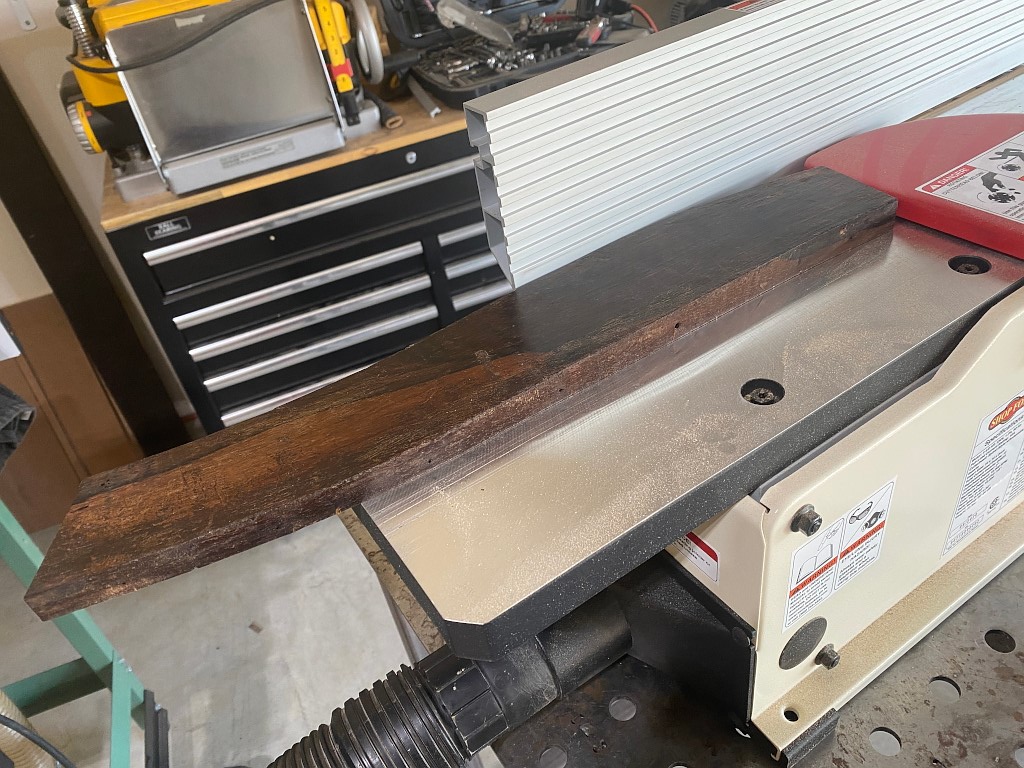
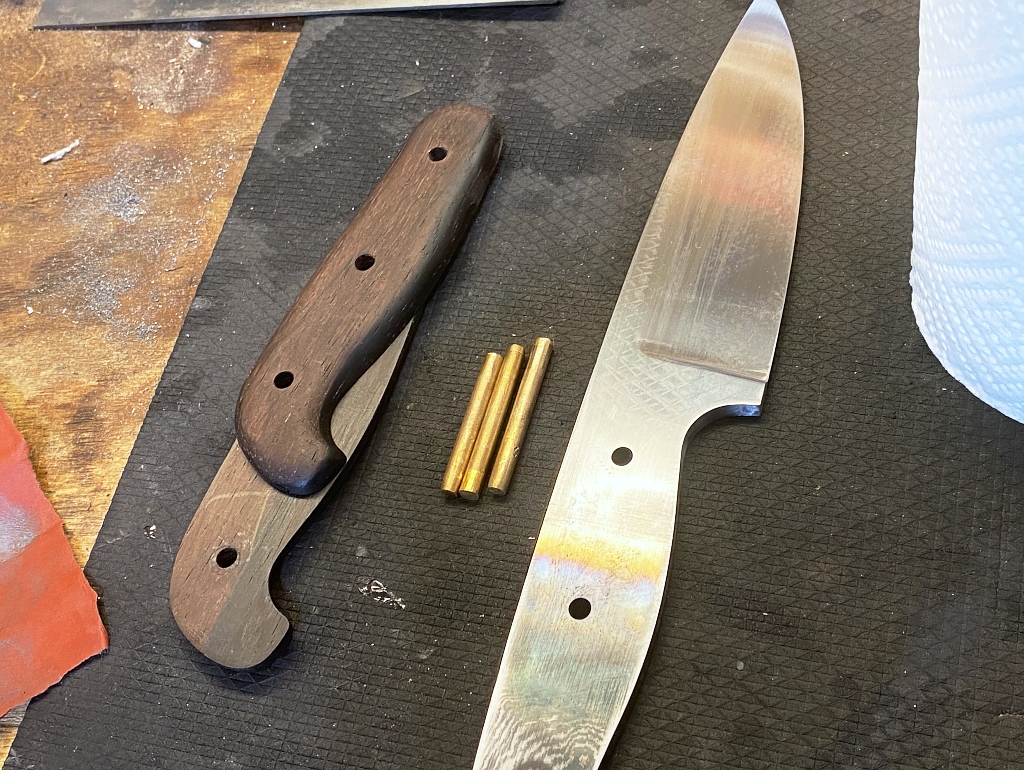
For the handles on this knife Kenny provided me with some nice pieces of brazilian rosewood. He has hooked me up with brazilian rosewood before for use as a guitar fretboard.
To start I need the board flat and even in thickness, so I flatten one side on my jointer
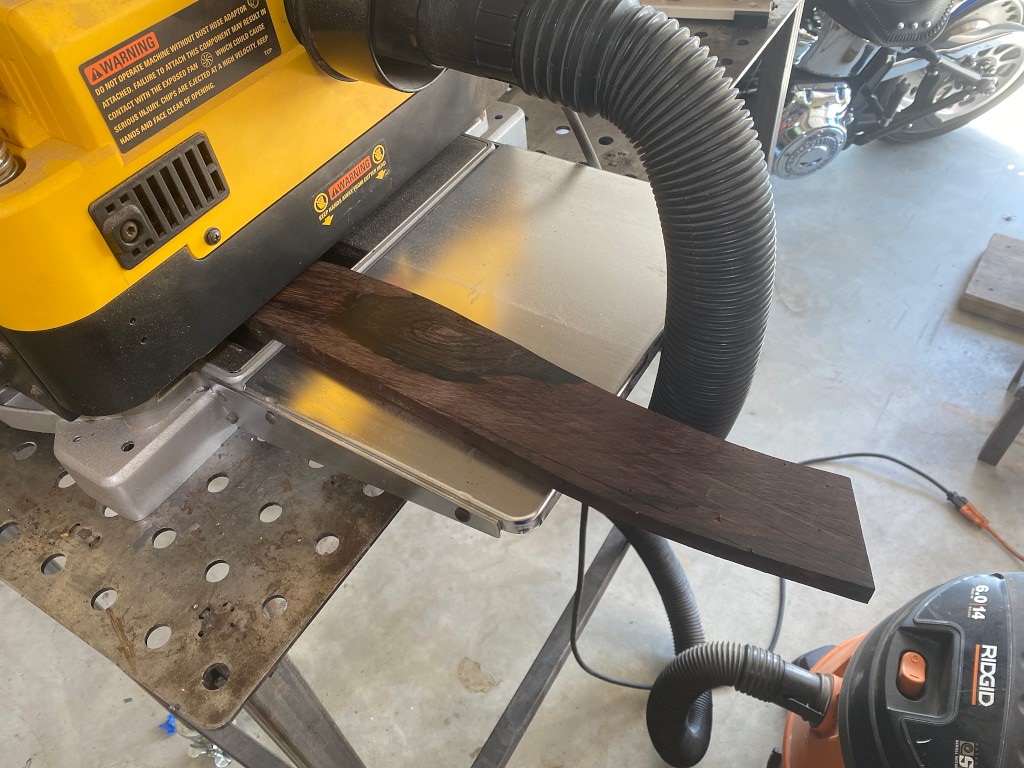
Then put it through my planer/thicknesser to make it perfectly even in thickness
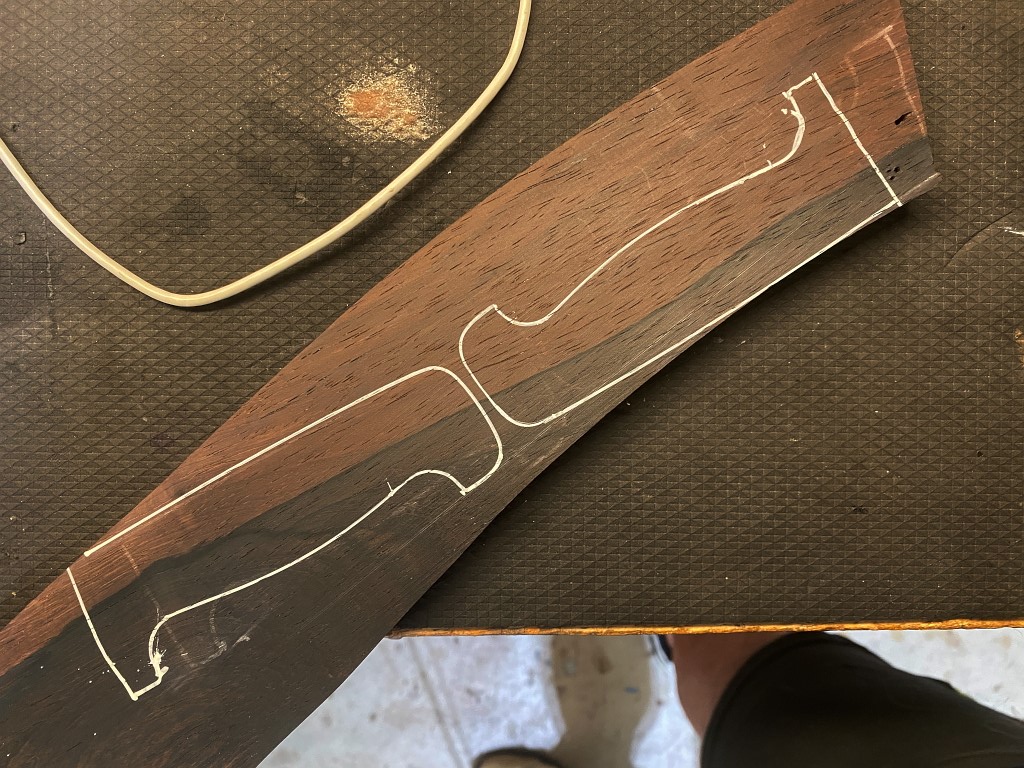
Then I trace out the knife tangs, trying to get it aligned along a color change ridge and add a nice visual touch to the handles.
Cut them apart.
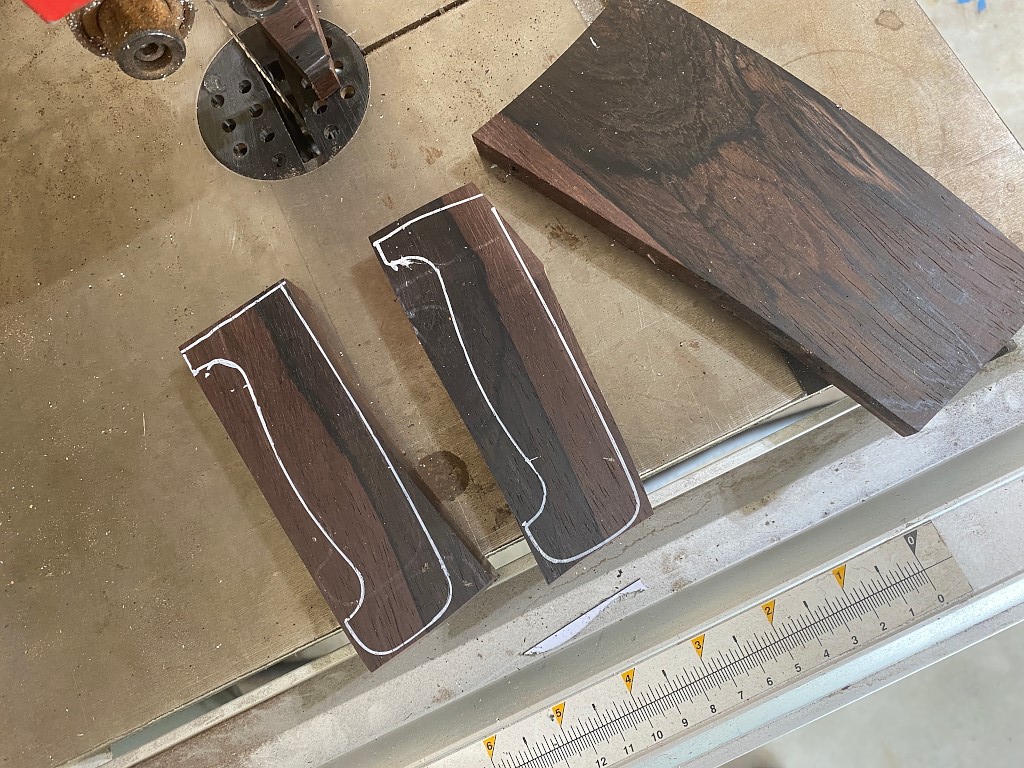
Ialso cut my brass pins and bevel one end on the grinder so they’ll go through the scales and tang more easily. the hole is sized exactly the same as the pin thickness, so its a bit of a snug fit.

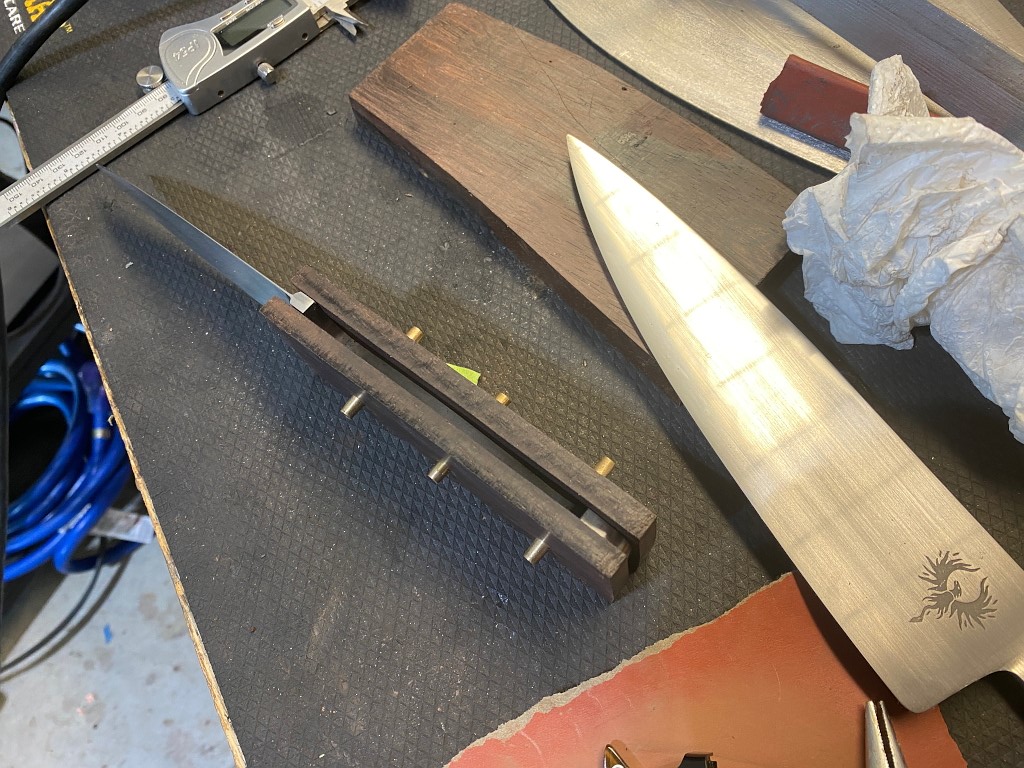
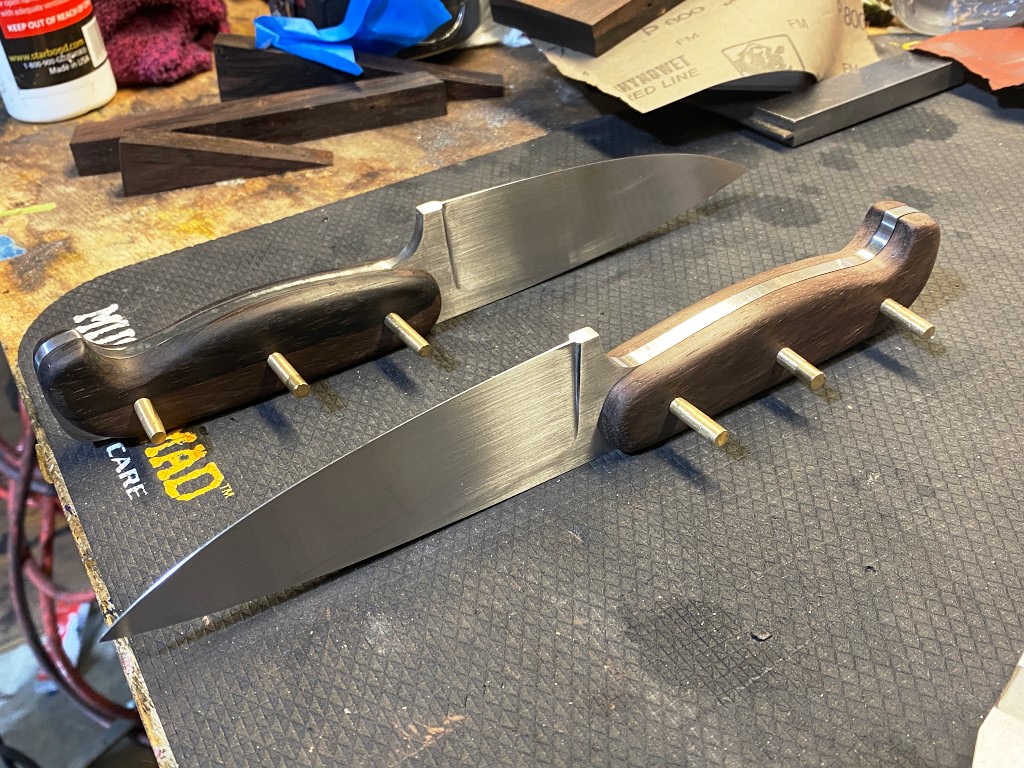
Each of the scale pieces get split in two down their centers. One piece for each side of the tang. Pins are fit in place so I can do the rough shaping.
Once the scales are sanded to finish and everything fits nicely its time to disassemble again in order to etch the blades. They have dirt and oil on them still and that all has to be cleaned off
First I use hot water and soap, and then acetone to make sure the steel is as clean as humanly possible. Any dirt or oil could cause the acid to etch unevenly.
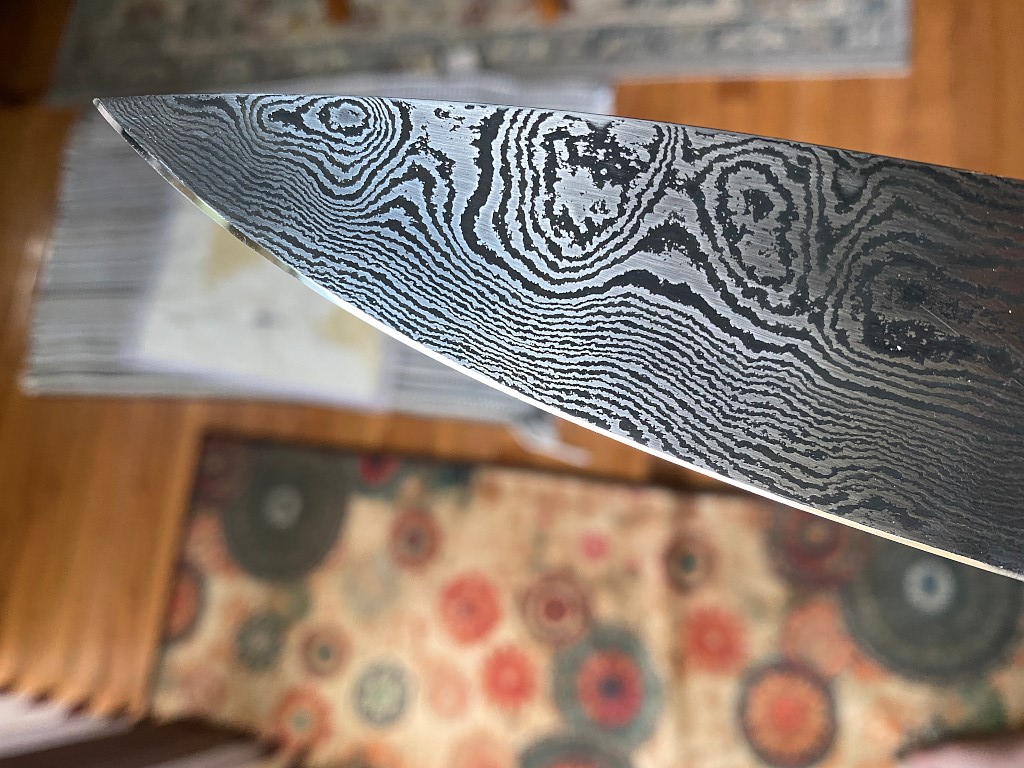
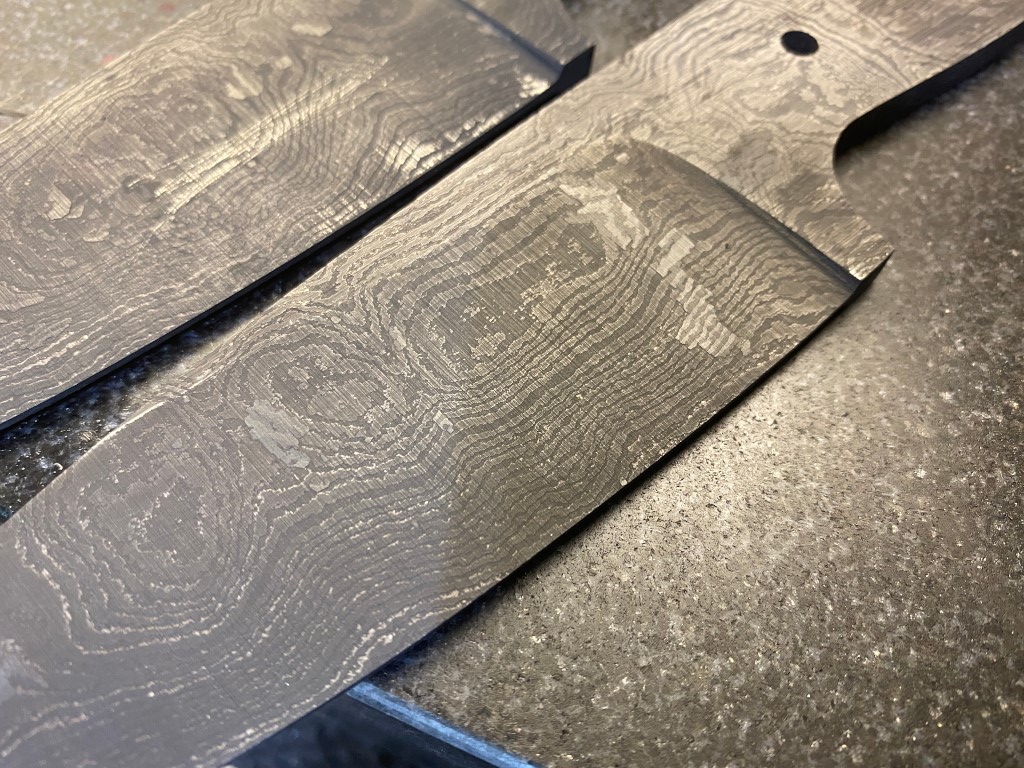
Into the etch. This is a dilute solution of ferric chloride. The pattern is revealed when the surface of the 1095 steel oxidizes in the acid and turns black, while the 15n20 stays bright because it contains nickel and is therefore more resistant to the acid.
After the etch, I sand the surface lightly with 1200 grit paper and itcleans most of the oxides off. then I boil them in water with a high consentration of baking soda. This assures that all the acid is 100% neutralized even at a microscopic level. We dont want the acid to continue to etch any farther.
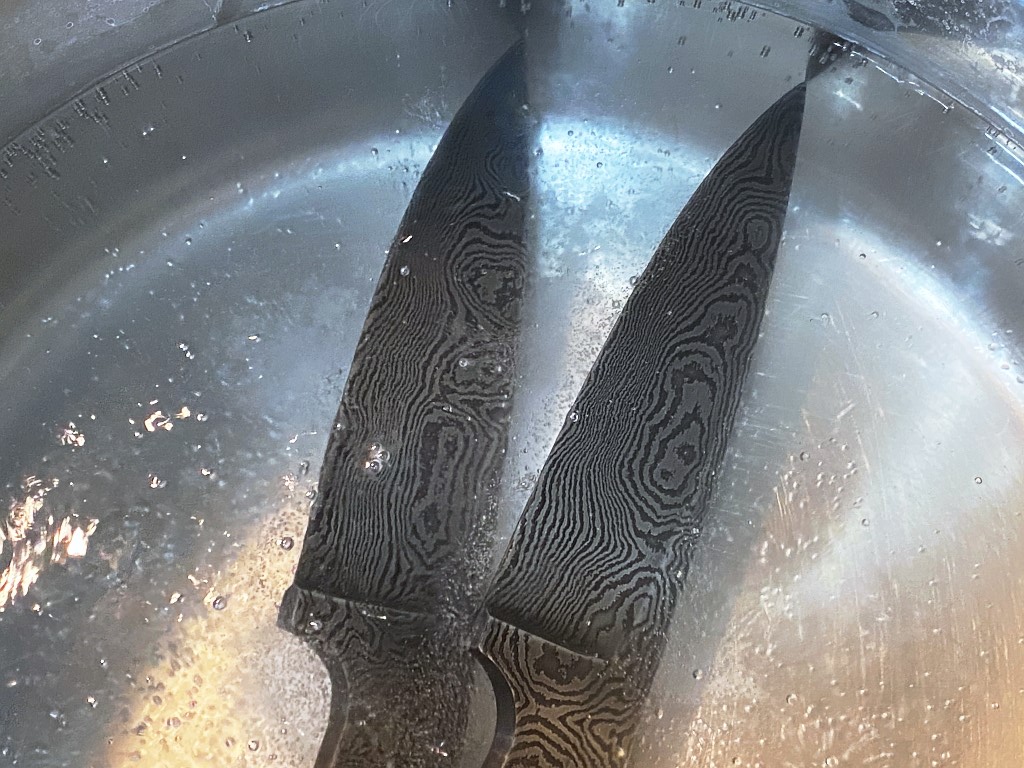
and here we are 🙂
Now its simply a matter of attaching the scales. I apply epoxy to all surfaces, force the pins through, and clamp together for 24 hours. This also seals the scales to the steel so that dirt, oil, moisture, etc, cant get in between scales and steel.
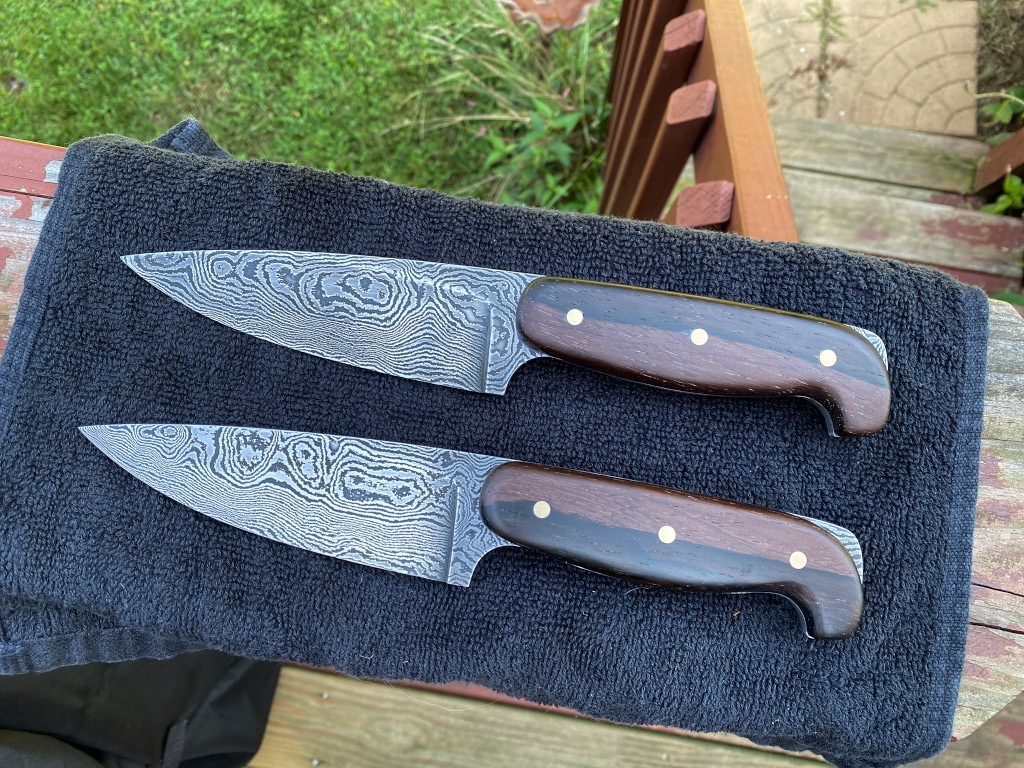
Last step is sharpening. For this style of knife I use a 25 degree angle for the secondary bevel. Its still sharp enough to shave with, but well supported so it can take a lot of abuse, as a knife of this type was designed for.