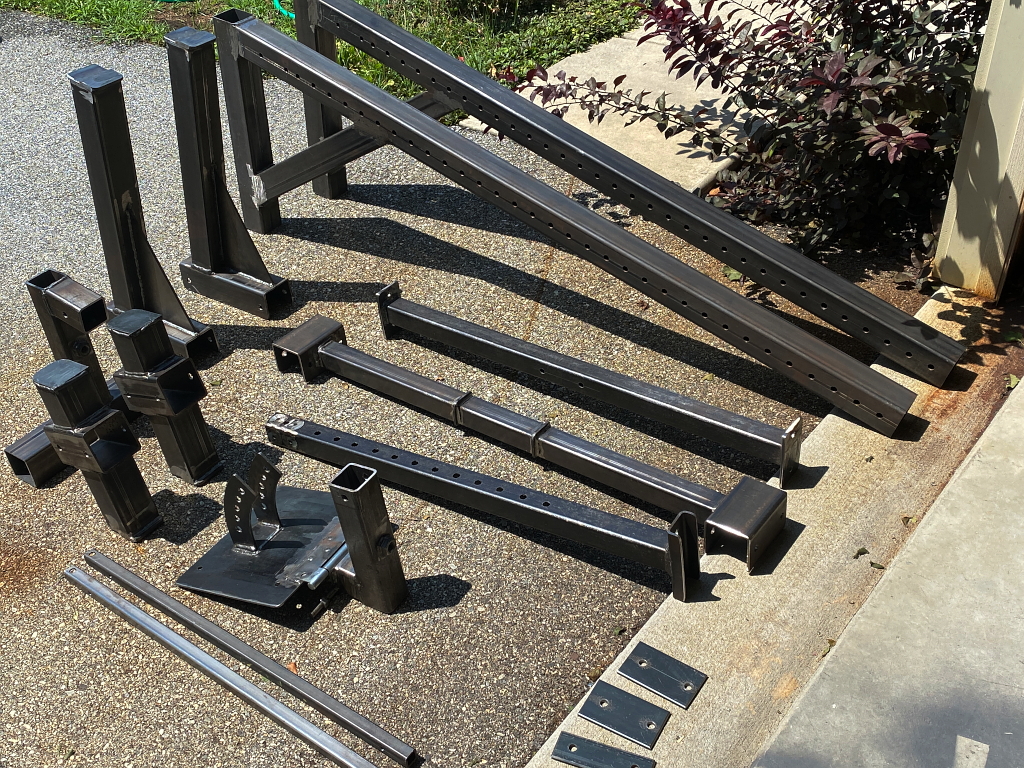
So the initial build is complete. That is to say, the main part of the bench. I still have to make the leg apparatus and cable/pulley ganrty, but in an effort to get the main piece completely finished and out of the shop, and to assuage my impatient desire to begin using it as soon as possible, I decided to go ahead and clean and paint the main bench, wrap up the pins, rubber pads, etc, and assemble it for use in its final home. My workout room 🙂
So here I’ve completely dismantled it and wiped down all the surfaces with acetone. This is because the week I’ve been building this just happened to coincide with a 10-day long heat wave where the temps were over 92 F. every day accompanied by very high humidity. My shop is NOT air conditioned 🙂 Cutting, grinding, and welding in this environment is extremely trying and I was sweating profusely the entire week, and dripping and rubbing oils from my skin, as well as cutting fluid from all the drilling, all over the steel. You can actually see rusty handprints where I handled the steel. Scotchbright pads scoured the worst off, and the acetone wiped off any oils and dirt, so I had a relatively clean surface for painting, If Id had the chance I would have preferred to sand blast everything to bare, clean steel, but I dont have that capability.
Cleaned, but not painted
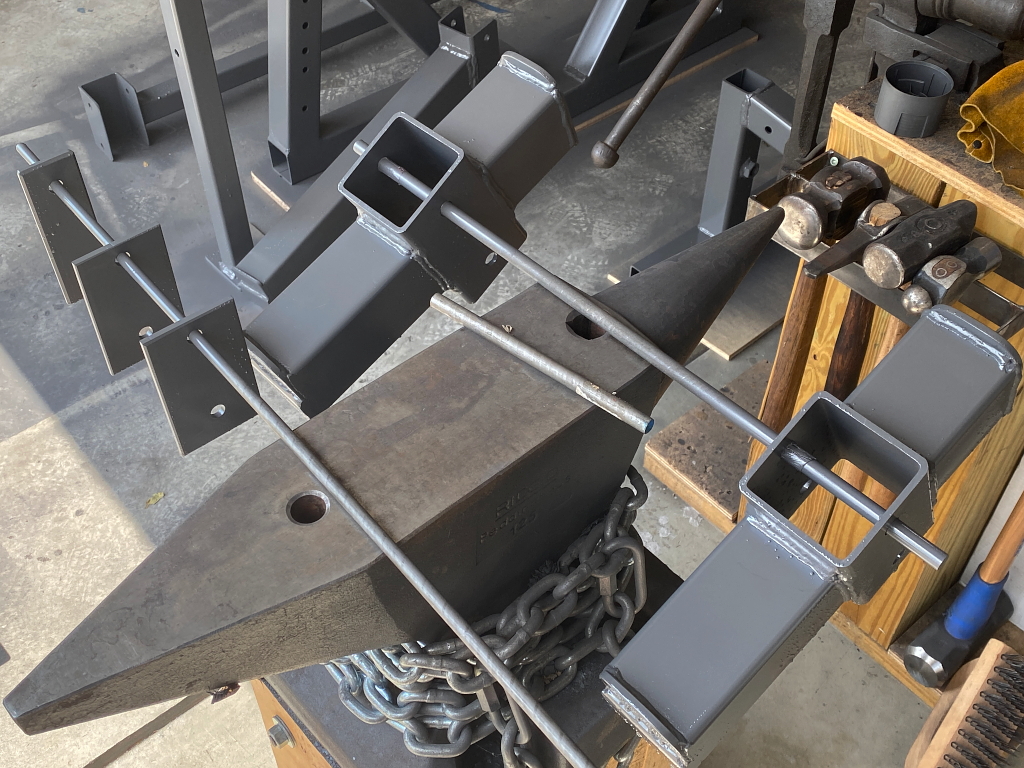
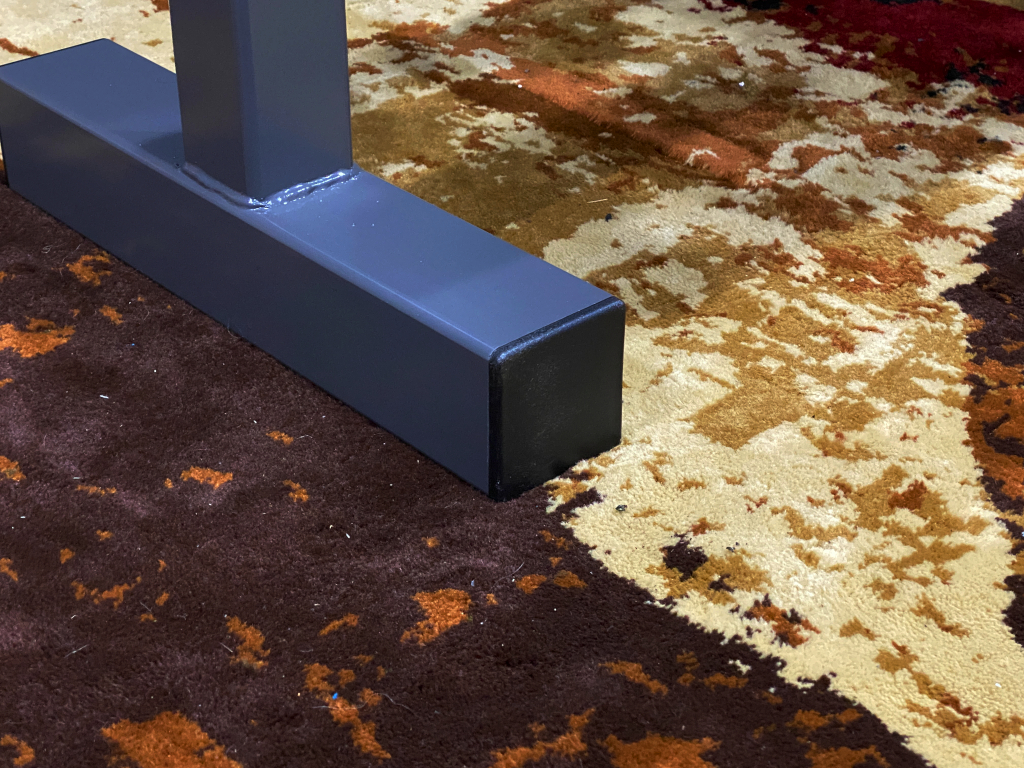
and painted. The keen eye might note a lot of tiny bumps. these are actually some weld spatter which I suppose I should have cleaned off with a flap disk or something, but I’m too impatient, and not all that concerned about a perfect appearance. Theres a few runs and bubbles as well. This is due to using spray cans, which are less than perfect in application, and also the aforementioned high heat and humidity. Not ideal for shooting finishes. If I was shooting a finish on a guitar I would simply have had to wait until the fall and more appropriate weather for a better finish, but this is a weight bench. Nuff said.
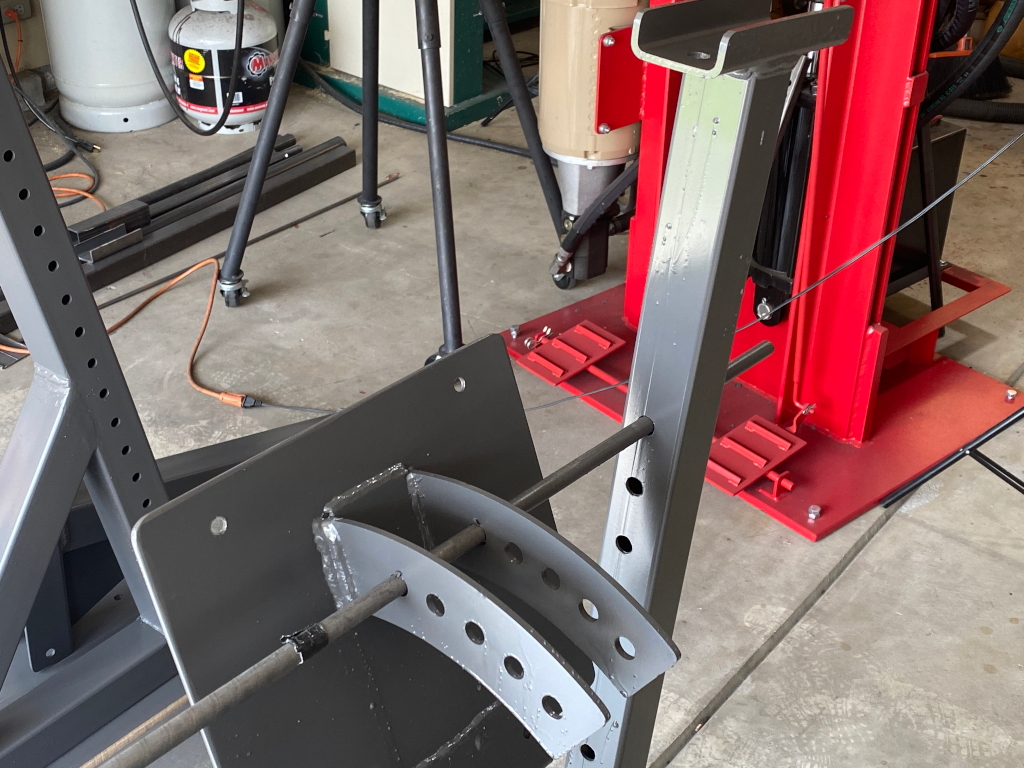

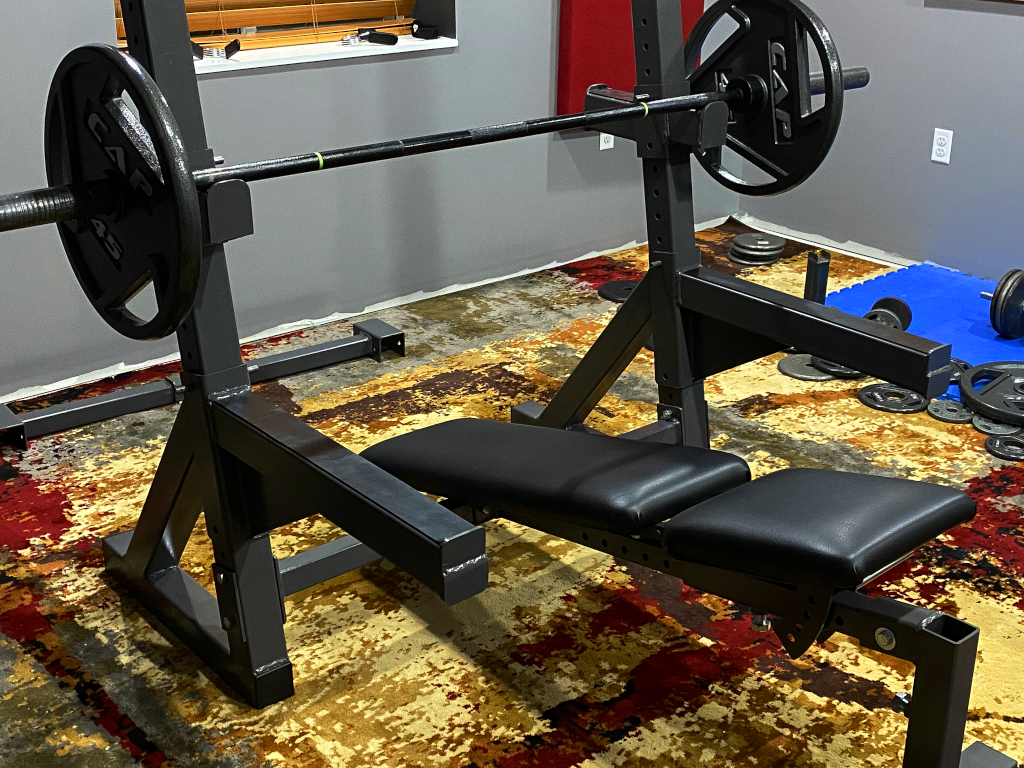
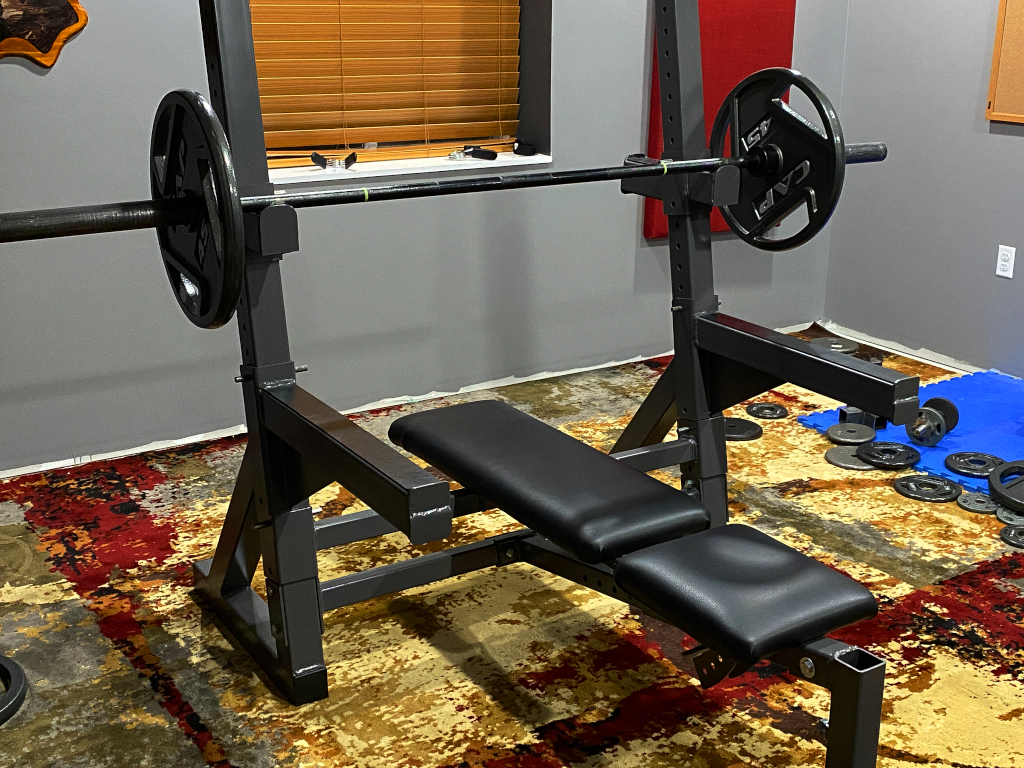
So we’ve arrived at the conclusion of the main build. I’ve assembled the painted parts here and am showing various configuration examples, but there really are many possible positions between decline and fully upright, so that workouts can be kept rotating through different positions, which is much better for overall muscular development than always working the same way.
I say “The main build” because I have yet to build the leg apparatus. Two pieces remain to be made. The attachment for leg extension and curl, and the other is a fixed position pad for using with decline bench to give leg stability.
In order we have decline, flat, incline, and fully upright, all with the safety rails shown. When working with a spotter the rails are left out.
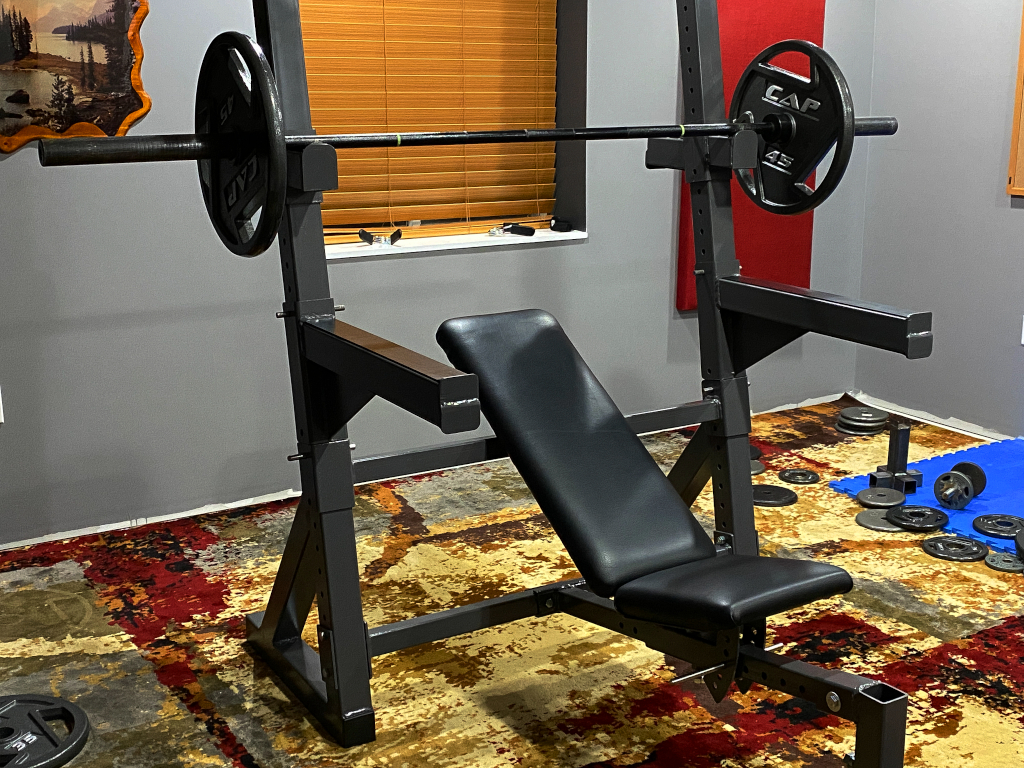
In the fully upright position the bar is situated a few inches too far to the rear for comfort, so the bar rests can be flipped over and using the bottom side of the squat bar rest, which are several inches longer and positions the bar comfortably forward for the shoulder press position. In this reversed position the rests still have the rubber pads and bar catch

On the reverse side is the squat/power rack. As you can see, like the bar rests, the safety rails are also reversible. Flipped over they fit the reverse angle of the uprights to use with the squat rack and also like the upper bar rests, they also have the rubber pads and bar catch. Since the angle of the safety rails is designed to be perpendicular to the floor, flipping the safety rails over allows them to still be perpendicular to the floor when used on the back.
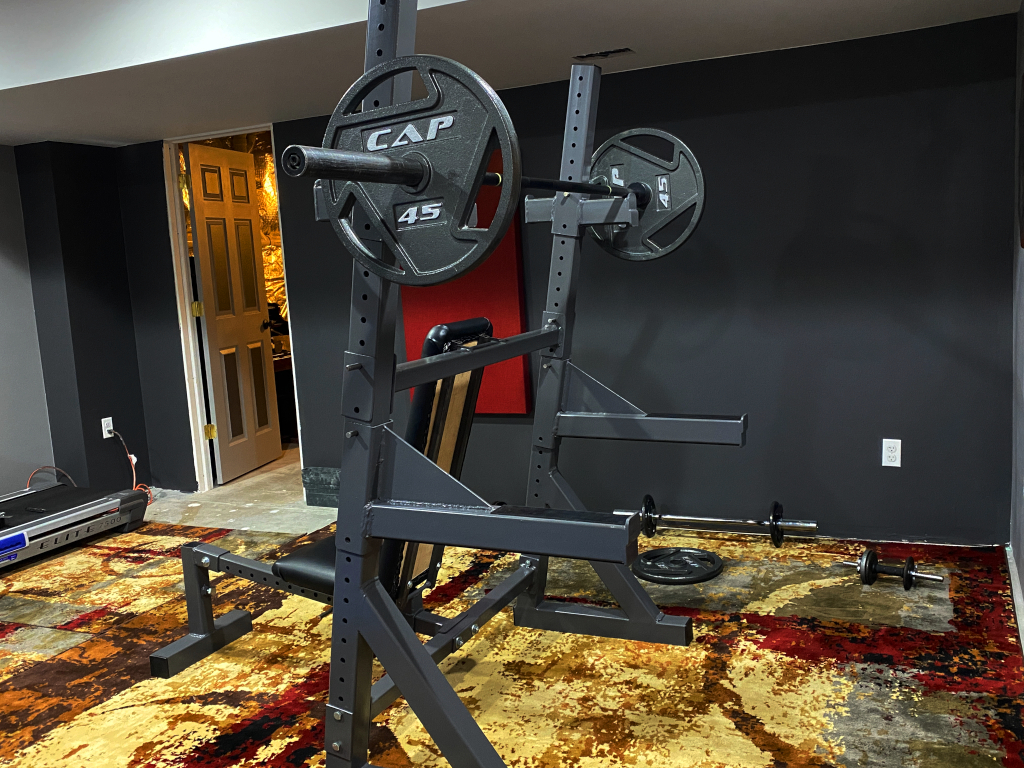
Purely for aesthetics, like the paint job, I’ve plugged all the open tube ends with plastic end caps
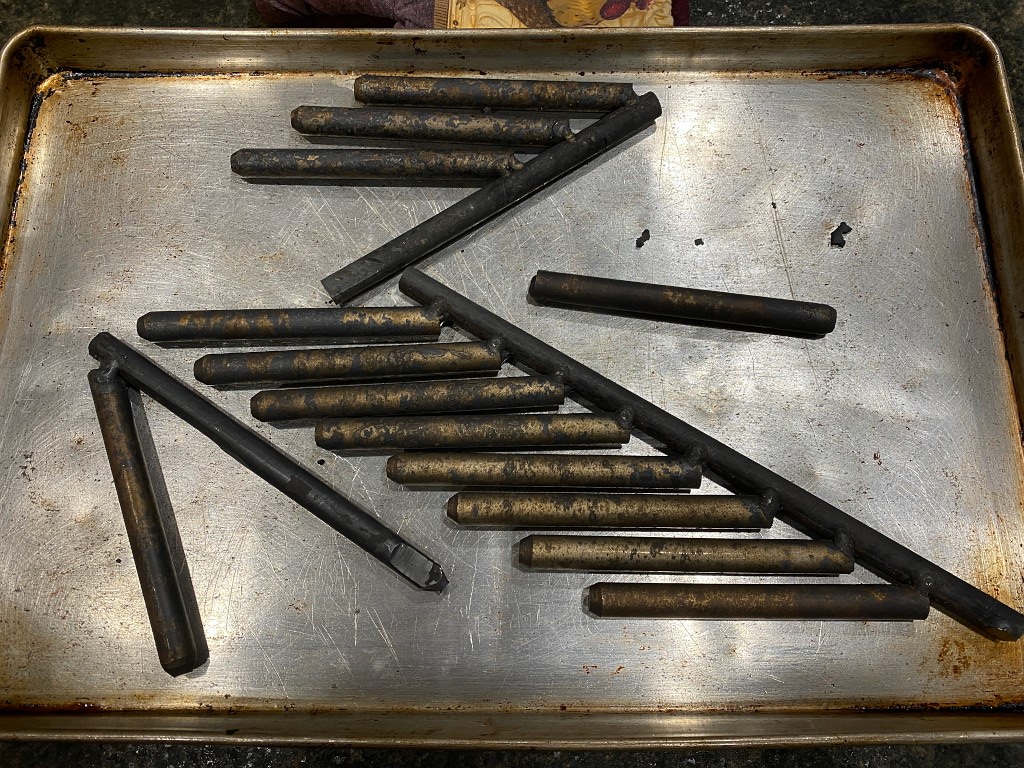
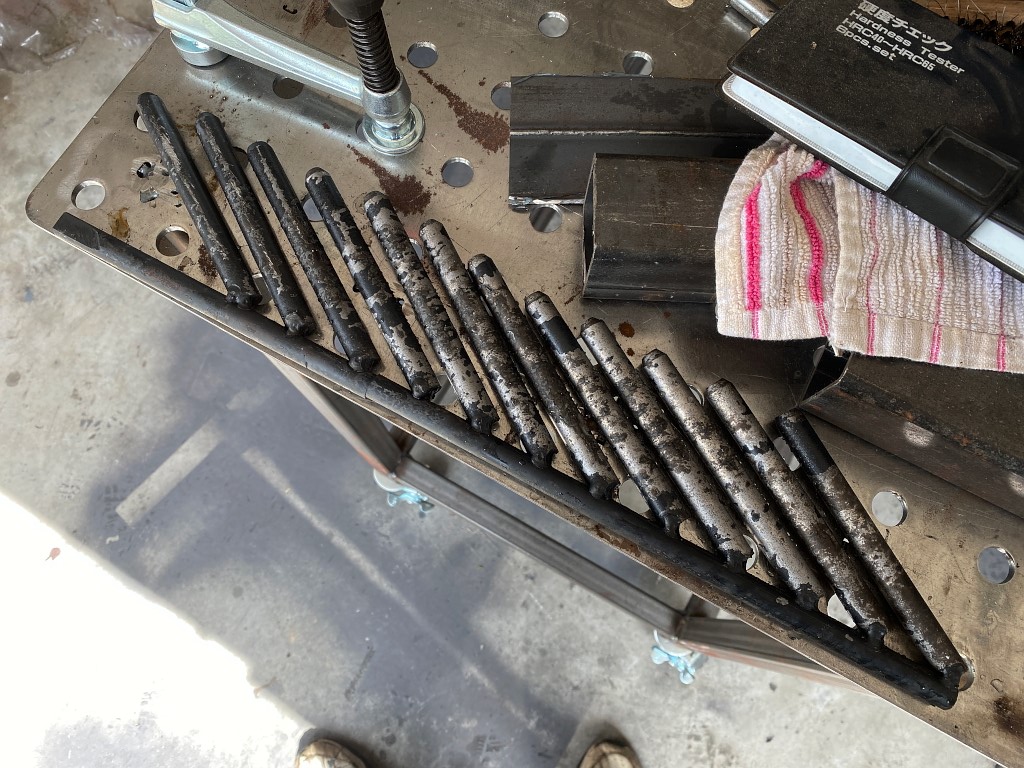
Now moving on to the pins. The whole bench includes a total of 13 pins used for holding the various bar rests, seat support bar, and seat angle support, which also doubles as a lock to keep the seat in position on the lower support beam. The reason there are so many is simply redundancy. Each bar rest has two pins. From a strength perspective, one pin is more than enough, but one thing I wanted to build into this bench is an almost ludicrous amount of strength, not because I’ll ever be so strong that I’d challenge the limits of the bench, but so that I dont ever have to be even remotely concerned about it breaking while I work out. I’ve had this fear with store-bought equipment in the past, and this is one of the reasons I decided to build my own. So, since each bar rest has two pins, and each pin goes all the way through both sides of the rest and the upright, in order for a bar rest to fail, it would have to shear through over 2″ of hardened and tempered W1 tool steel, and thats per side since there are two uprights, each with a bar rest.
Ridiculous, right? 🙂
As shown in the initial photos, I purchased a couple 36″ lengths of W1 tool steel, and I cut them into 5″ lengths and ground a slight bevel on the end of each to make it easier to guide them through the holes. The W1 comes in a fully annealed state which makes it a lot easier to work with it. Shaping, cutting, grinding, etc., but its not an ideal state for the intended purpose, so I have to harden and temper it.
With so many pins, and not wanting to heat treat them all individually, I tack welded them to a piece of mild steel so I could treat them all as one object. I have one by itself because I considered the possibility that when quenched the tack welds might fail and drop the pins into the bottom of my 5″ tall quench tank. If that happened I’d have to dump out all the oil to fish them out which would be a giant PITA, so I tried it first with just one first. It worked fine so I was good to go to do the rest in bulk.
Here they are tack welded to the bar prior to heat treating

Here they are after hardening. This worked well and they all hardened to roughly 65 HRC. Even before testing the hardness, the appearance told me I’d hardened them successfully. The silver/gray color is is the classic look of martensitic steel. Martensite is the hardened state of high carbon steel.
Next they had to be tempered. 65 HRC is great, but they dont actually need to be that hard, and at 65 they are also fairly brittle. Two cycles of tempering at 450 F. for one hour each, cooling to room temperature in between tempers the hardness back to a 56-58 which is perfect for this application. they wont abrade or deform under pressure, but they are also not brittle and wont crack even if sustaining a huge hit.