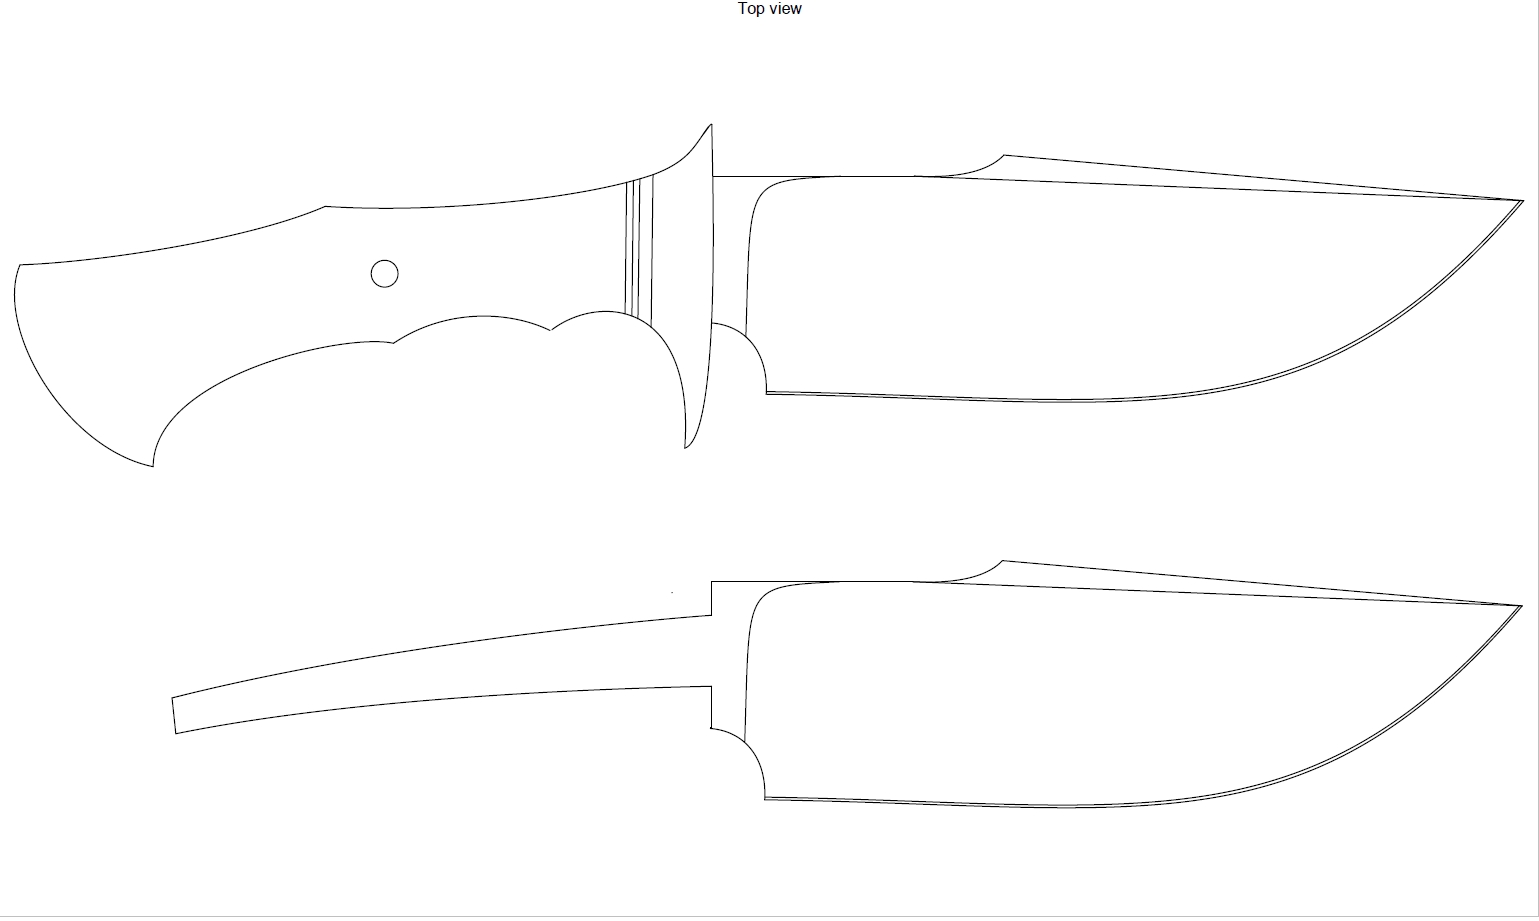
First off, the design. Whether I can actually make this knife remains to be seen, but I’m going to give it a shot 🙂
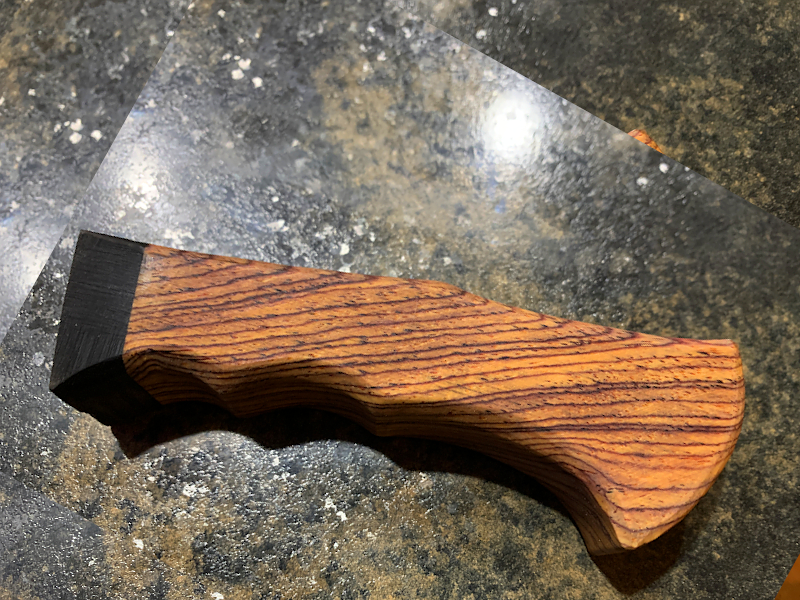
This will be a 6″ blade with hidden tang forged from low-layer ladder patterns damascus steel, with a matching guard and a cocobolo handle.
Ok, first step in making a damascus knife is making the damascus. This is the more time-consuming and tedious task. Damascus is another name for pattern-welded steel
There are many different styles and patterns that can be created with damascus. As I mentioned at the top, the style I’m making for this knife is called “ladder” pattern.
A quick description of damascus for the layman:
I start out with stacks of 1095 and 15n20 steel. Both these steels are high carbon steels, and both make excellent knife blades, but the 15n20 also contains nickel which is much more corrosion-resistant than the 1095. The patterns in the steel are made visible by “etching” it in a mild acid. Ferric chloride is probably the most common etchant for knife-makers, and what I use as well. The 1095 corrodes to a black color, while the 15n20 (by virtue of the nickel in it) doesnt corrode, and so remains bright and shiny. The contrast between the two colors makes the visible patterns in the finished product.
I grind the flat faces of all the pieces clean and wipe them down with acetone. This assures that theres nothing on the steel to inhibit the forge-welding. No mill scale, grease, oil, or dirt.
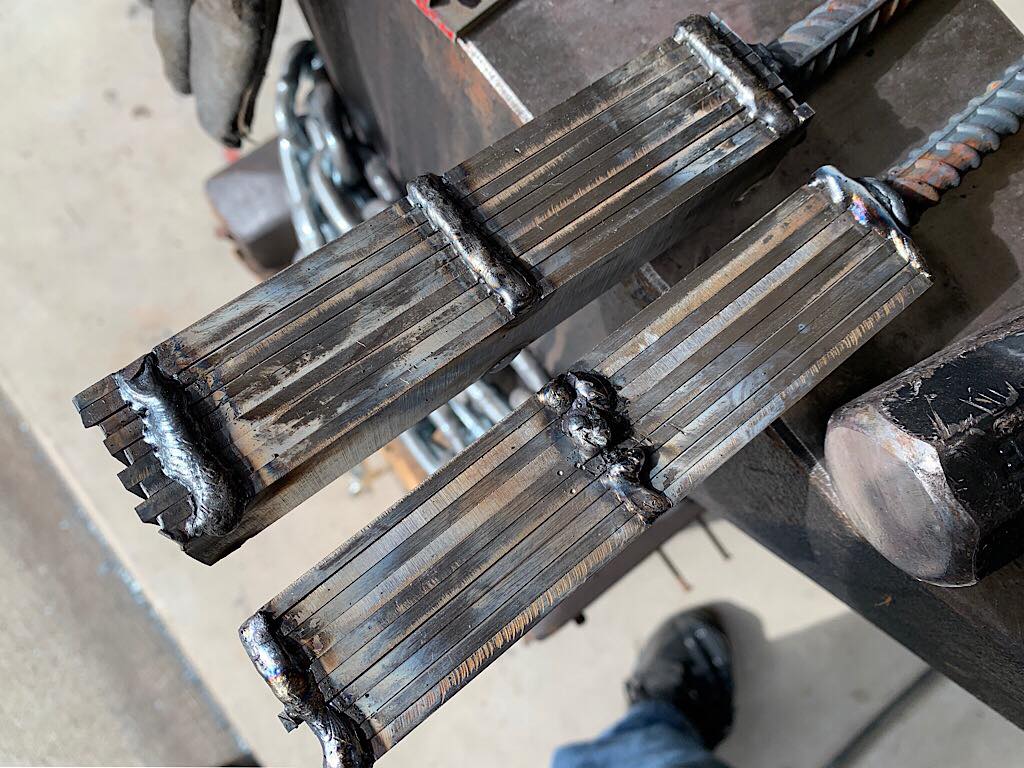
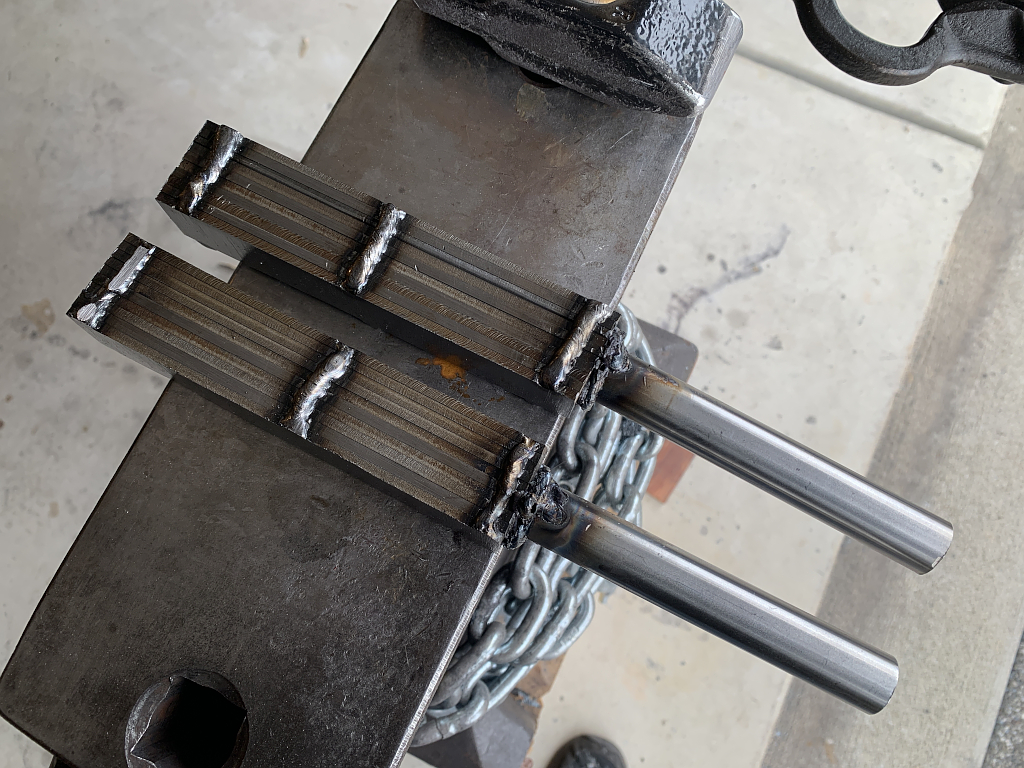
Then I make 2 stacks of 10 pieces. Each stack has 5 pieces of each steel type, each 1/8″ thick, stacked alternately, 1095, 15n20, 1095, 15n20, etc.
Then I run a couple welds to keep the stacks together and lined up.
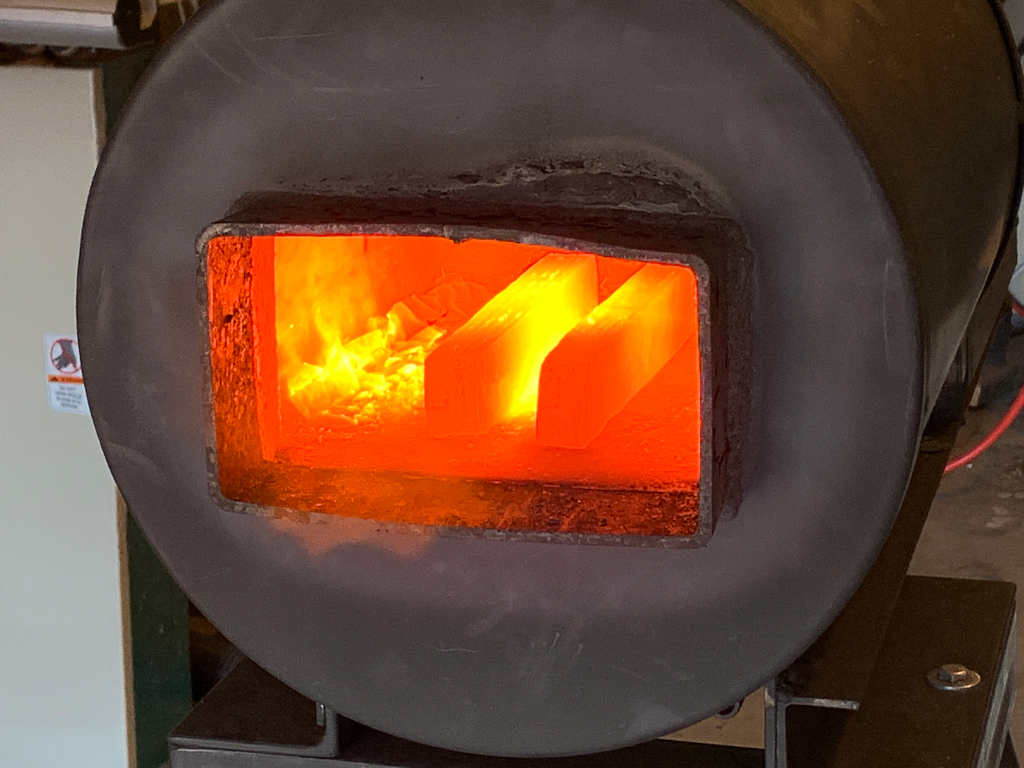
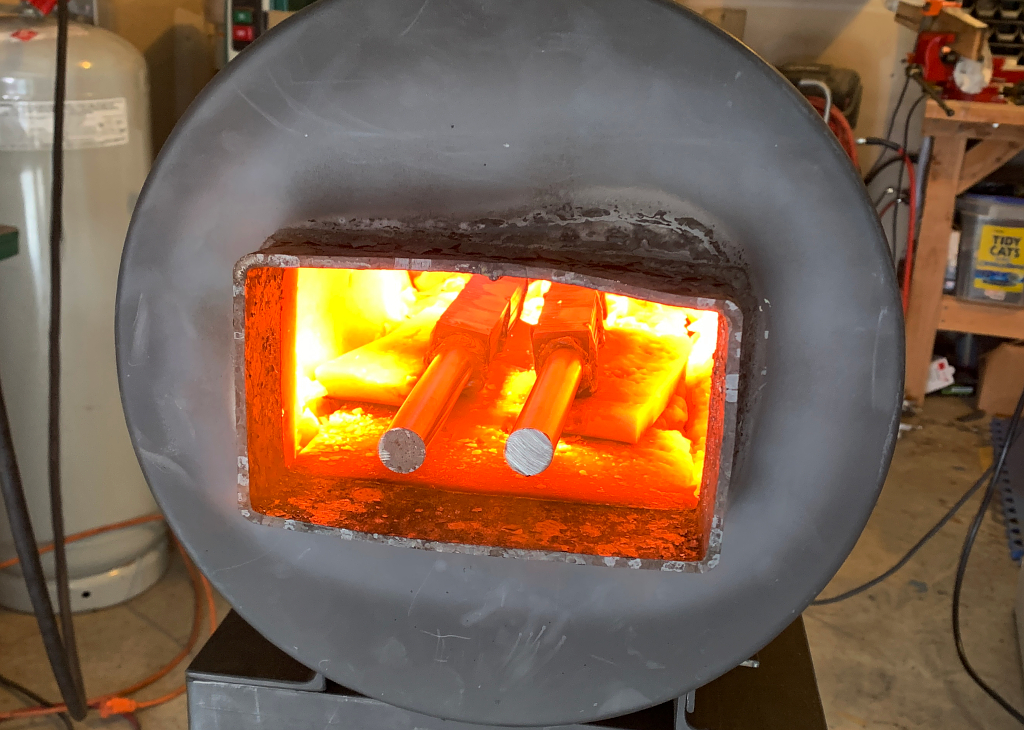
Into the forge with them. I heat to orange, which is around 1500 F. and then flux the billets well with borax and then back into the forge. The flux will “wick” in between the pieces via capillary action and dissolve any scale that would normally form. The scale would prevent the pieces from welding together.
Forge-welding requires much higher temperatures than normal forging temps. Usually around 2300 degrees. I dont have a thermometer to determine the temp, but when the steel reaches a bright, pale lemon yellow in color, nearly white, its time.
I pull them out and hammer quickly and firmly on the billets while the temp is at max, and if all goes well 10 pieces of steel fuse together into one. They dont melt, but the surfaces fuse together into one solid billet.
Once they are welded, I draw them out normally like any other bar stock.
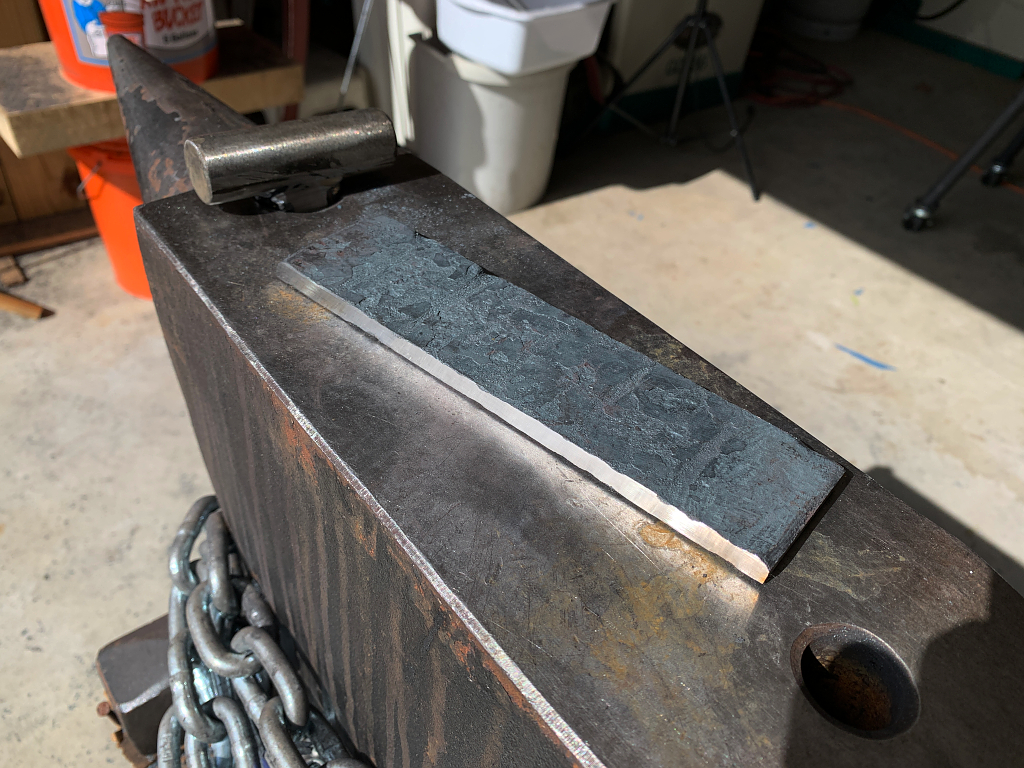
Each of the two billets are forge-welded into solid billets, and drawn out. The resulting billets are longer, wider, and shorter than the initial stacks. The reason they appear flaky and dark gray is because when you heat steel to forging temperatures, the iron combines with the oxygen in the air and forms what we call “scale”. The scale is super hard and ugly and has to be ground off. The more you forge, the more scale forms, and if your process (as in making damascus) involves a lot of forging, you lose steel to scale. In the end you have a lot less steel than you had at the beginning.
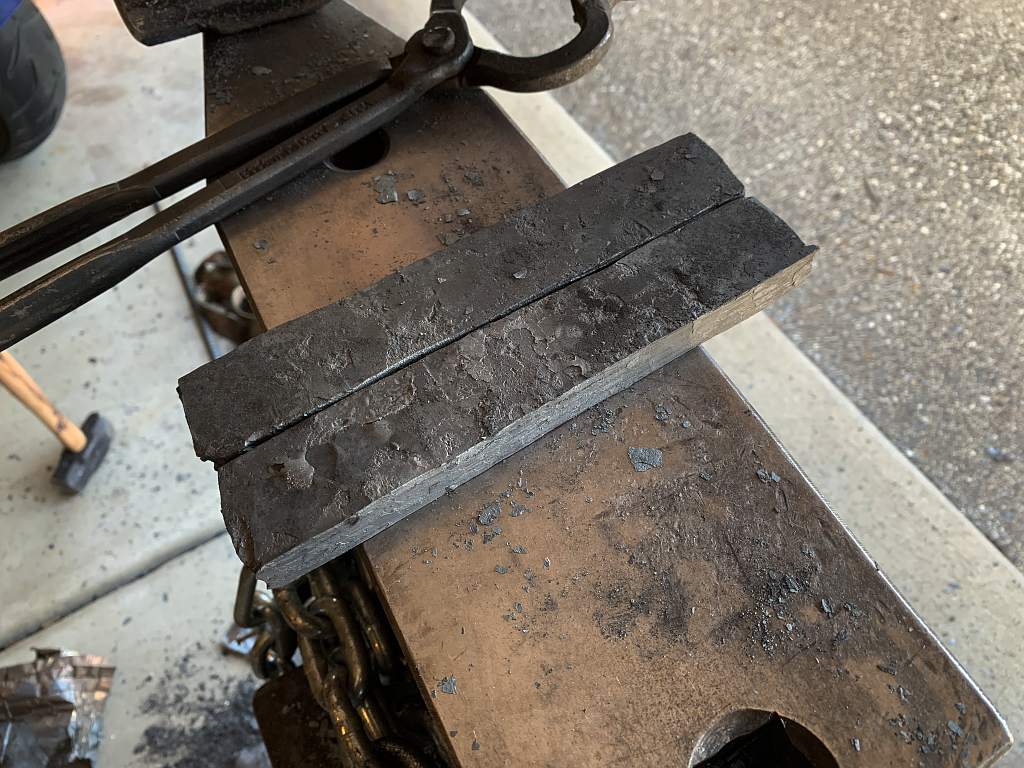
The scale is just on the surface, and I have to grind it off the sides of each billet to check the welds. There can be no visible gaps, cracks, lines, cold shuts, or delaminations. They should just look like hunks of solid steel, which in fact they are at this point. All those layers are still there, you just cant tell one piece from another. They are fused together into solid blocks, but they do not mix or blend. 
This is a youtube video of me making a couple billets exactly like these.
Next I cut each bar in two, and ground the wider face of each flat and clean. Then I tack-weld each pair together with the clean faces in direct contact, and then forge-weld them again, leaving me with two billets, each one half as long, but twice as thick… 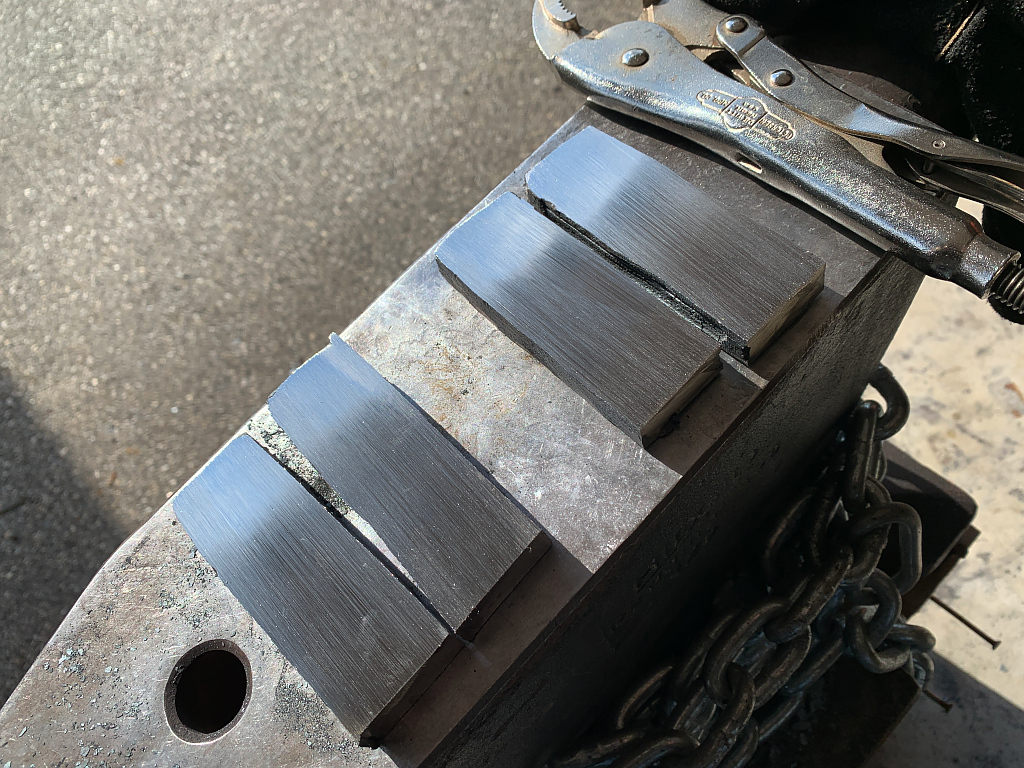
Then those two billets are drawn out again, as before, into longer, wider, shorter billets. If you are keeping count, each billet now has 20 layers. 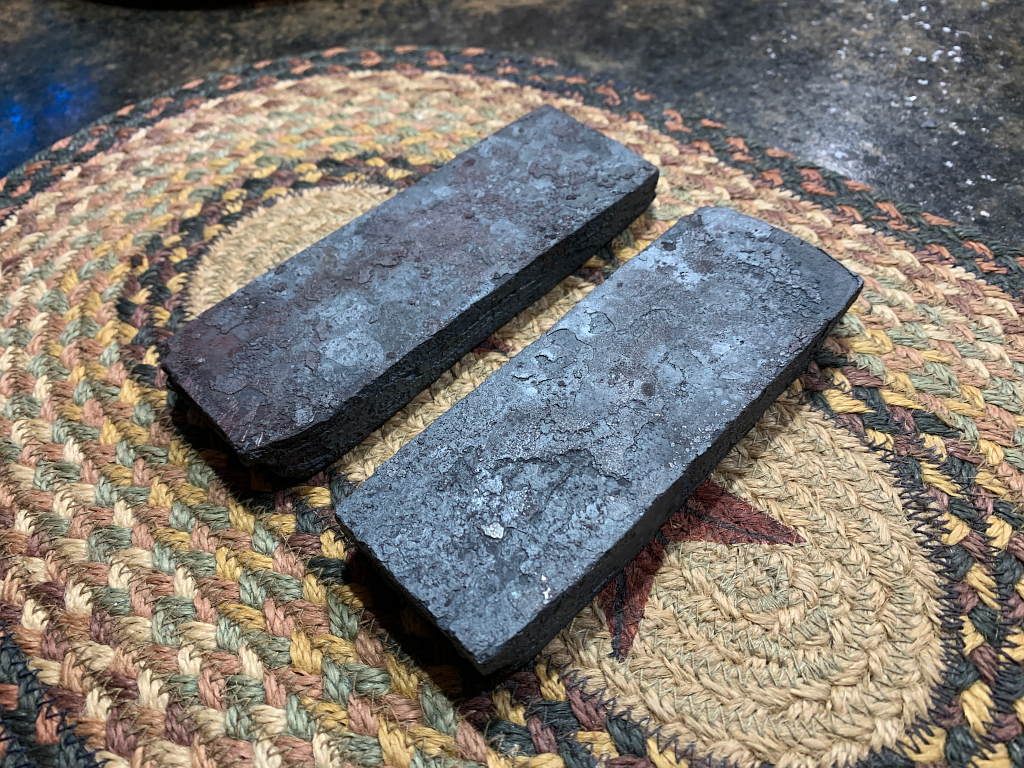
Next I repeated the above step again. I ground one face of each billet flat and clean, tack-weld them together, and forge-weld them into one solid billet, and draw it out again. Now I’m left with one billet of steel composed of 40 layers of alternating 1095 and 15n20 steel.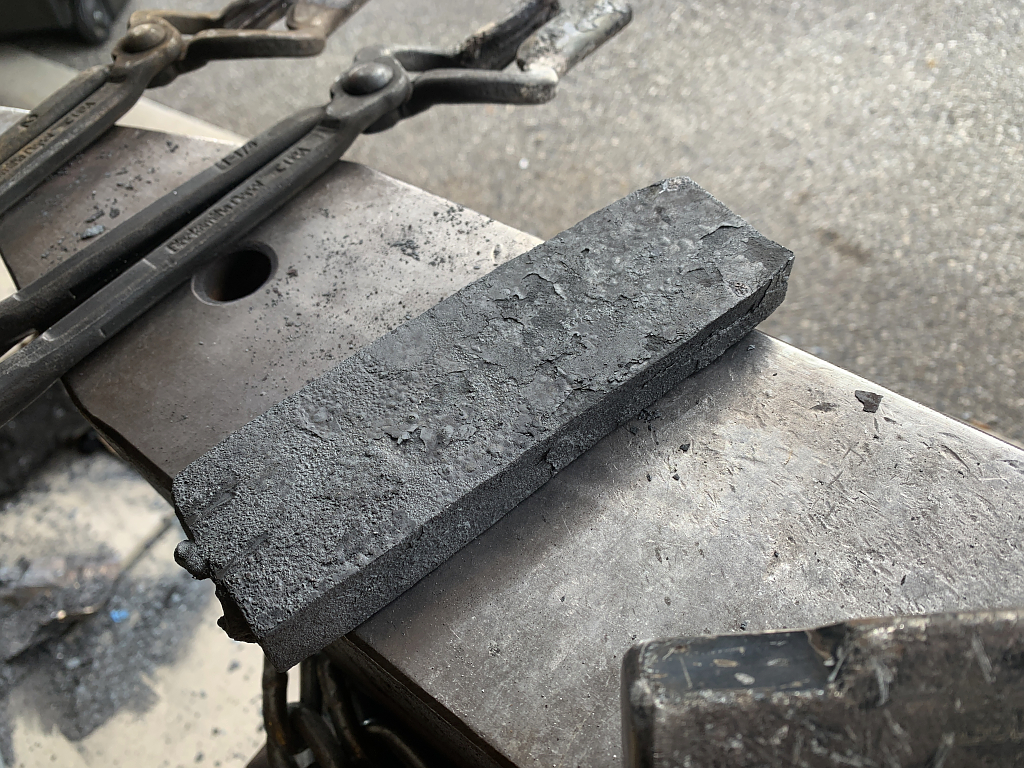
Also as before, I grind the scale from the edges to check that all the welds are solid. No delaminations, gaps, cracks, lines, etc. It would ruin the finished piece to have layers not fully fused together.
Now comes the steps that create the actual pattern in the finished steel. Recall that at this point we have 40 layers, all flat, running lengthwise in the billet. I make cuts widthwise across the billet every inch of so making sure that I cut about halfway through the billet.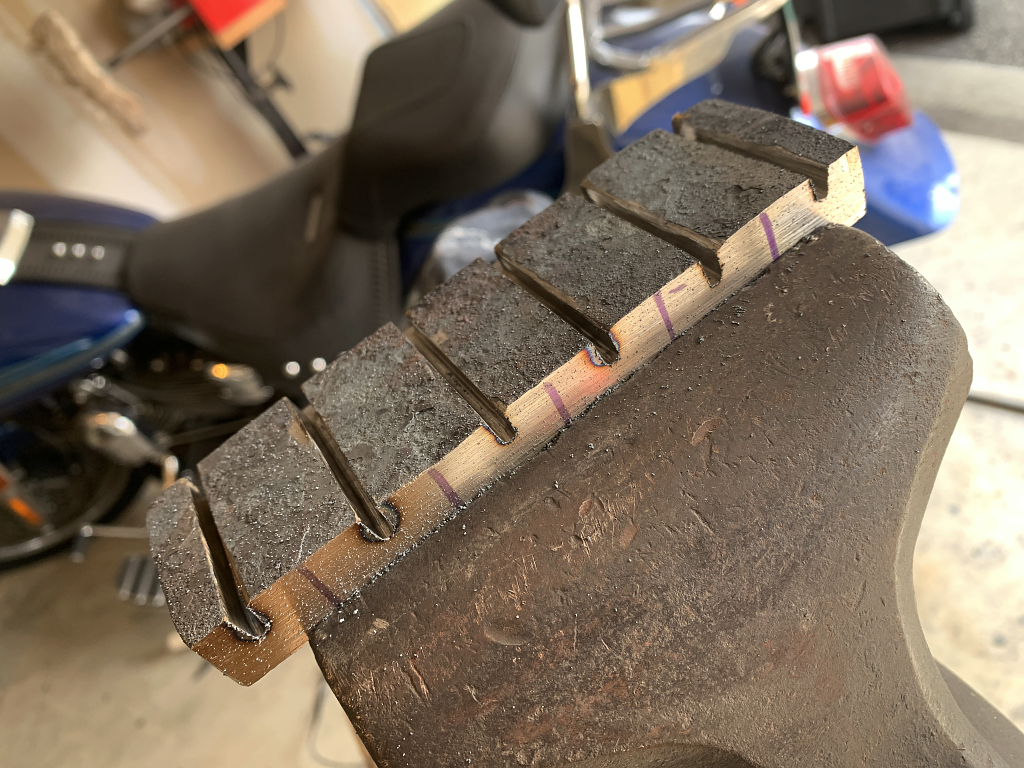
Then I flip it over and repeat that process, only my cuts on this side are in between the cuts on the opposing side. Again, cutting about halfway through the billet.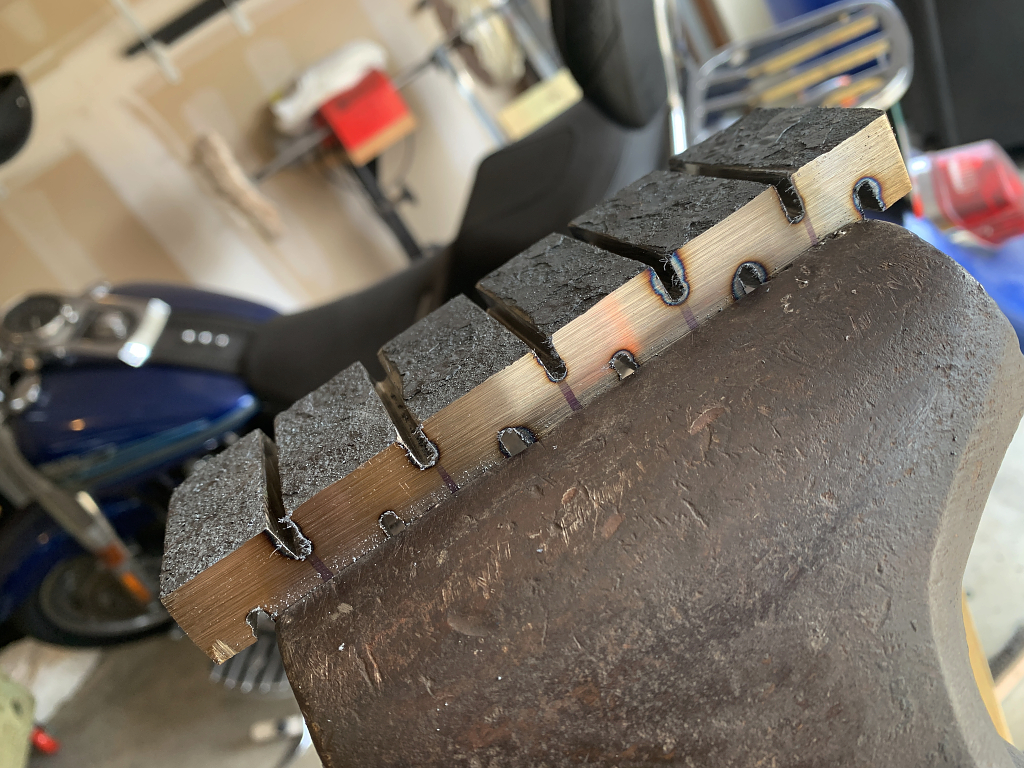
Then I use an angle grinder and round out the cuts leaving me with a billet that appears to wave back and forth. Remember that those layers are all still dead flat and parallel with each other even though the billet now appears to ripple back and forth.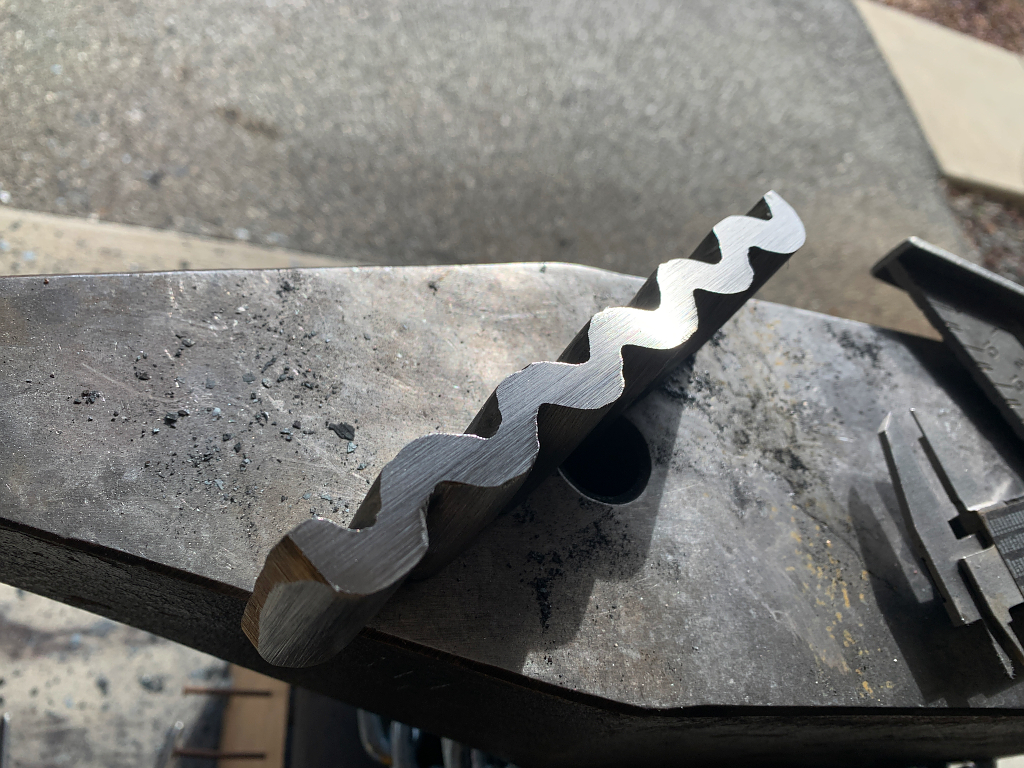
Next I heat the billet back up again, bringing it nearly to welding heat, and gently hammer the grooves open first on a fuller, then on the anvil face. I keep working gently, and very hot because I dont want to risk delaminating any of the layers since rather than just flattening them all together evenly and stretching them straight out. Now I’m actually stretching, bending, squashing, and distorting the layers by hammering my wavy bar out flat.
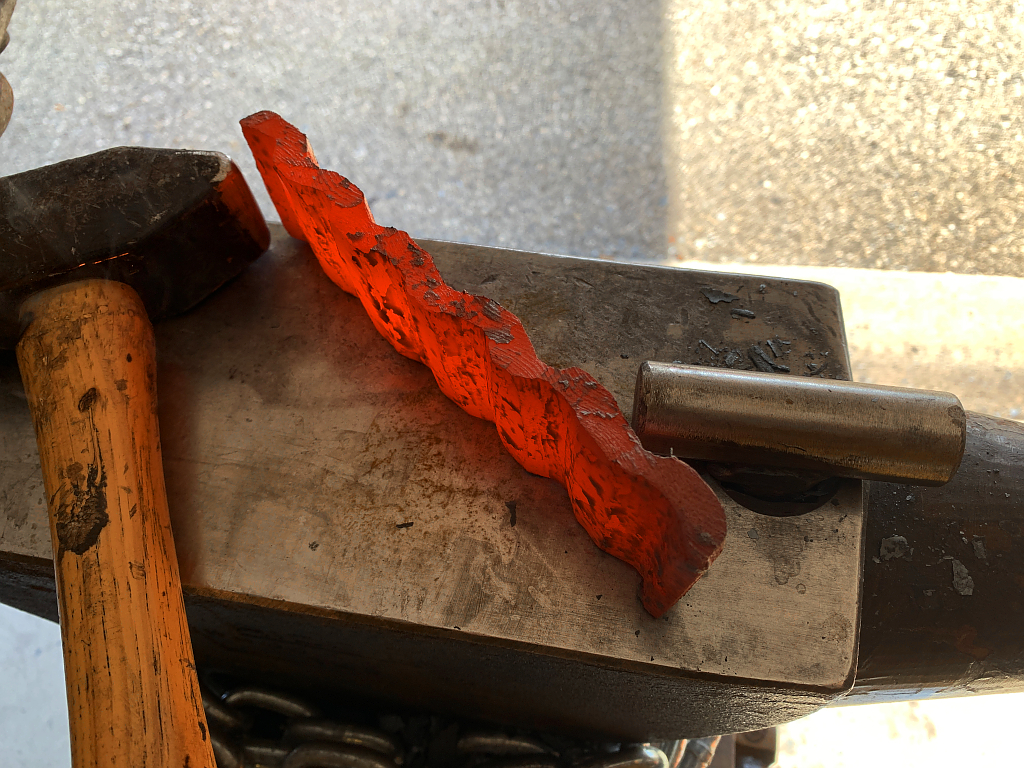
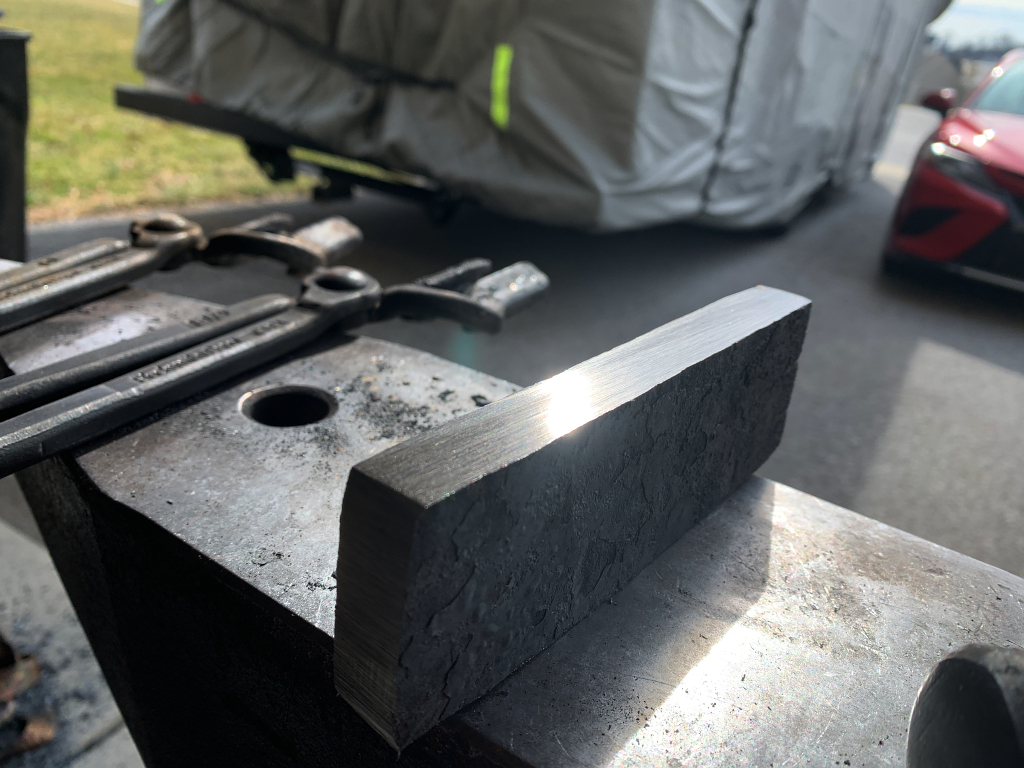
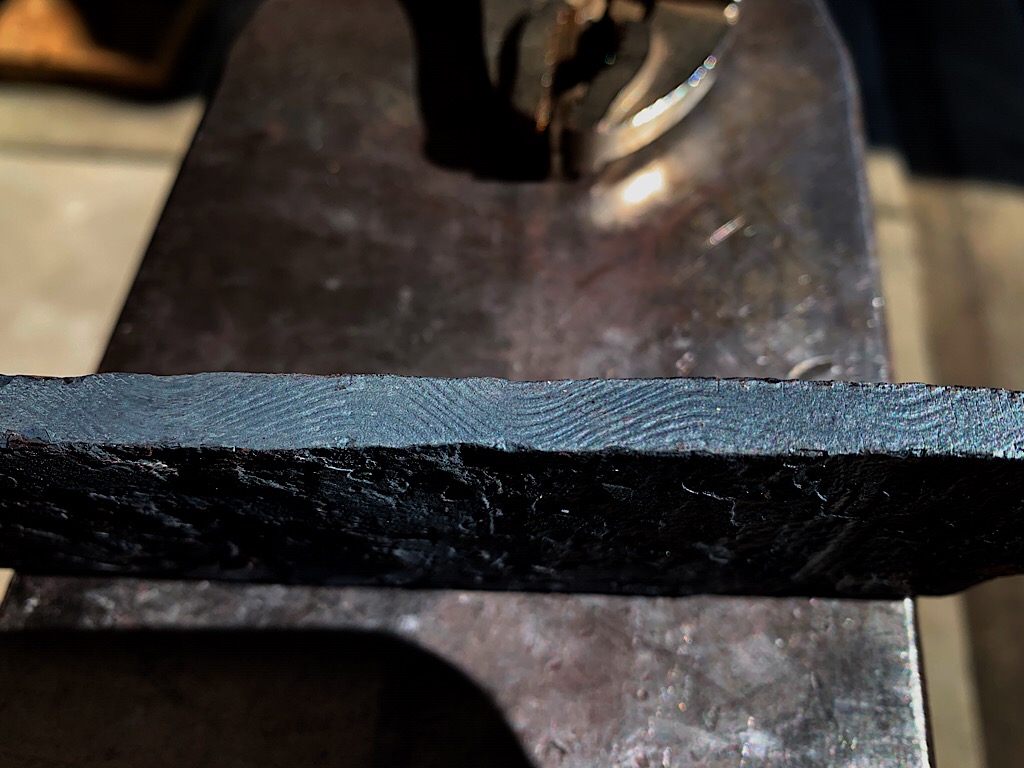
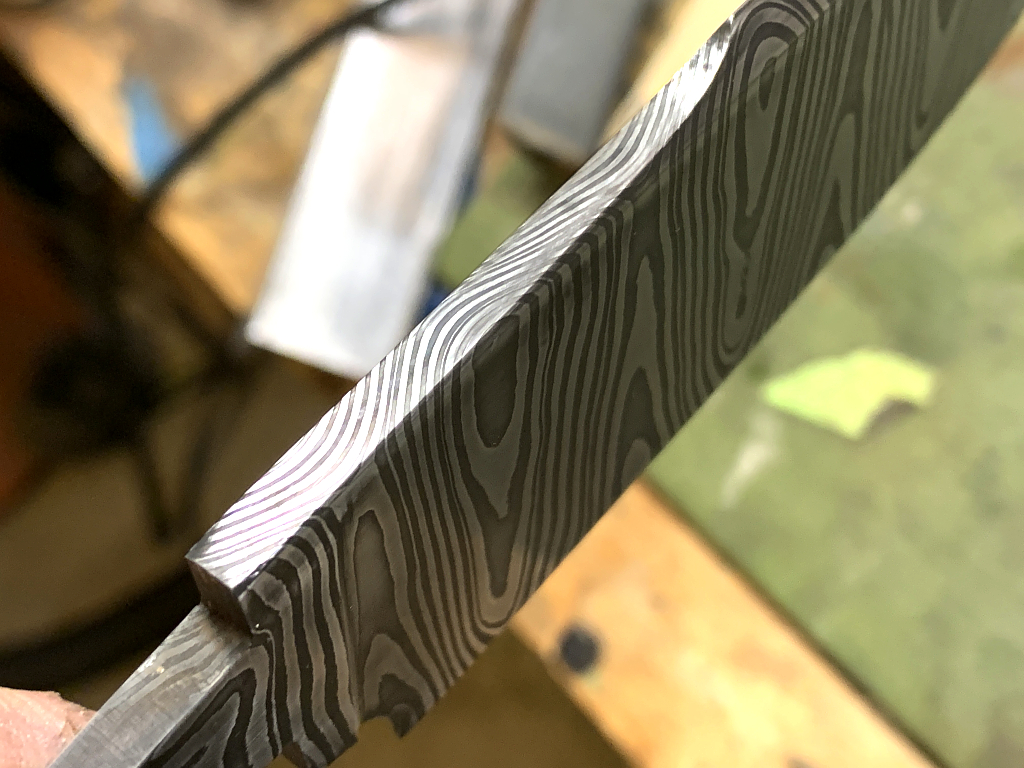
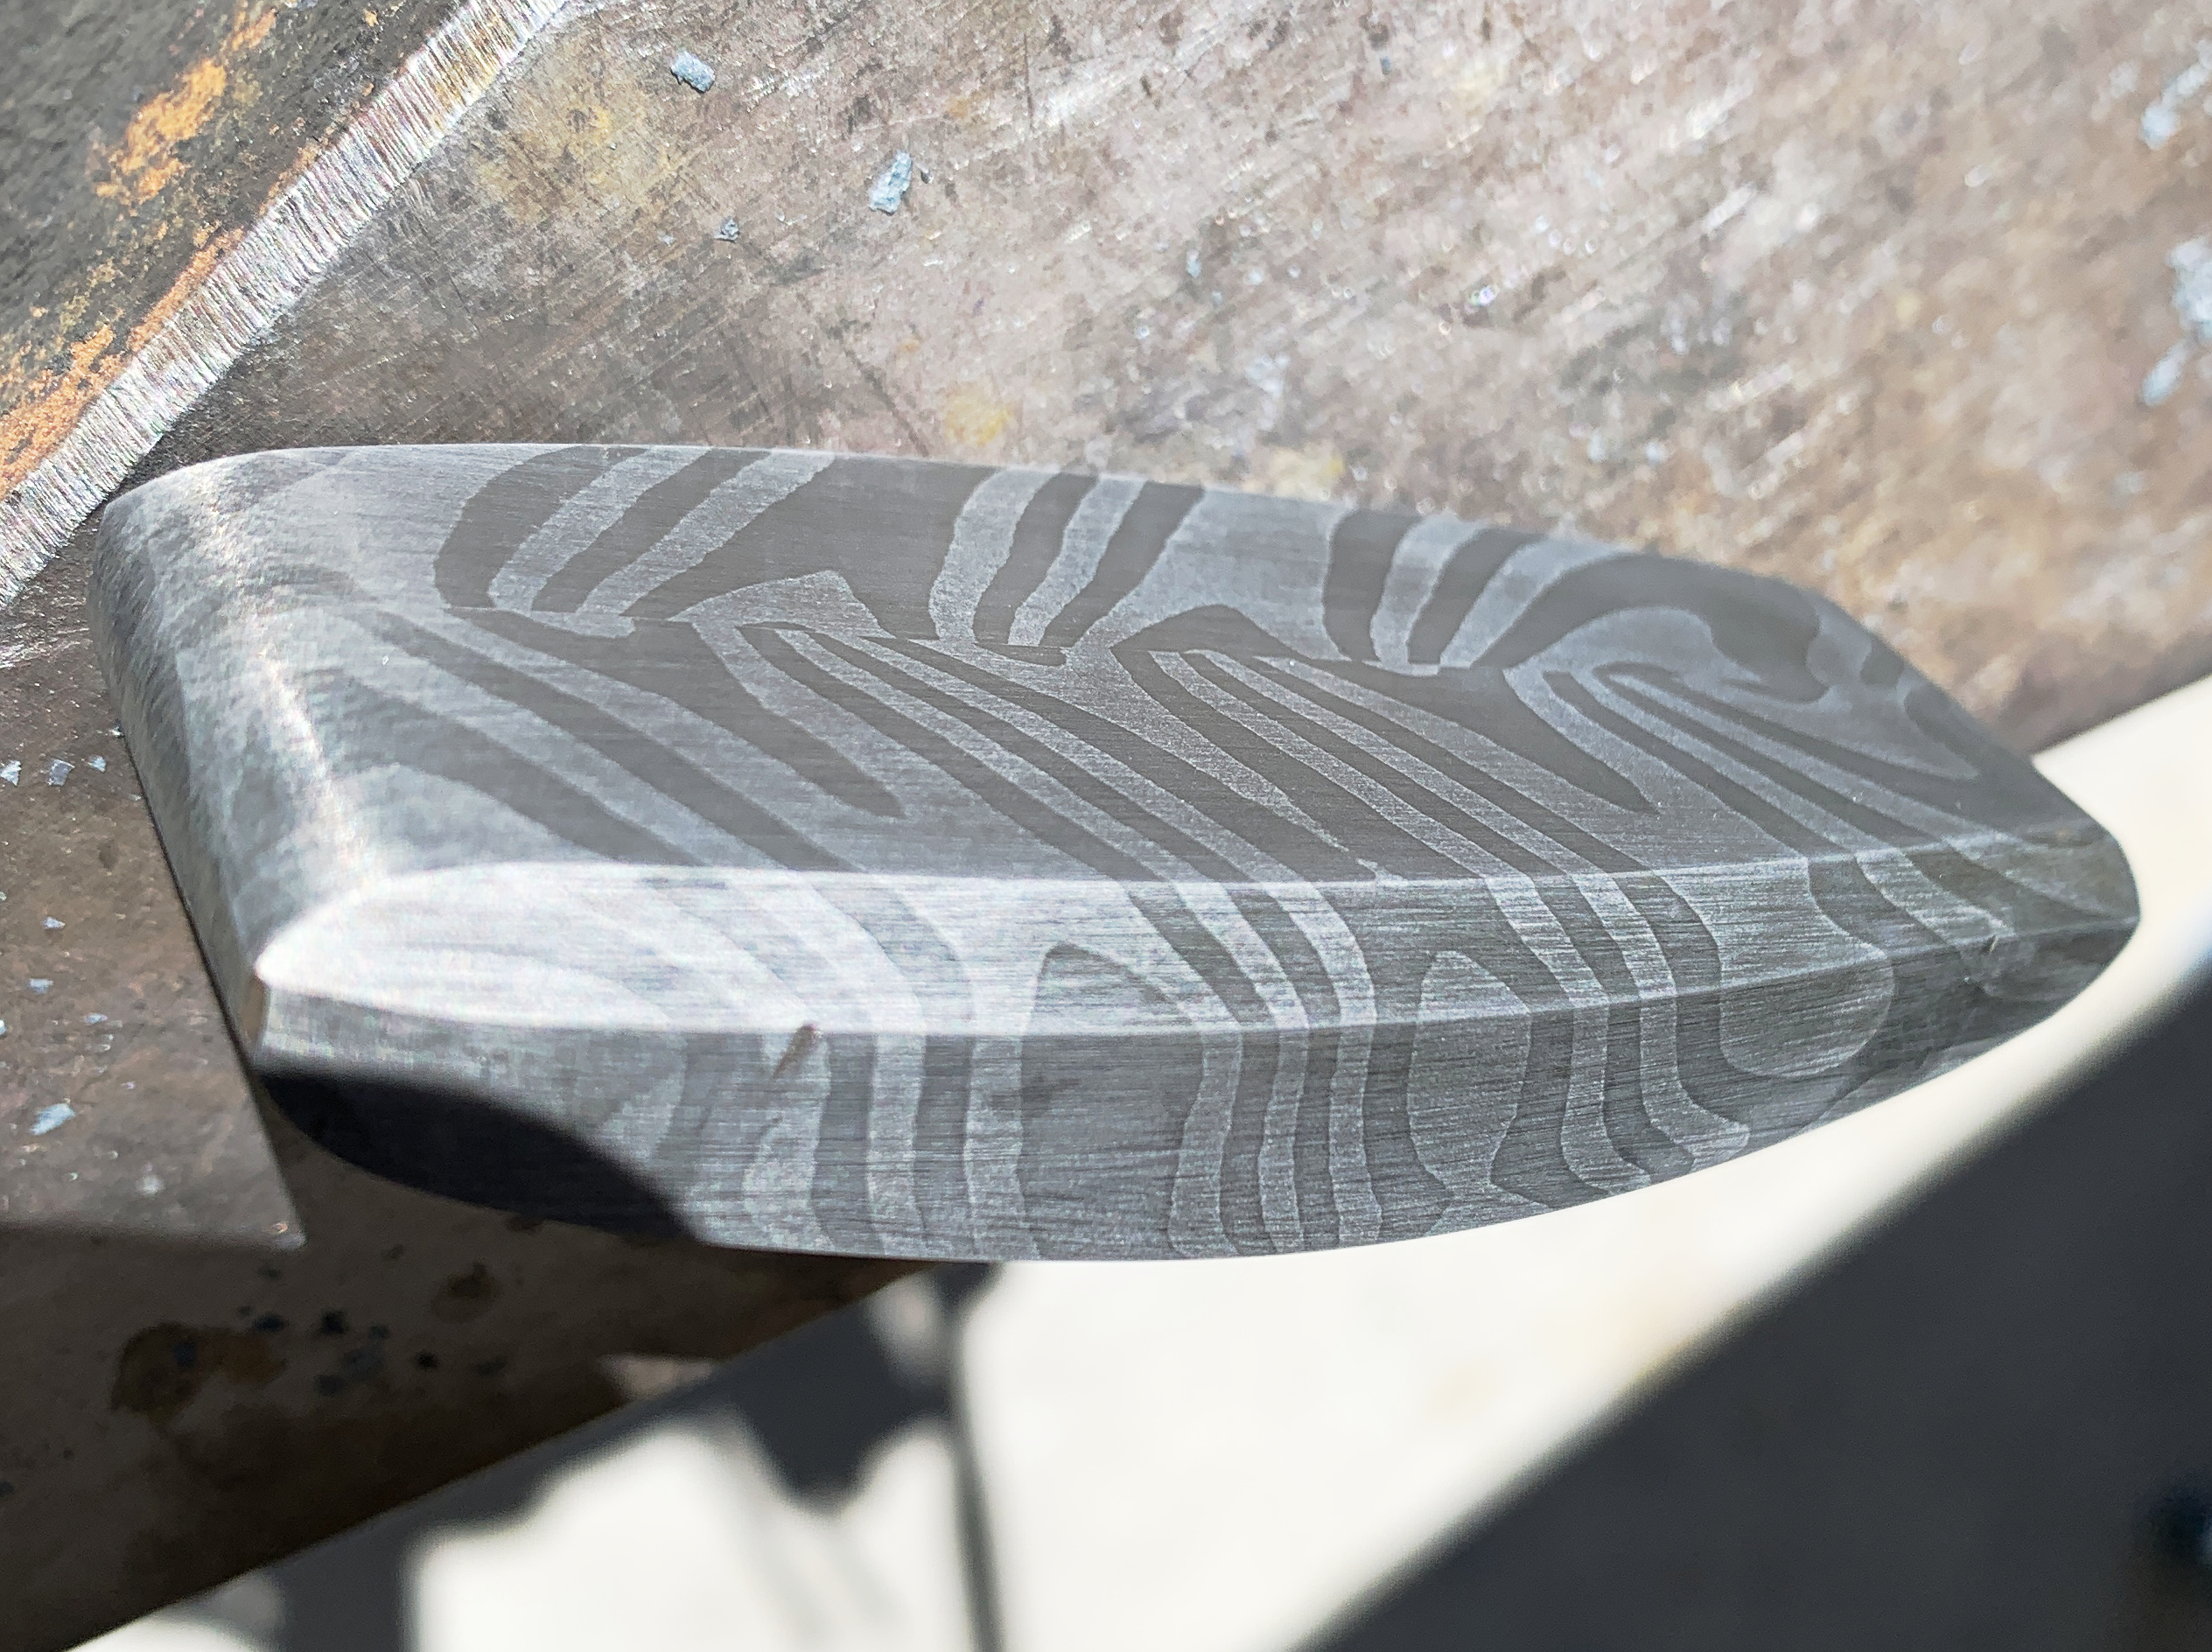
Now I have a billet thats perfectly flat again, less than half as thick as before, and now the layers wave up and down through the billet, as you can see on the edge of this piece.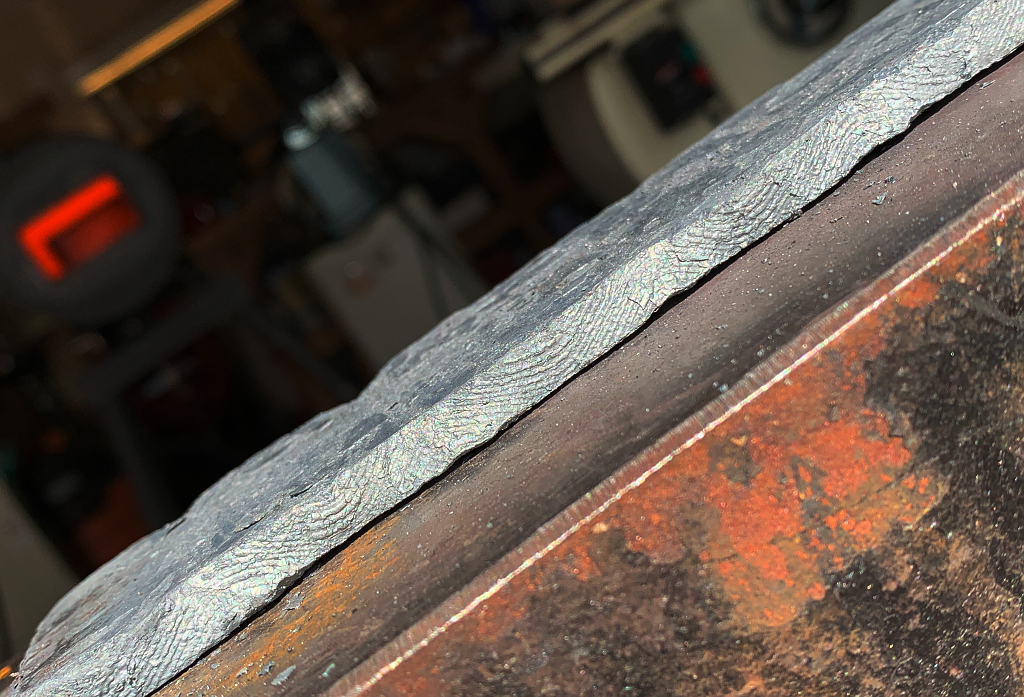
the entire process leaves me with one flat bar of steel just over 1/4″ thick, 8′ in length, and about 2″ wide.
Did I say I was going to make a knife? OK, time to actually start doing that.
Next I carefully isolate about 1″ on one end of the billet and forge it out into a tang. This concludes the forging. If this were a mono-steel blade (not damascus) I would forge the blade to nearly final shape. The profile and the bevels as well. With ladder damascus though, you get a better looking pattern in the end if you grind the bevels. Cutting through the wavy layers at an angle produces a more interesting patterns than the mostly straight lines you would get if the bevels were forged out.
Given that the forging is complete now, I do the first part of the “Heat treatment”. This is called normalizing. The purpose is to relieve the stresses in the steel introduced by forging. Also, it shrinks the grain of the steel and homogenizes it making for a stronger knife. The stresses and irregular, large grain size in the steel that results from forging can cause weak spots, and warping during the hardening process that comes later.
I heat the billet to 1600 F., hold for 5 minutes, then allow it to cool to “black”. Black is when the steel is no longer visibly glowing, which is around 800 degrees. Then I repeat that heating and cooling process 3 more times, each time my peak temp is 50 degrees cooler than the previous. So 1600, then 1550, then 1500, then 1450. Its important to allow the cooling stages to occur in still air. Moving air can cause it to cool at different rates from one side to the other, which can introduce stresses back into the steel.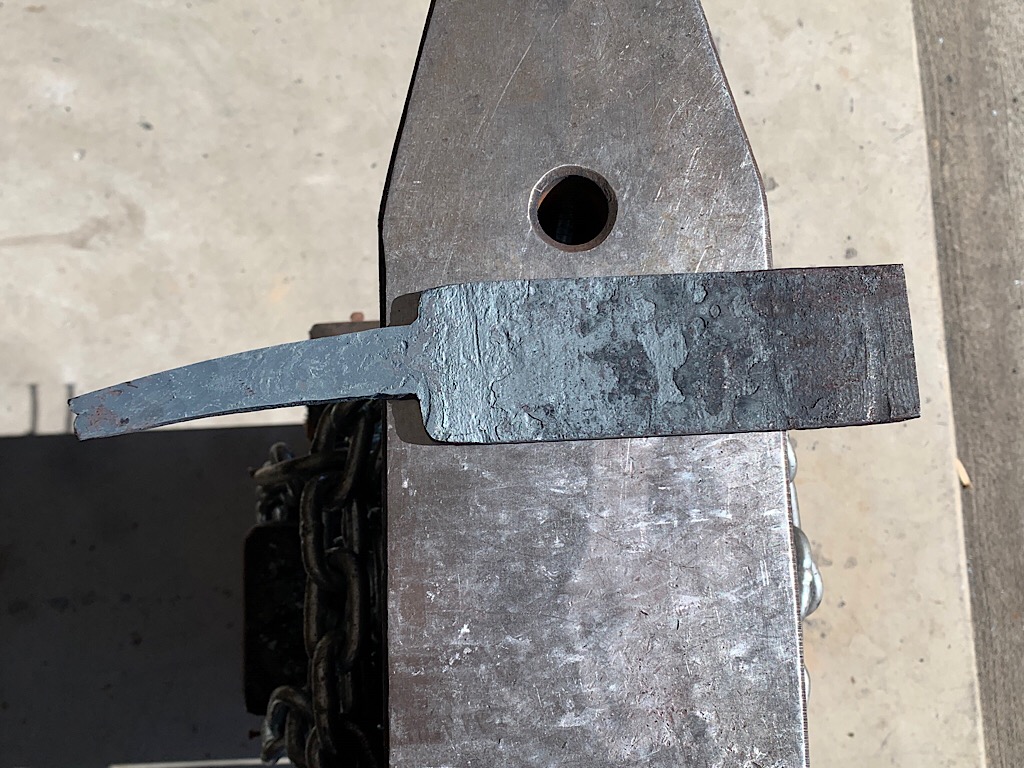
Normalizing completed, now I grind most of the forge scale off the billet.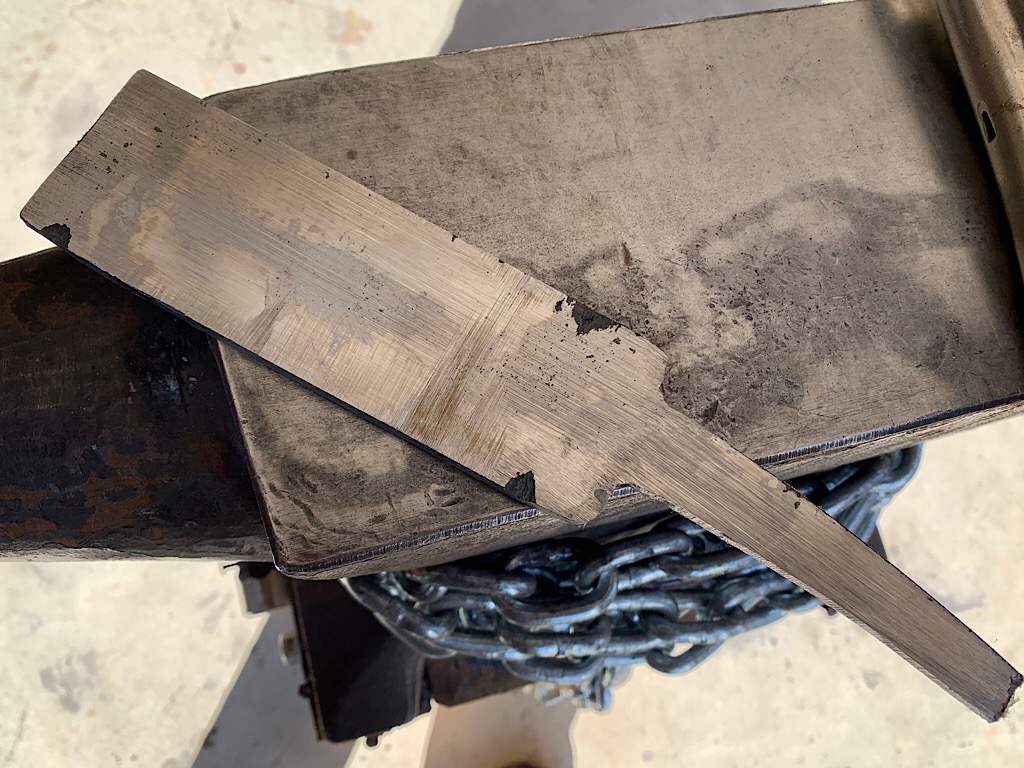
Glue a paper template of my design right to the billet with CA glue…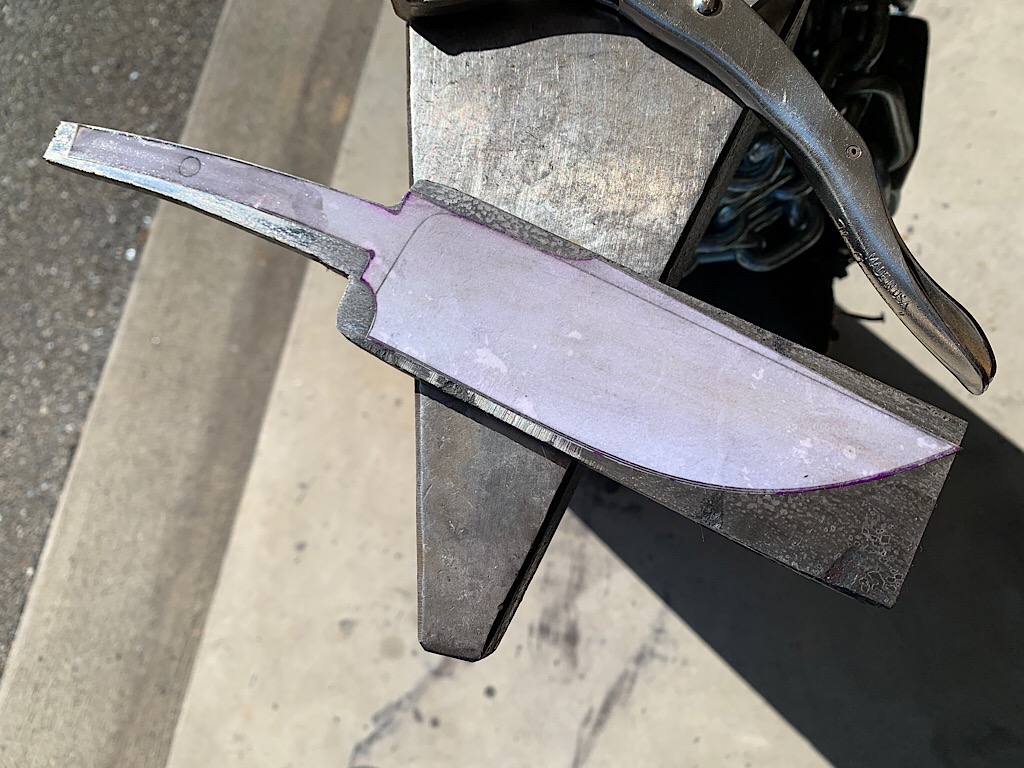
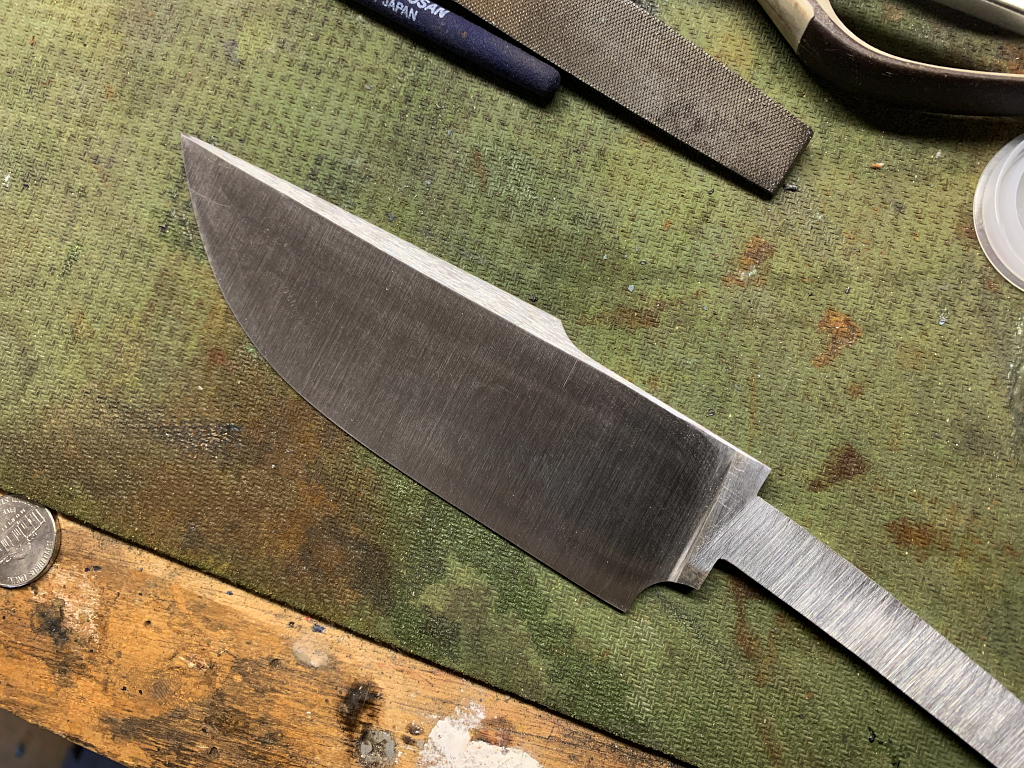
And grind the profile on my belt grinder. This leaves me with a knife “blank” Its still a flat bar of steel, but ground to the outline of my knife.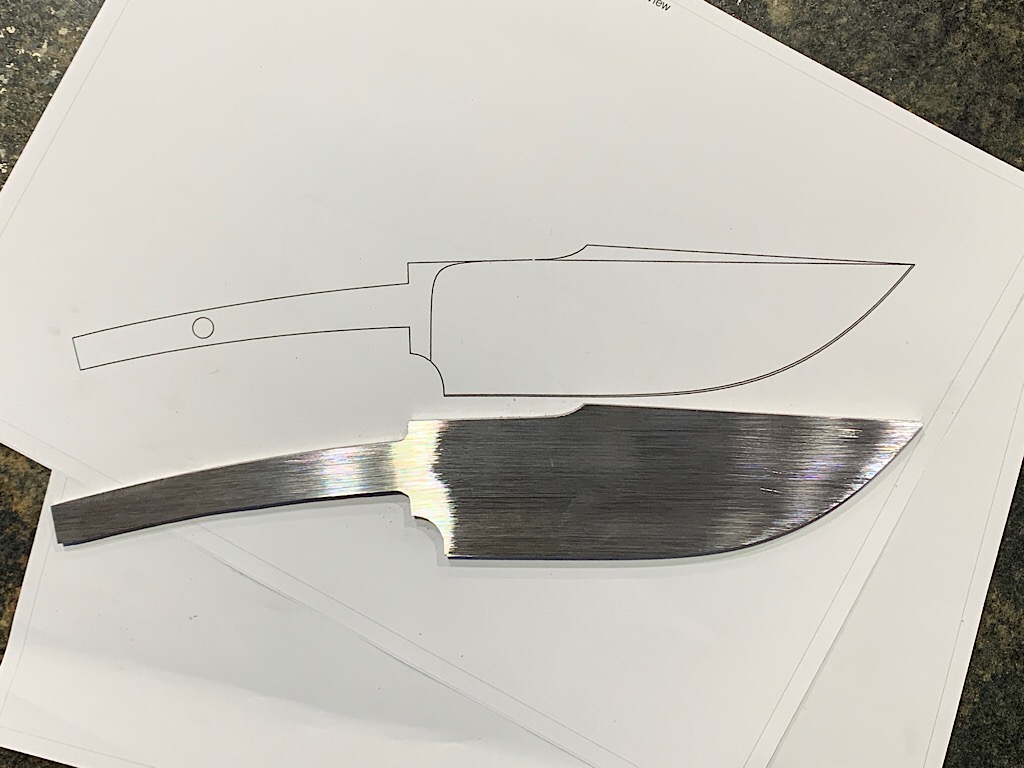
So we have the outline of a knife, but as you can see, the edge wouldn’t cut warm butter…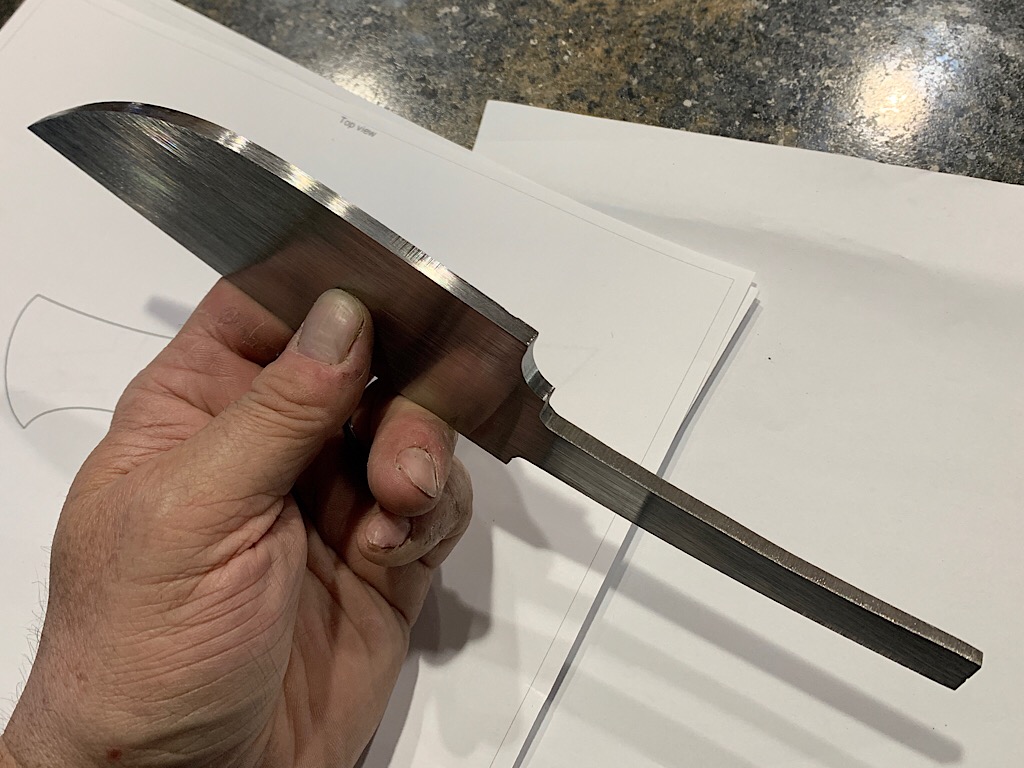
This is a granite surface plate and height gauge. I set the gauge to 1/2 the thickness of my knife blank
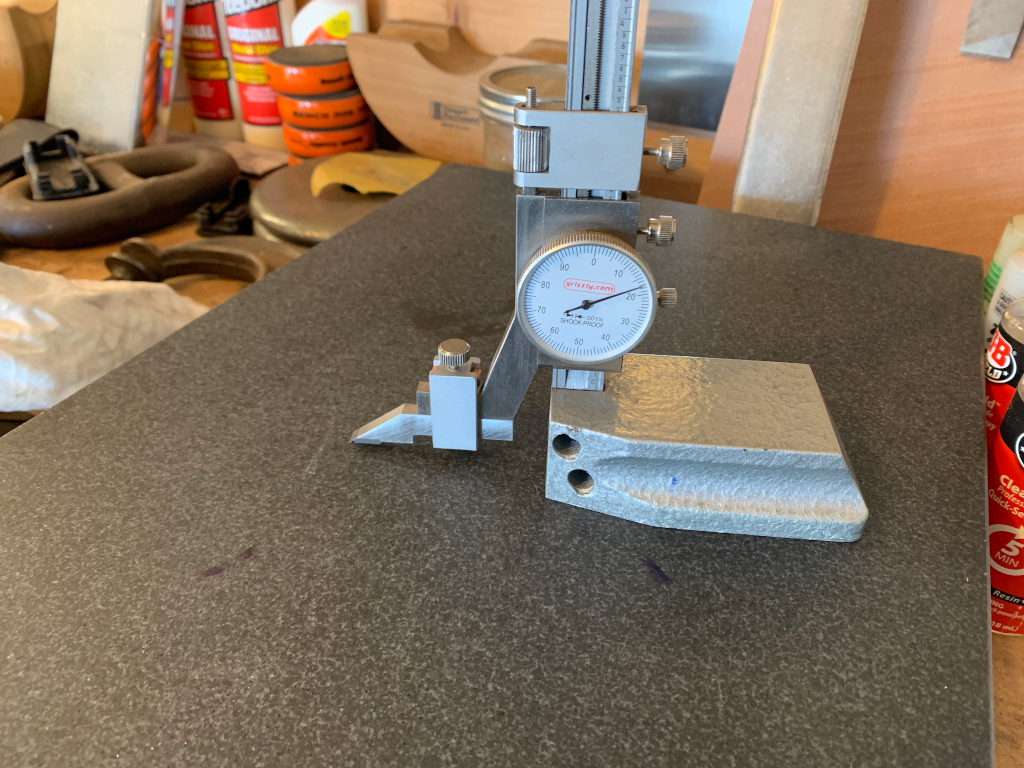
And scribe a line along the edge after coating it with blue dykem. This gives me a clear line I can grind to so that my cutting edge stays nice and straight.
I mount the knife blank to a piece of angle iron and set it on the table of my grinder, which I have adjusted so that the knife blade is angled toward the belt 3 degrees. This allows me to grind the edge perfectly, and reversing for the other side, lets me match the bevel angle on each side of the blade so they are identical.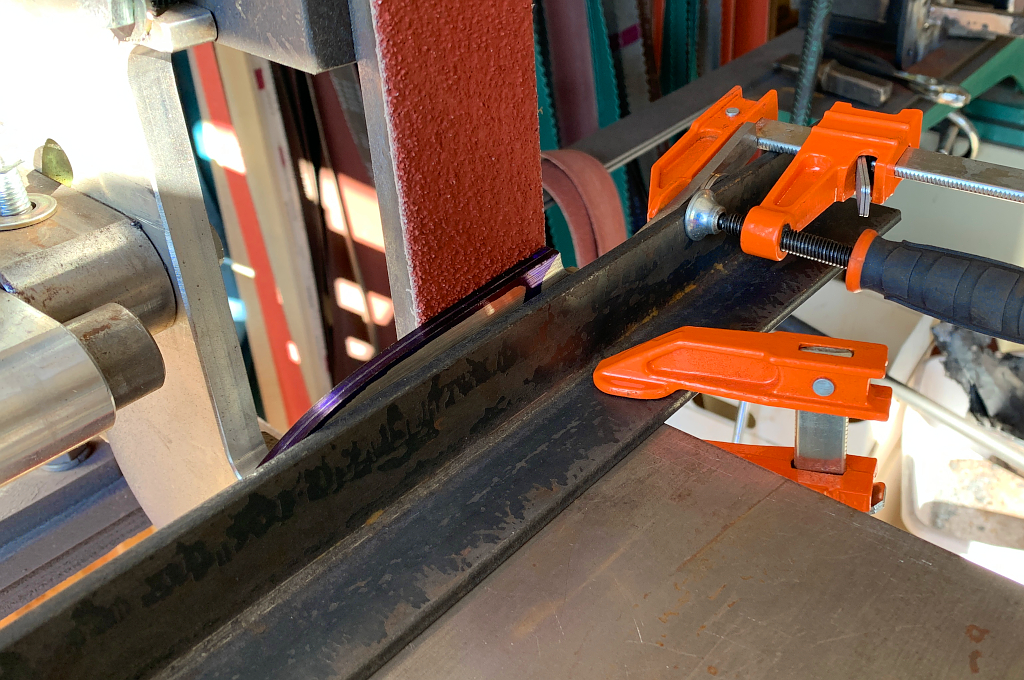
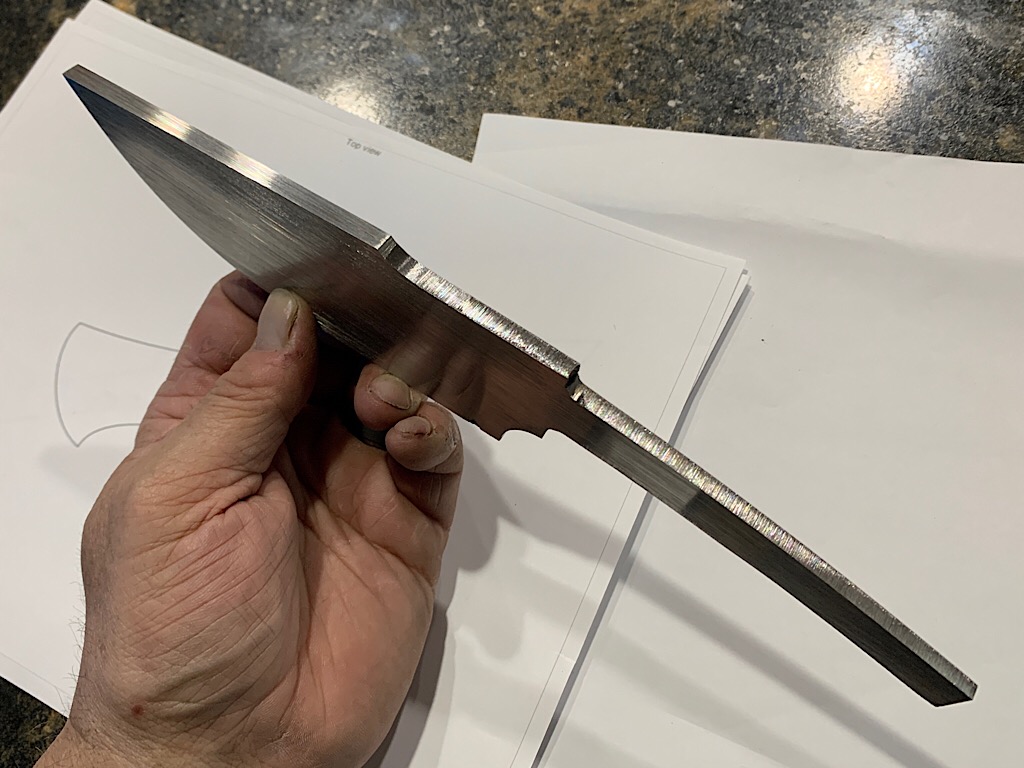
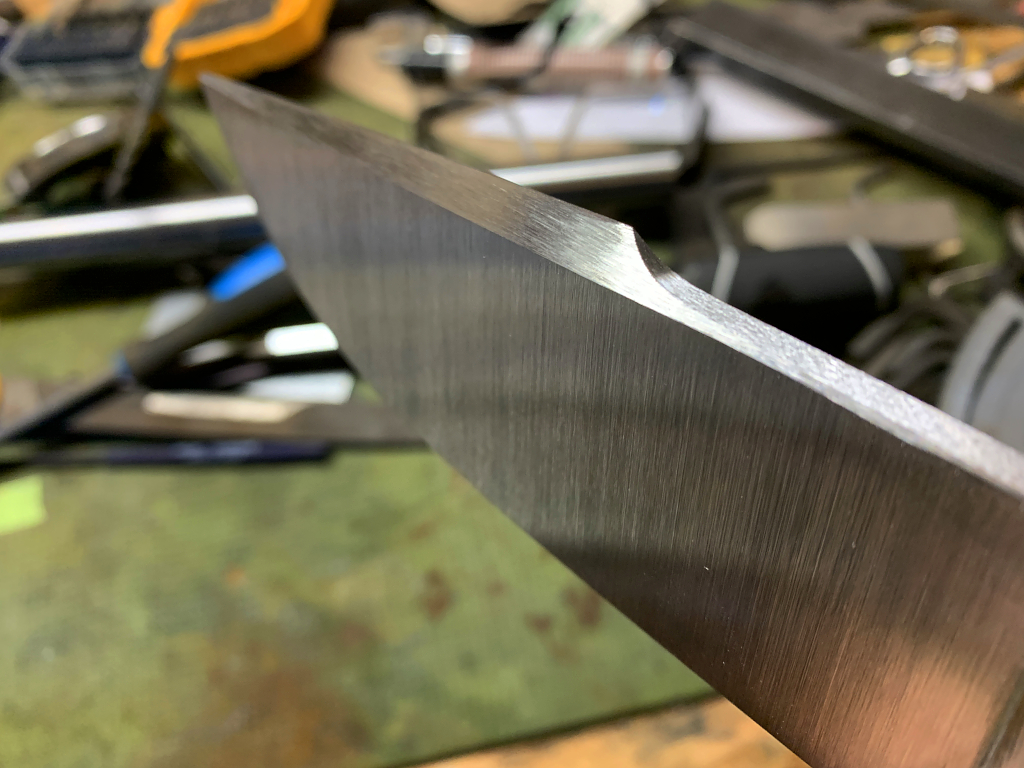
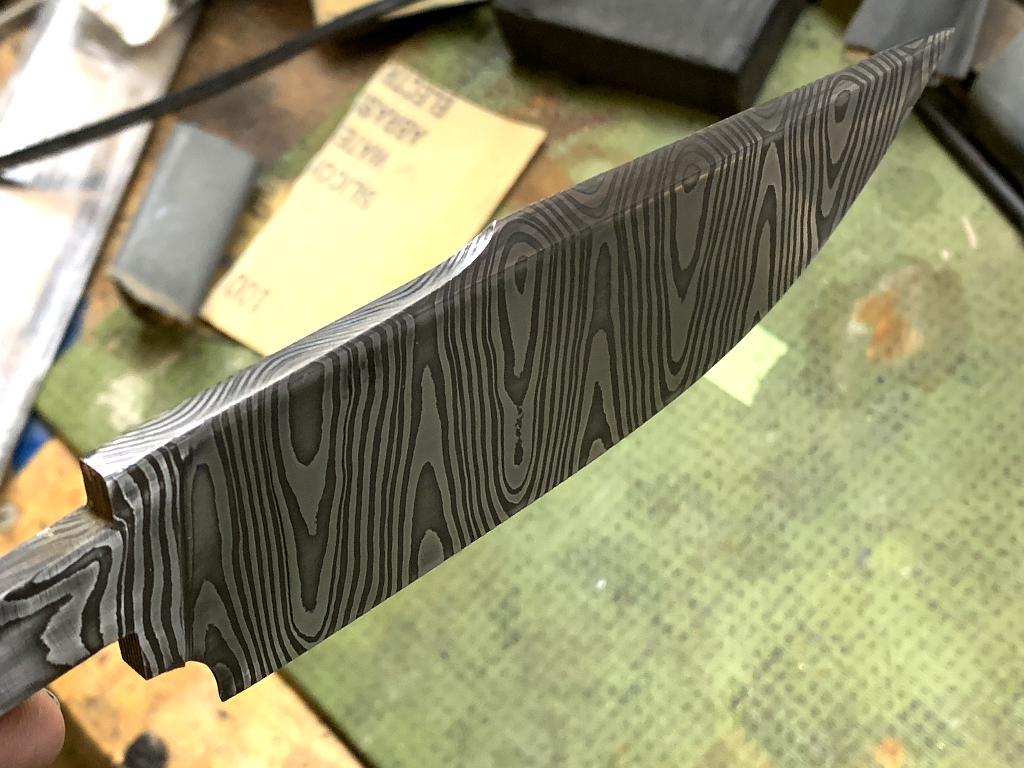
Giving me a nice, full flat grind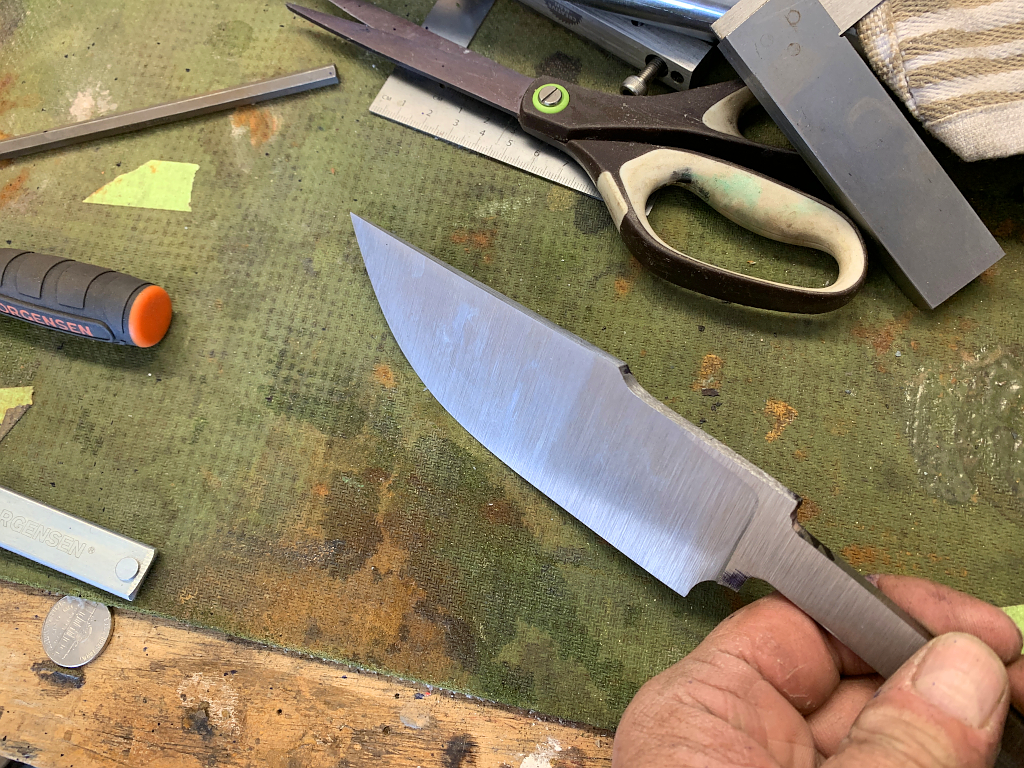
and smooth distal taper from base to tip.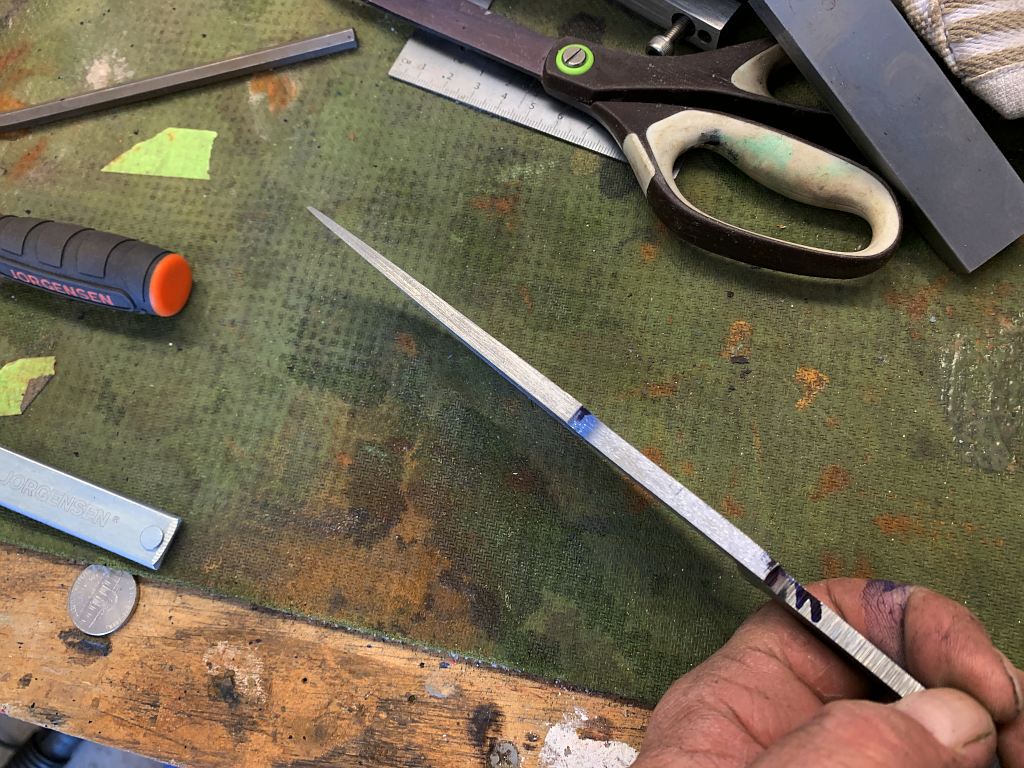
A file guide with carbide sides allows me to file the shoulders of the ricasso perfectly flat and parallel to each other so that when the tang goes through the slot in the guard (which I havent made yet), it will sit perfectly flat and flush. 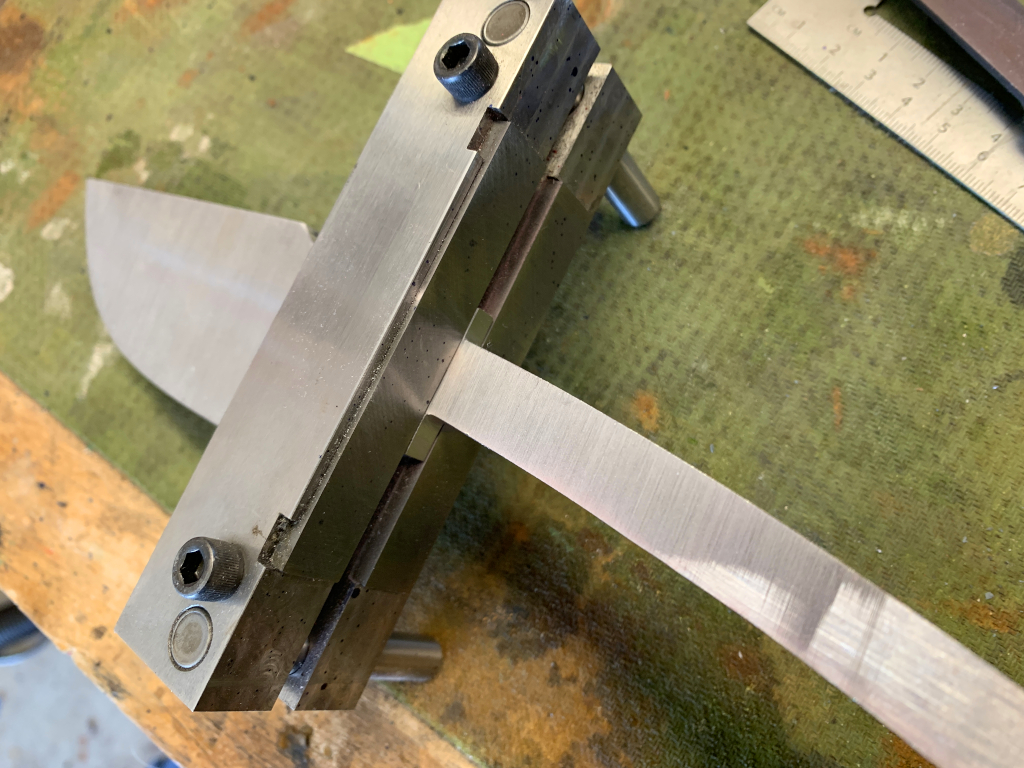
Everything is ground to 120 grit now. Ready to harden. 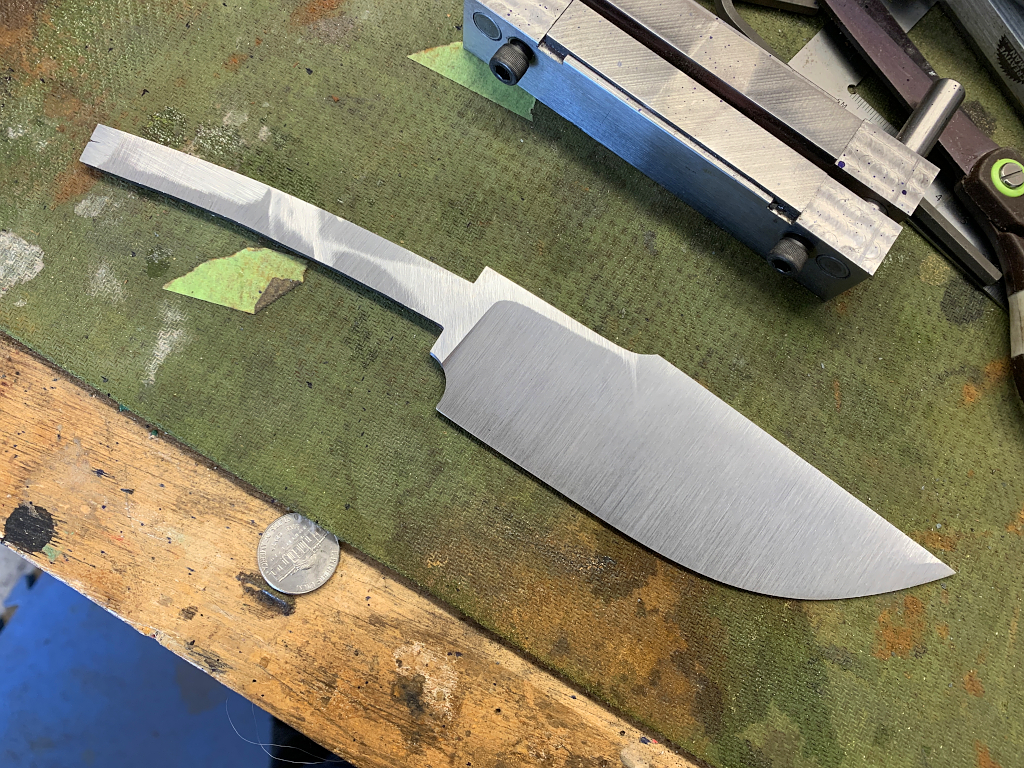
Hardening is the next part of the heat treatment process, and critical for a knife. Right now the steel is relatively soft. I could grind a sharp edge, but after a couple easy cuts it would already be dull. for a good knife we need to be able to grind a razor-sharp edge, and we need that sharp edge to last a long time. For that to happen we need to harden the steel. To do this I heat the blade to exactly 1475 F. and hold at that temp for 10 minutes, and then immediately plunge the blade in Parks 50 quench oil. This cools the steel from 1475 F to below 700 F in a fraction of a second. The speed that the steel is cooled is crucial to successful hardening. Without boring you with the science of metallurgy (which I’m happy to do if asked!), if it takes even as long as one full second to cool it, the steel will form a crystalline structure called pearlite, which is not hard. When done at the proper speed, and the proper temperatures, the steel forms a structure called martensite which is extremely hard. This is what we want. The part of the process is called the quench, or quenching.
After the quench the blade is over 65 HRC and quite brittle. No good for any tool, really. Just dropping it on the floor could literally cause it to shatter into several pieces. So the next step in the heat treatment process is called “tempering”. This is simply heating the blade to a much lower temperature, 400 F. in this case, and holding it at that temperature for one hour.
Two one-hour tempering cycles, allowing the blade to cool completely to room temperature in between cycles, removes the brittleness in the entire blade, but keeps hardness around 58 HRC. This will hold an edge very nicely but also allow it to take a lot of punishment without breaking. This amber/wheat color is what I look for after tempering to tell me its tempered the way I want.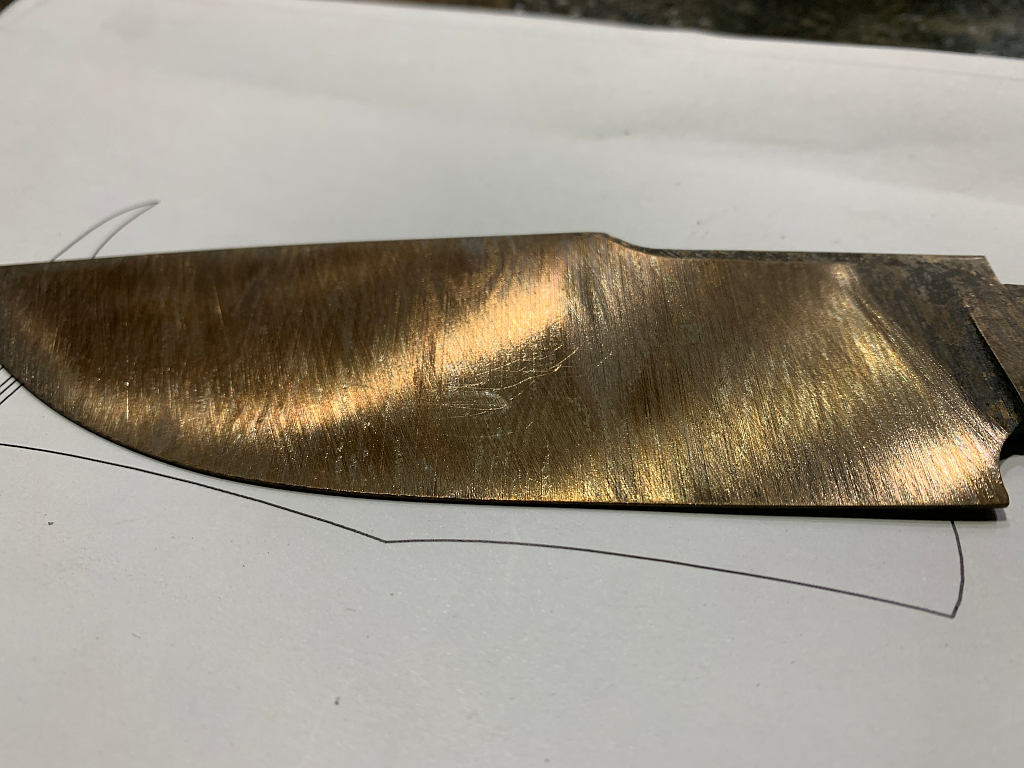
The details of the heat treatment process I described above (normalizing, hardening, tempering) are specific to the types of high carbon steel I used in making this blade (1095 and 15n20). Each different type of steel/alloy have their own specific numbers, temperatures, timings, etc. There are volumes of data on heat treating different kinds of steels.
Moving right along, my next step was to grind the false edge along the top of the clip area. I used the contact wheel on my grinder for this, but it might be that I’ll try the flat platen next time. We’ll see. This feature is really just for show. It looks cool to me, and while function is the top priority, once that is satisfied, form matters too 🙂
Next is the inevitable, tedious process of sanding the blade. For most blades I only need go to 800 grit, bit for damascus I’m going to 1000 grit. I did this yesterday and my thumbs are sore as hell today from hours of pressing hard on my sanding stick. Believe me, trying to sand hardened tool steel with a 1000 grit paper is a serious exercise in patience. All the sanding after heat treatment has to be done entirely by hand. Using any electric or power sander can heat the blade very quickly to temperatures that will wreck the heat treatment.
A short, flat bar of steel with a piece of sand paper wrapped around it, lubricated with WD-40, and a LOT of elbow grease is how its done…unfortunately.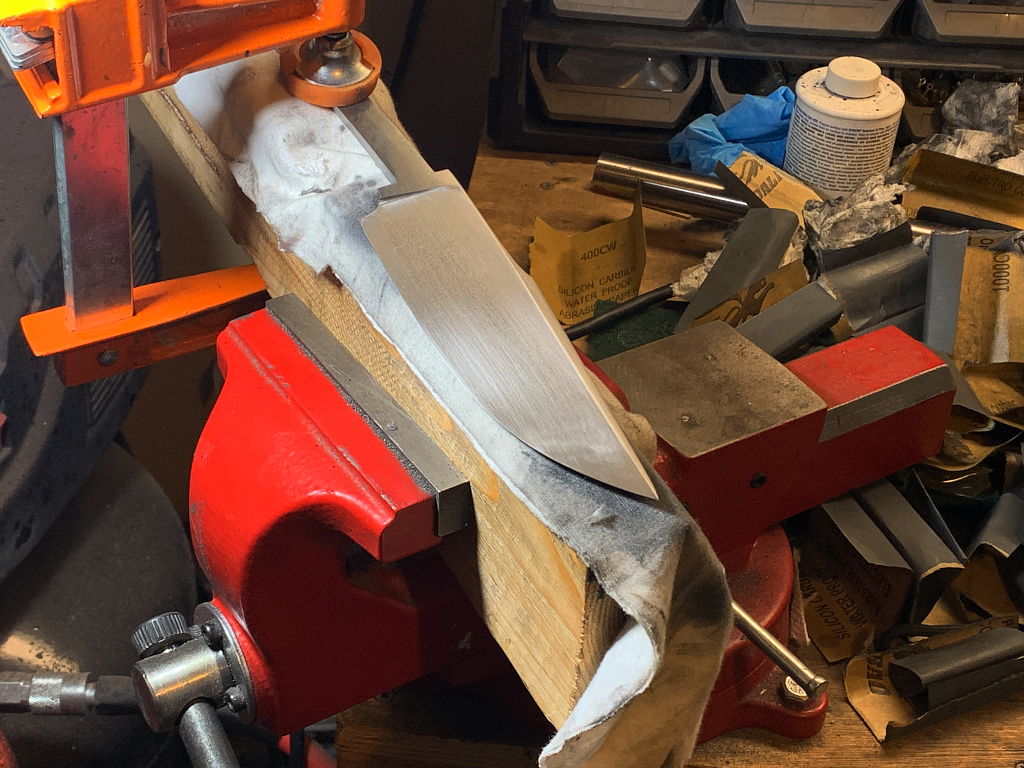
Once I was satisfied with the finish, I cleaned the blade throughly in hot water and soap, and then wiped it thoroughly with acetone to make sure that 100% of all oils and dirt were removed as they would really wreck the evenness of the acid etch. I clamped the end of the tang with a vice grips and immersed the blade in ferric chloride, which is an acid.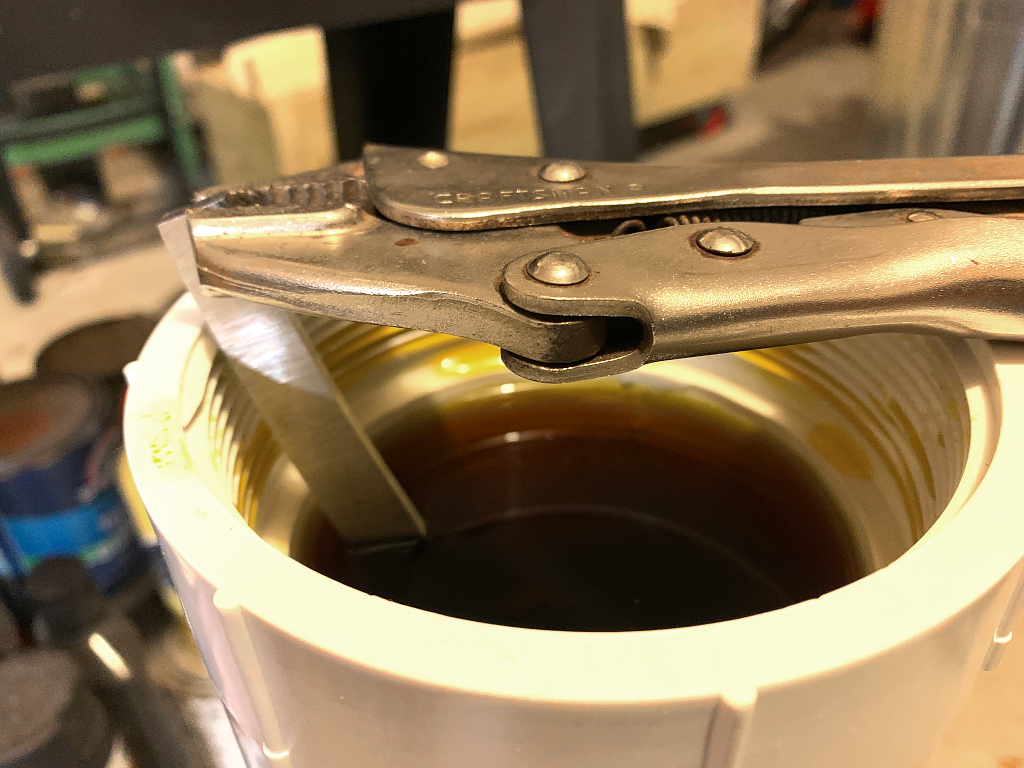
The acid oxydizes the entire surface of the blade and turns it black…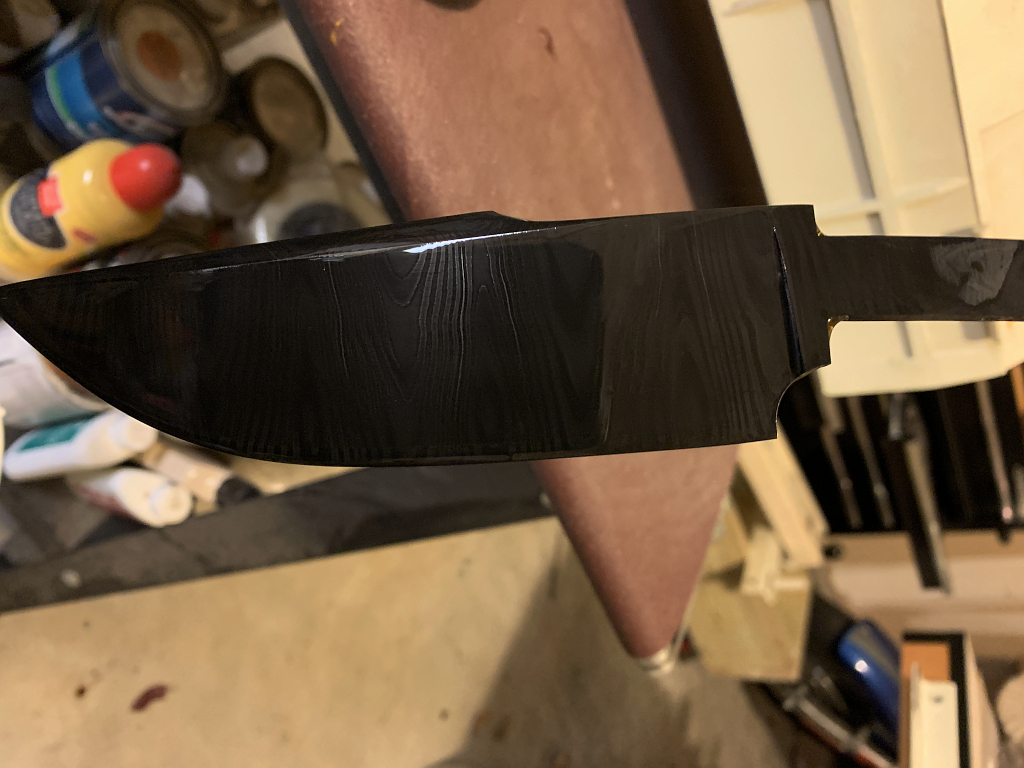
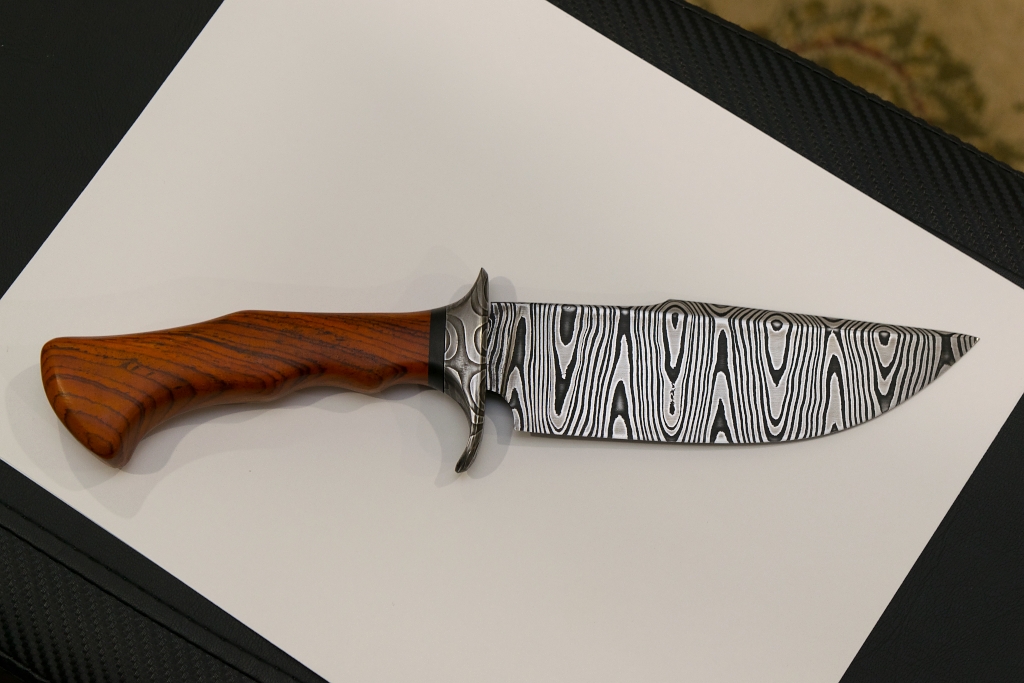
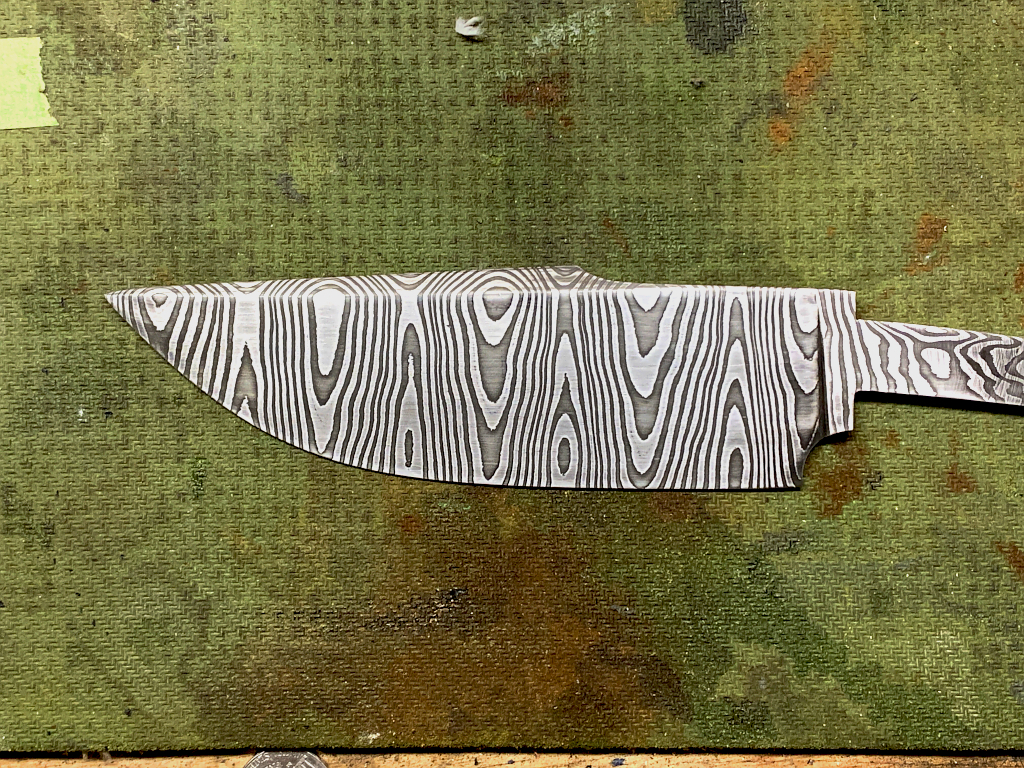
Once I neutralize the acid, I then sand the surface lightly with 1500 grit paper. The oxides clean easily from the 15n20 layers, but the 1095 layers are much more easily corroded by the acid and after a couple cycles of etching in the acid and cleaning with the 1500 grit, the oxides remain on the 1095 layers while the 15n20 layers remain bright. This is the reason for all the forge-welding and folding. 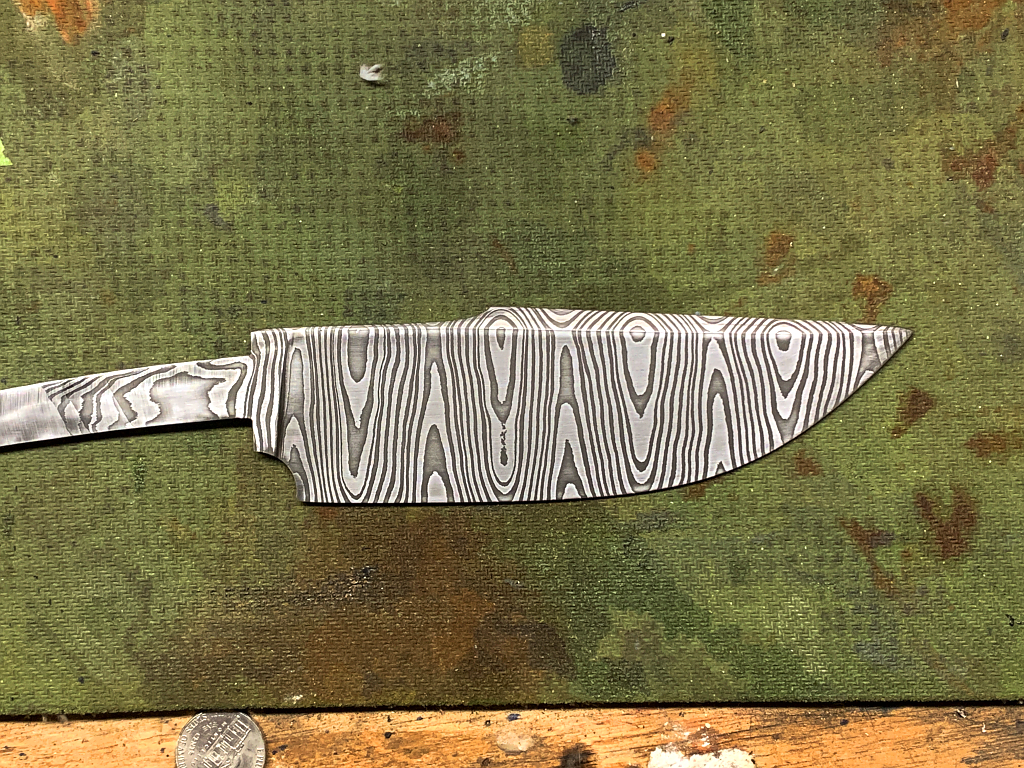
Next step, the guard. since the guard will also be steel, I want it to somewhat match the blade, so I need to make some more damascus. I would like some contrast between the blade and guard though, so I’m going to make a different pattern this time.
This will be a “turkish twist” pattern.
Starts out the same as before, forge-welding up two billets of alternating 1095 and 15n20 at 10 layers each
Some slo-mo action forge-welding the billet
Once the billets are forge welded and hammered down until roughly square in cross-section I hammer in the corners and re-shape the profile into an octagon except for the ends of the bars. I need to leave an end square to get my twisting wrench around it.
Then I twist the bar. This isnt east even at that temp. Upper body strength is a big plus here.
So I pull the billet out of the forge, into the vice, and proceed to…..JESUS CHRIST!!!!
That shit looks hot 🙂
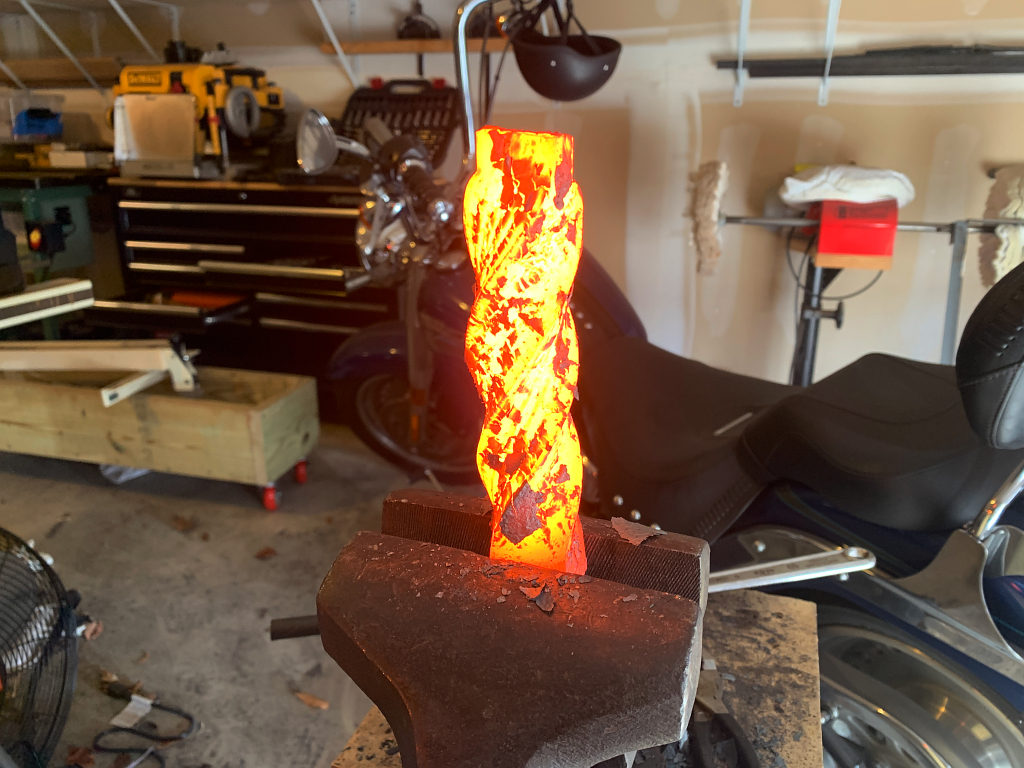
These bars got 6 full twists each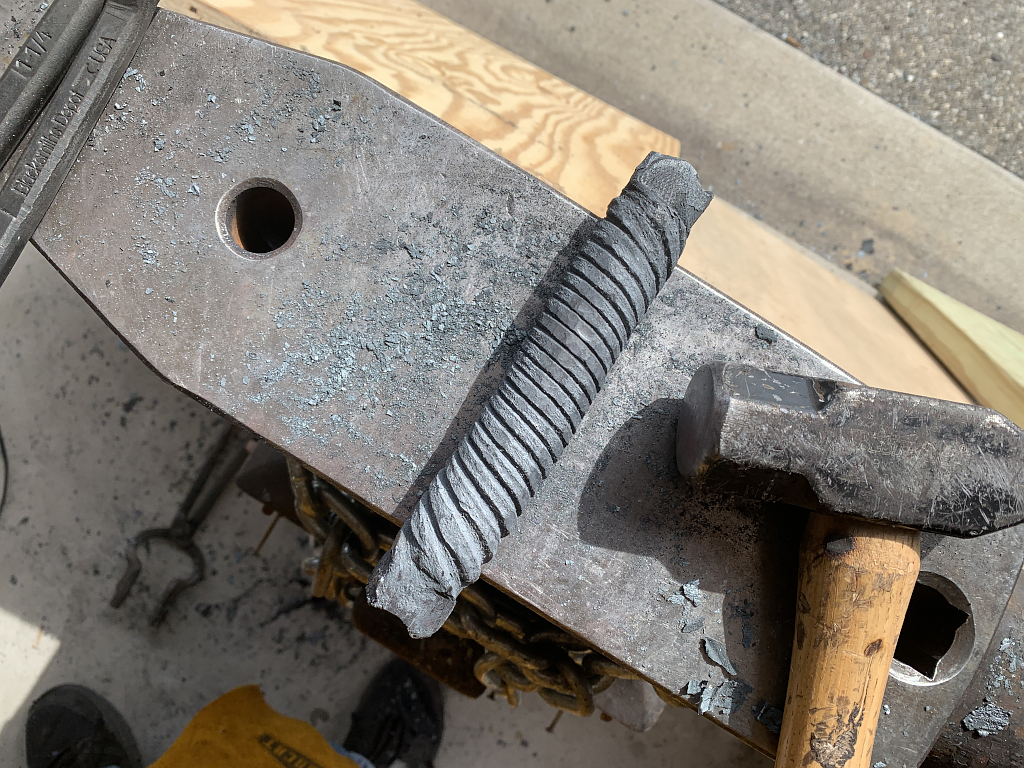
One down, one to go.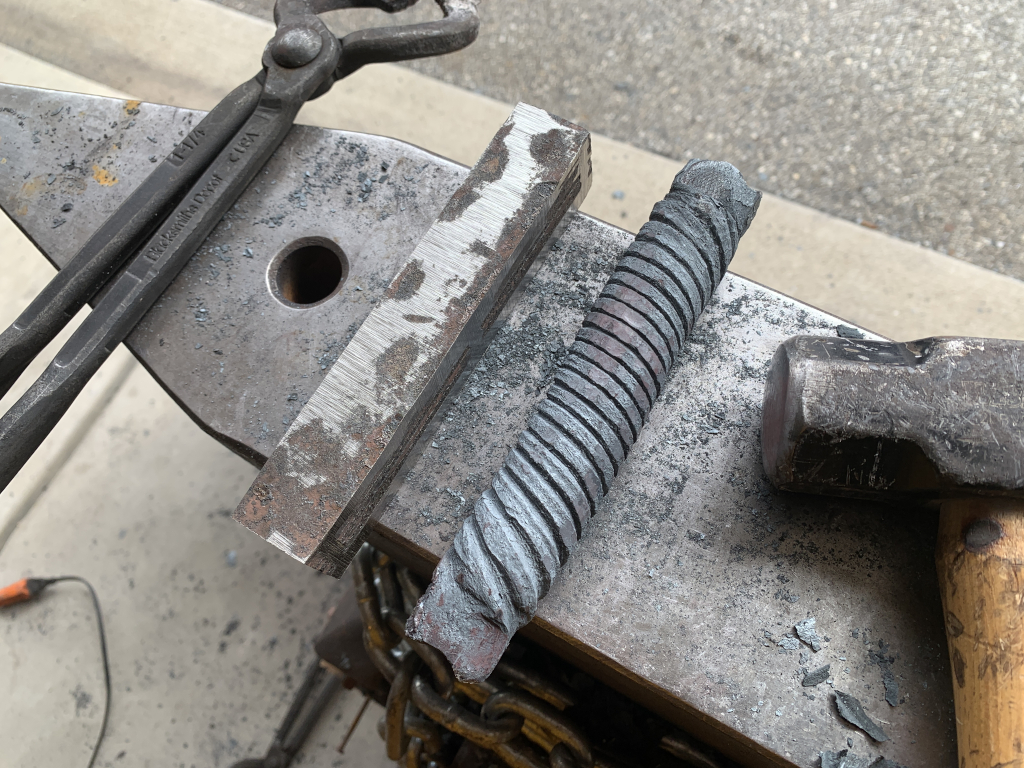
Being octagonal, and then twisted a lot, the bars are now round and need to be forged back into a square shape again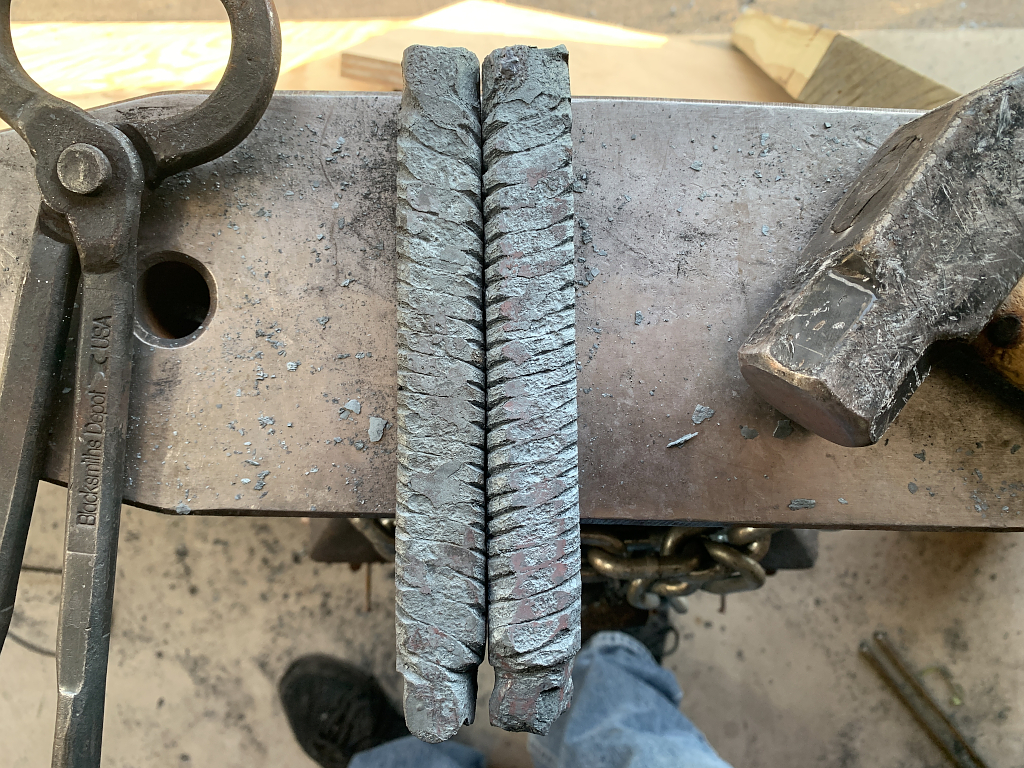
then one face on each are ground clean and flat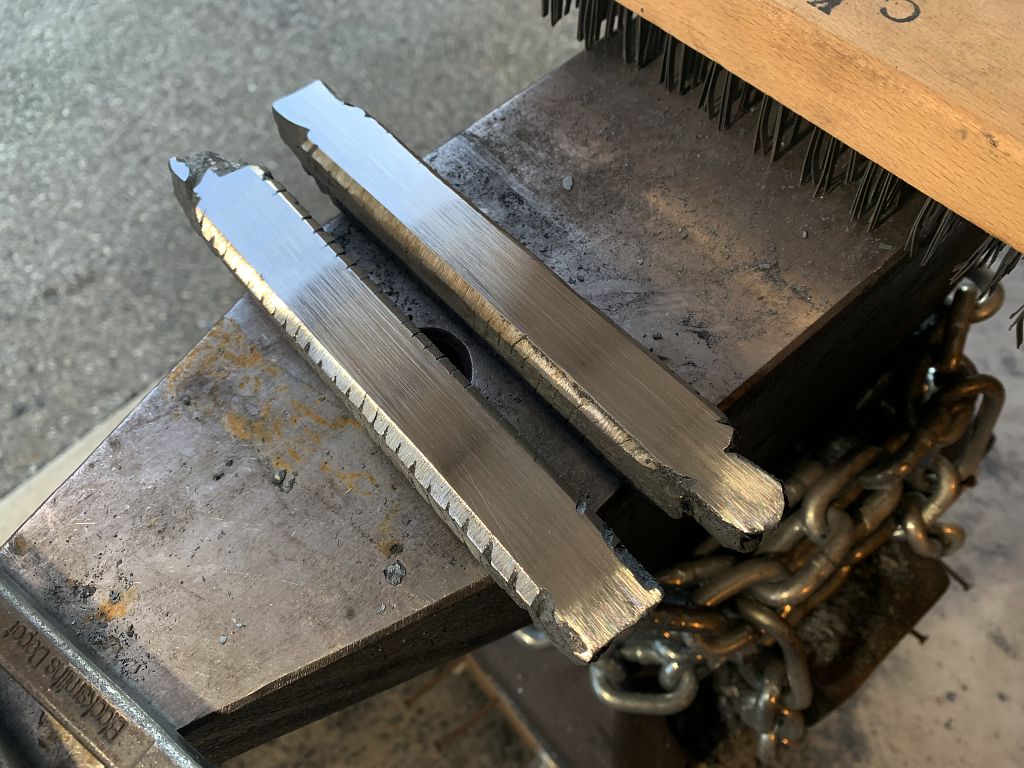
Tack welded together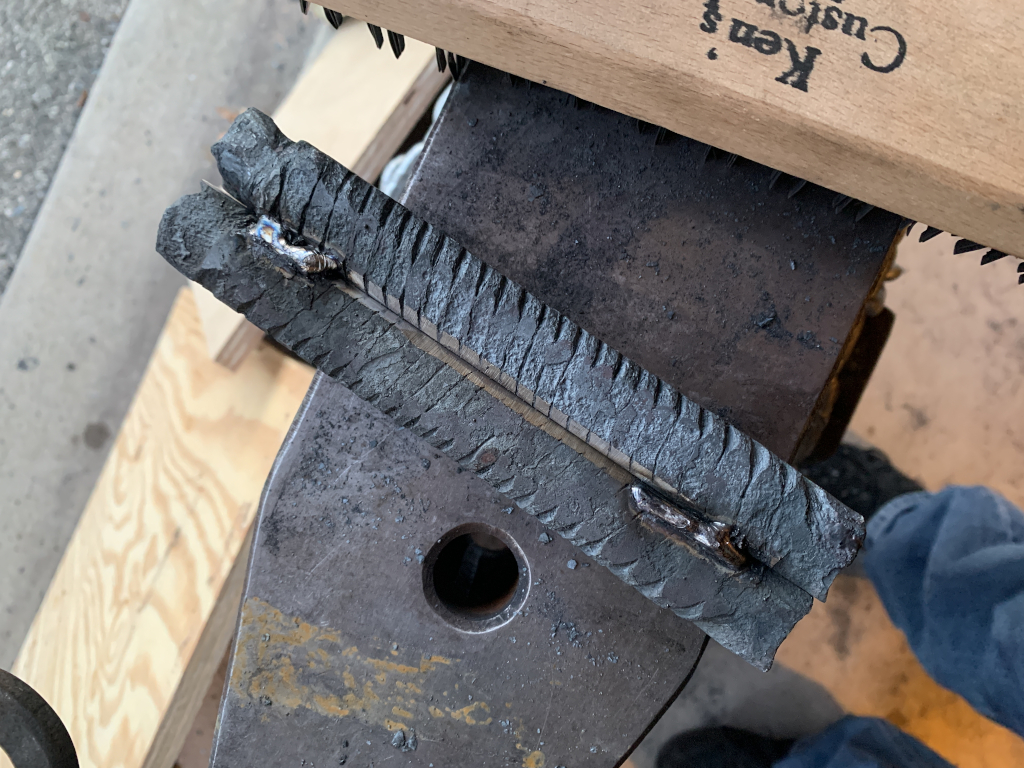
and then forge-welded into a solid billet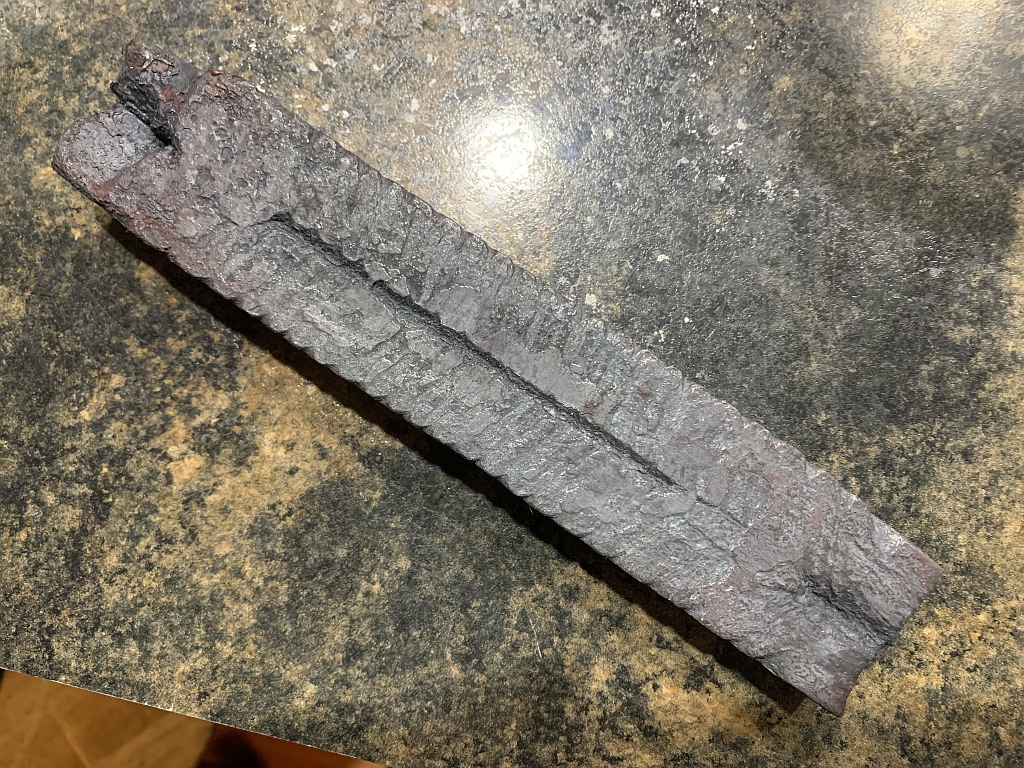
the process thus far yielded a good bit more than I need for the guard, so I use the hot cut to lop a piece off. Its faster than letting it cool off and cutting with a saw, less noisy, less messy, and less wasteful of material as well.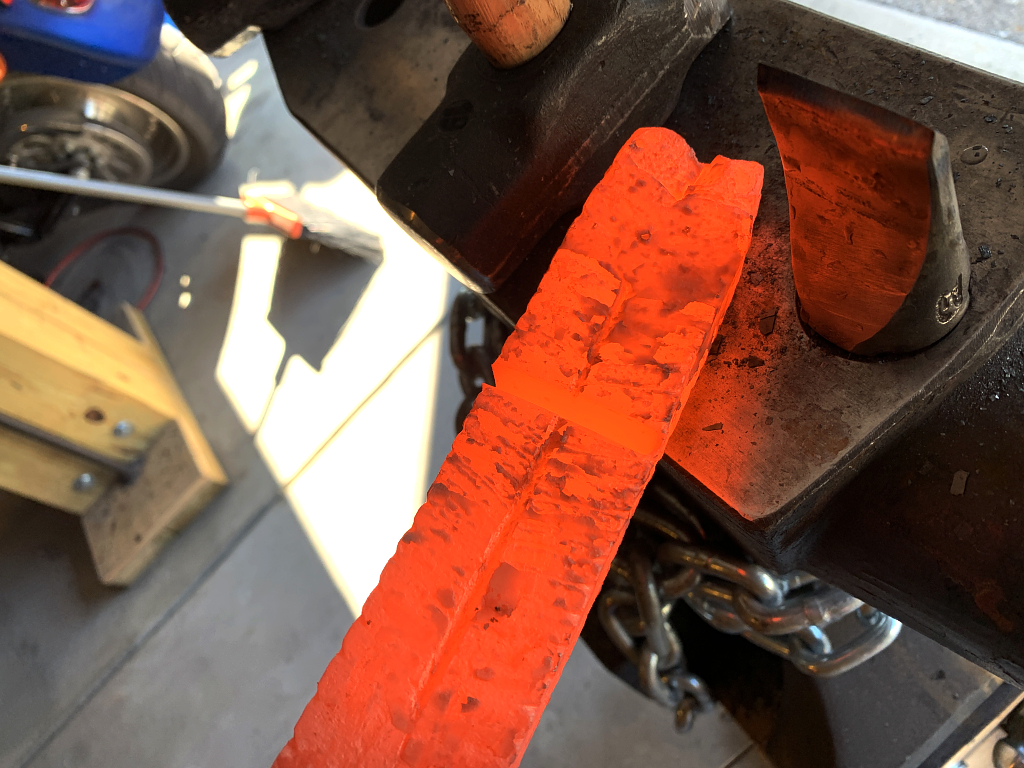
The bigger peiece will make a good sized knife in a future project, so I set that aside,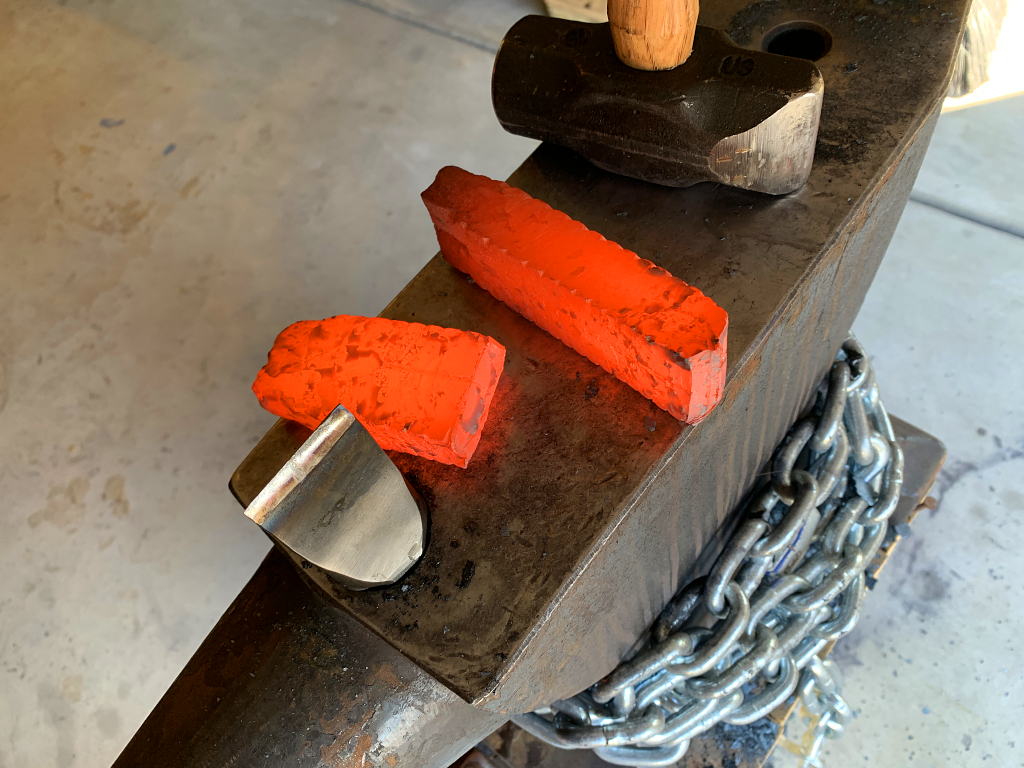
the smaller chunk gets forged into something a little closer in shape, although most of the shaping at this point will be on the grinder.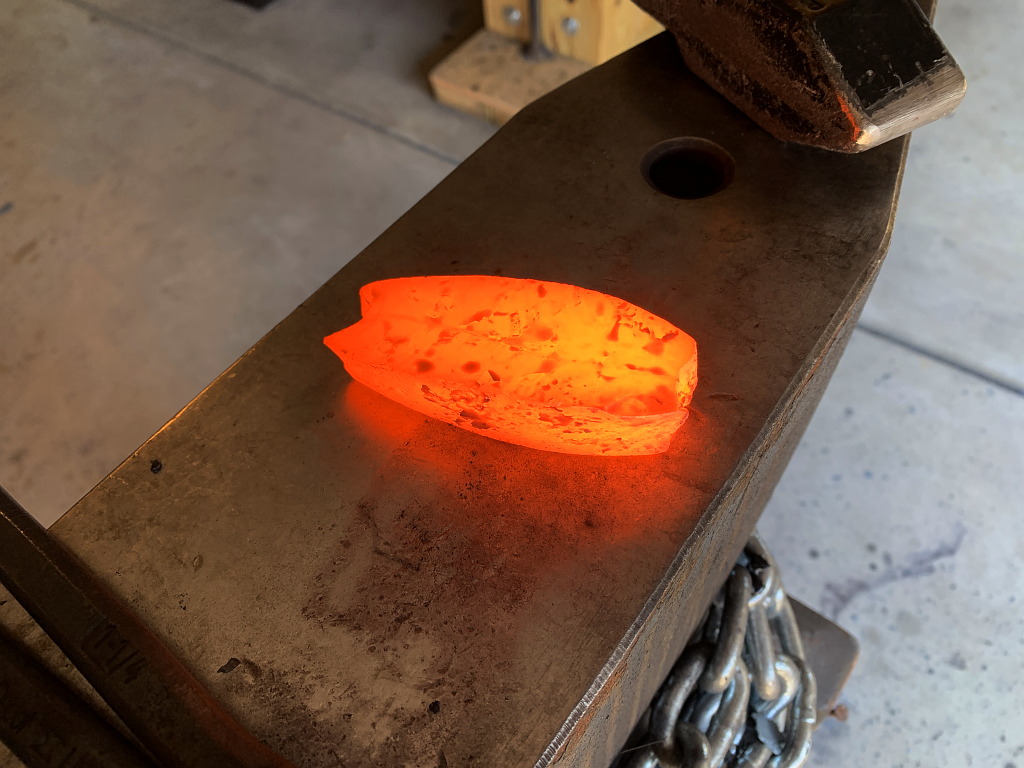
I do a quick test etch at this point to see where the pattern is. I want to cut the slot for the tang right in the center where the two halves of the pattern join. Better symmetry.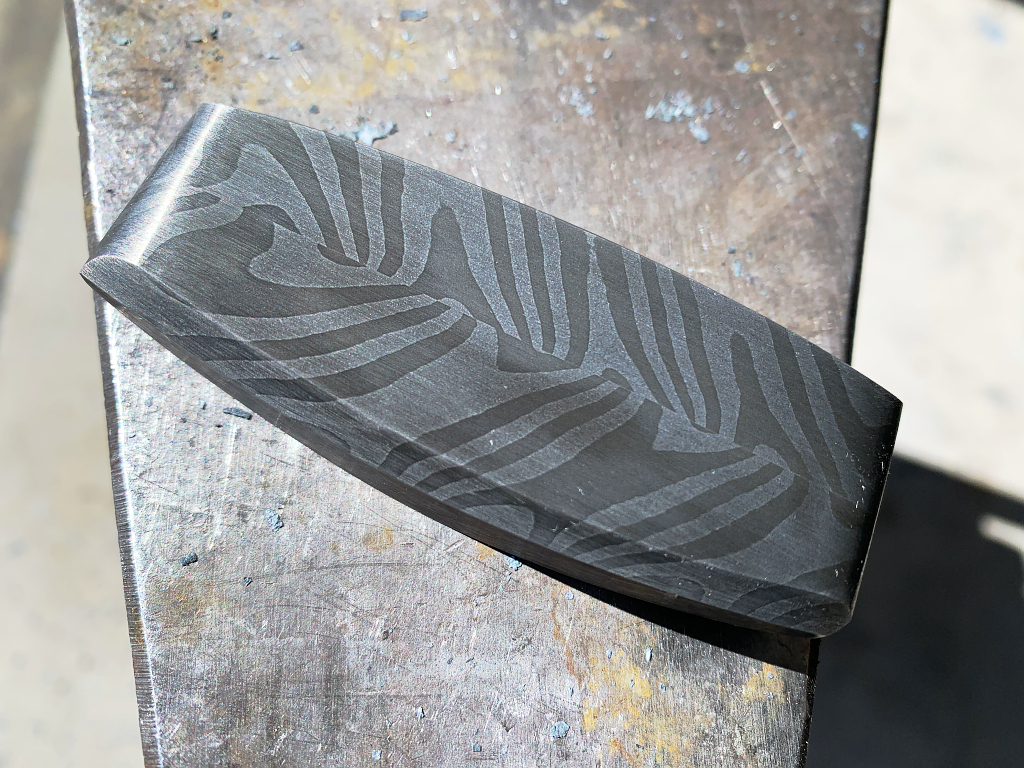
So its pretty clear that the hunk of steel is WAY too big, so I ground it WAY down, and into a more “guard-like” shape.
Drilled holes in a line where the tang slot should go, and then used needle files to connect the holes and square it out to fit the tang. This is a tedious process where I file a hair, test fit, file another hair, test fit, etc etc until the blade seats cleanly against the guard with no gap. Not there yet in this pic…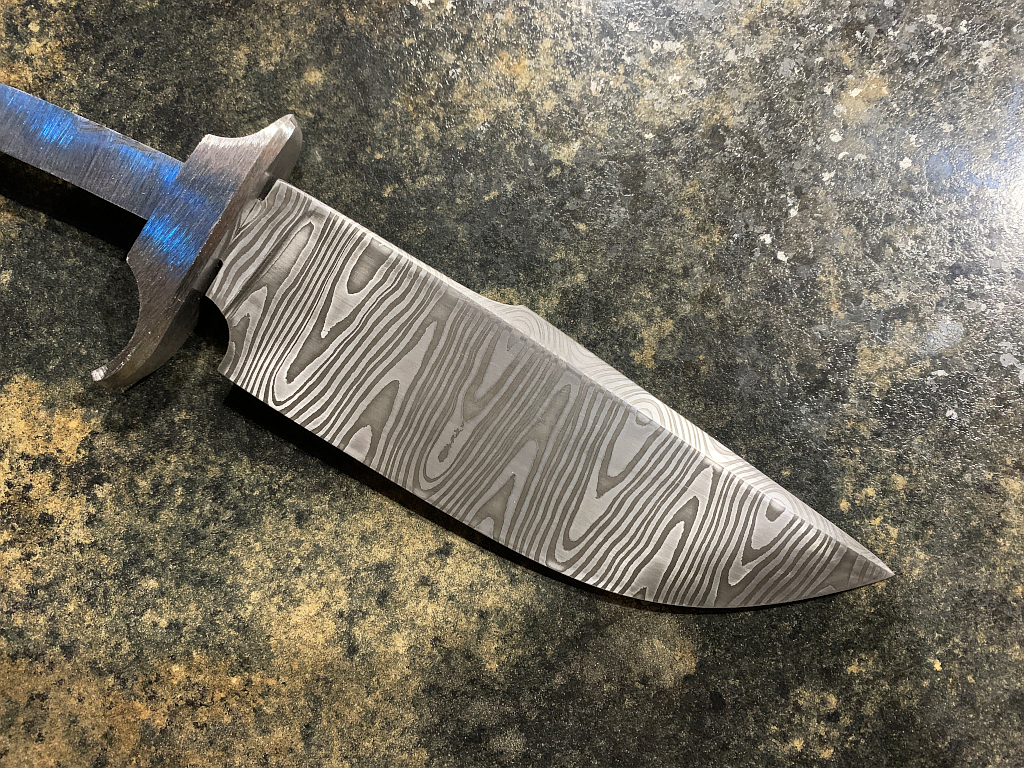
Or this….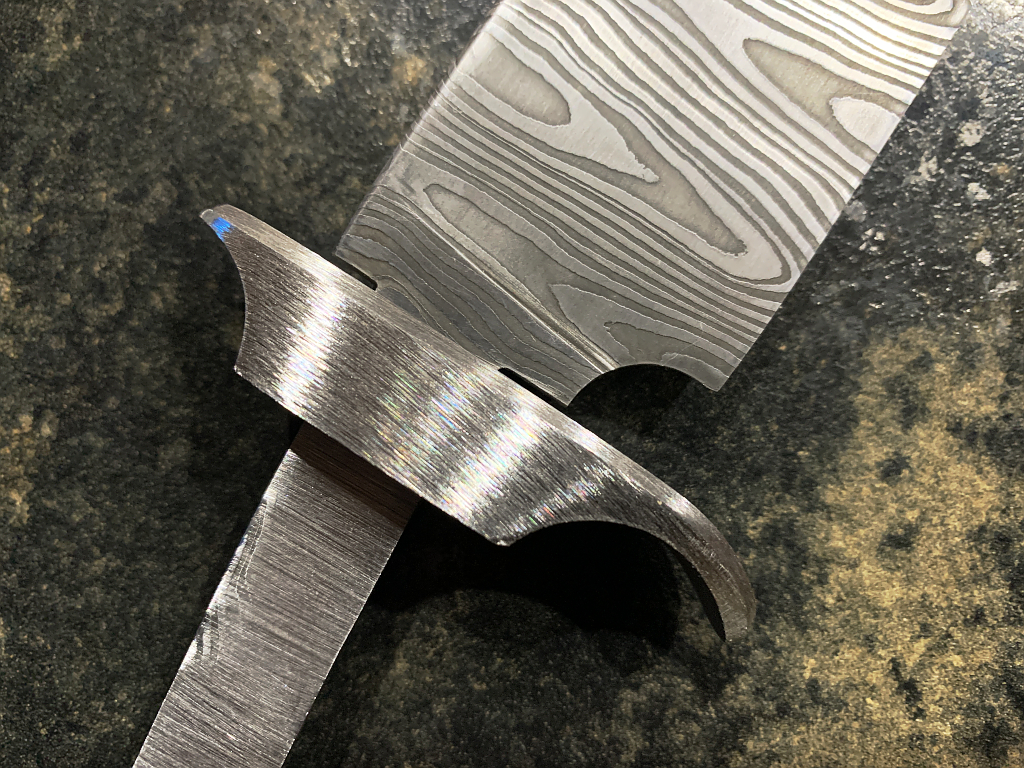
Getting closer, still needs some finessing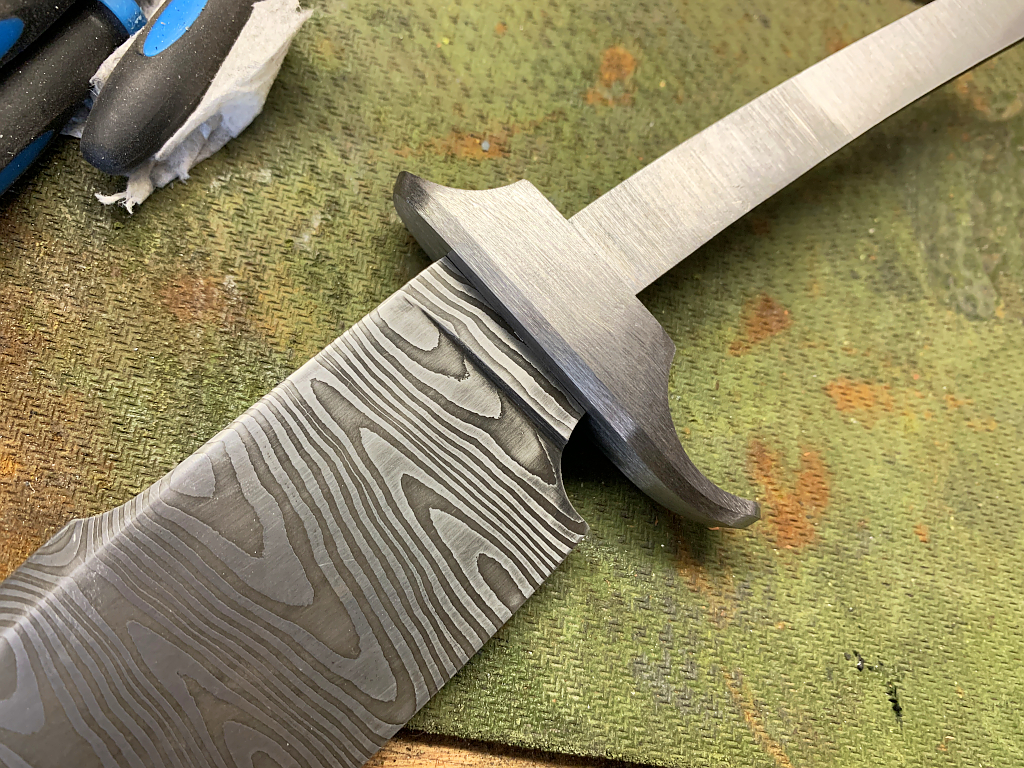
Before we go any farther, its time to heat treat. I grind it to 120 grit while its still relatively soft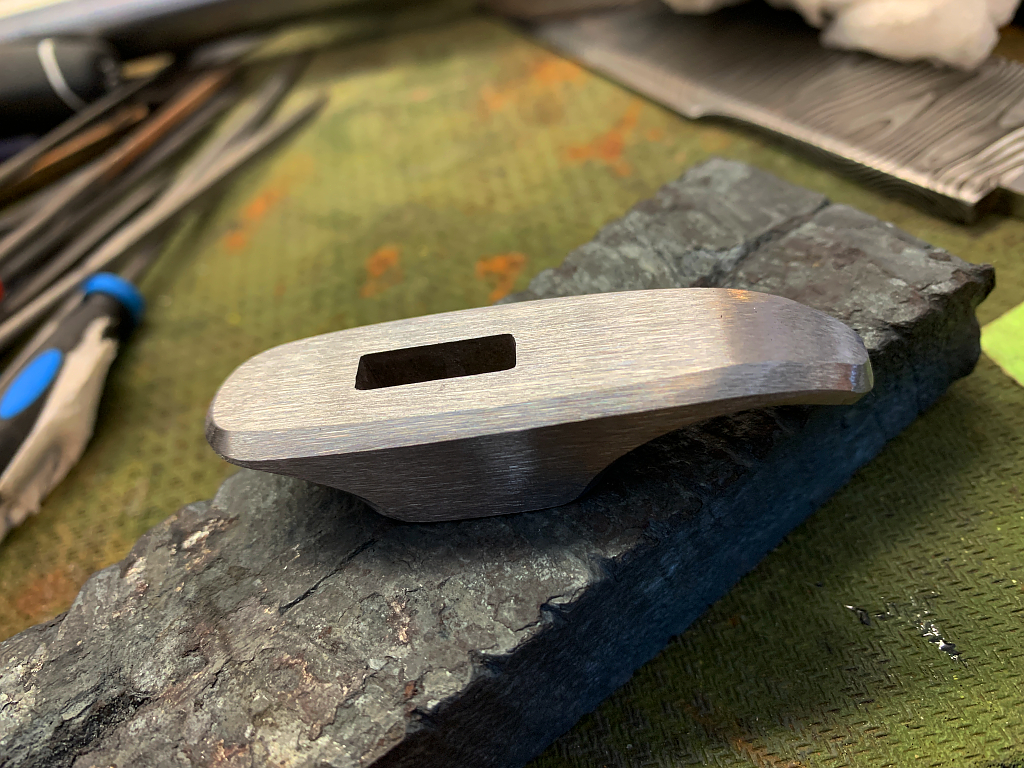
Then it gets one normalization at 1600 F, and after it cools to room temp I harden it, same way as the blade. heat to 1475 F., soak 10 min, and then quench in parks 50 oil. Here you can see the tell-take color of martensite. A silvery-gray color thats a good indication that it got hard.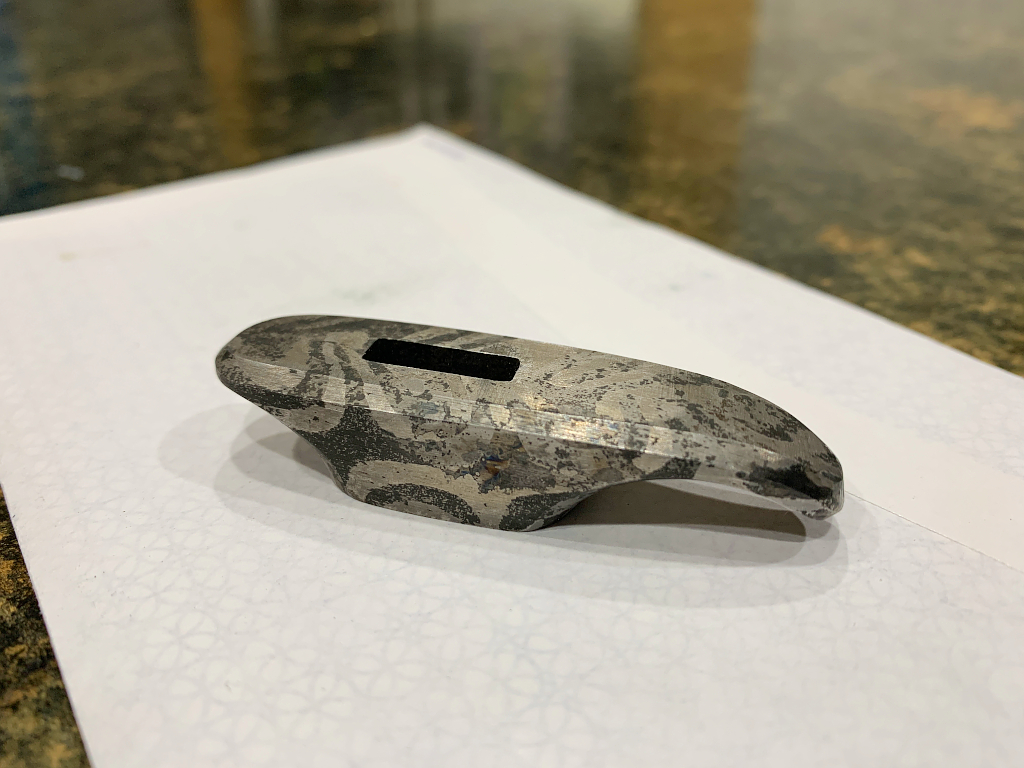
Followed by 2 one-hour tempering cycles at 400 F. The color is now a straw/bronze color. This tells me its tempered exactly how I want. Still hard, but soft enough that if it sustained a hard hit it wouldnt break or deform.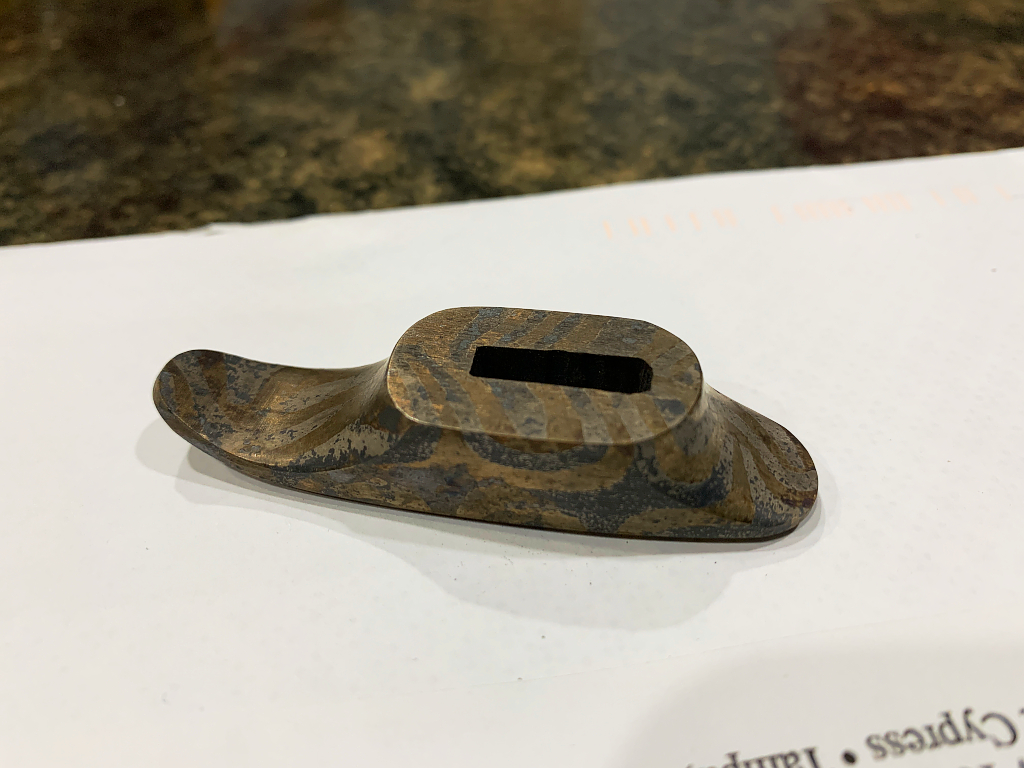
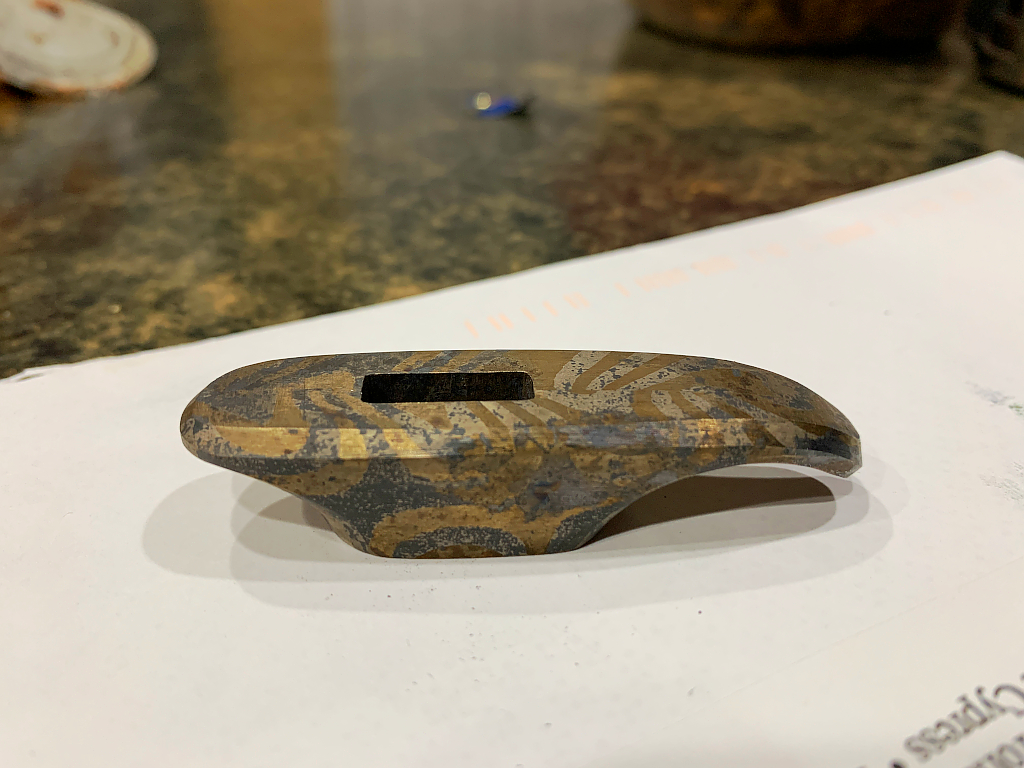
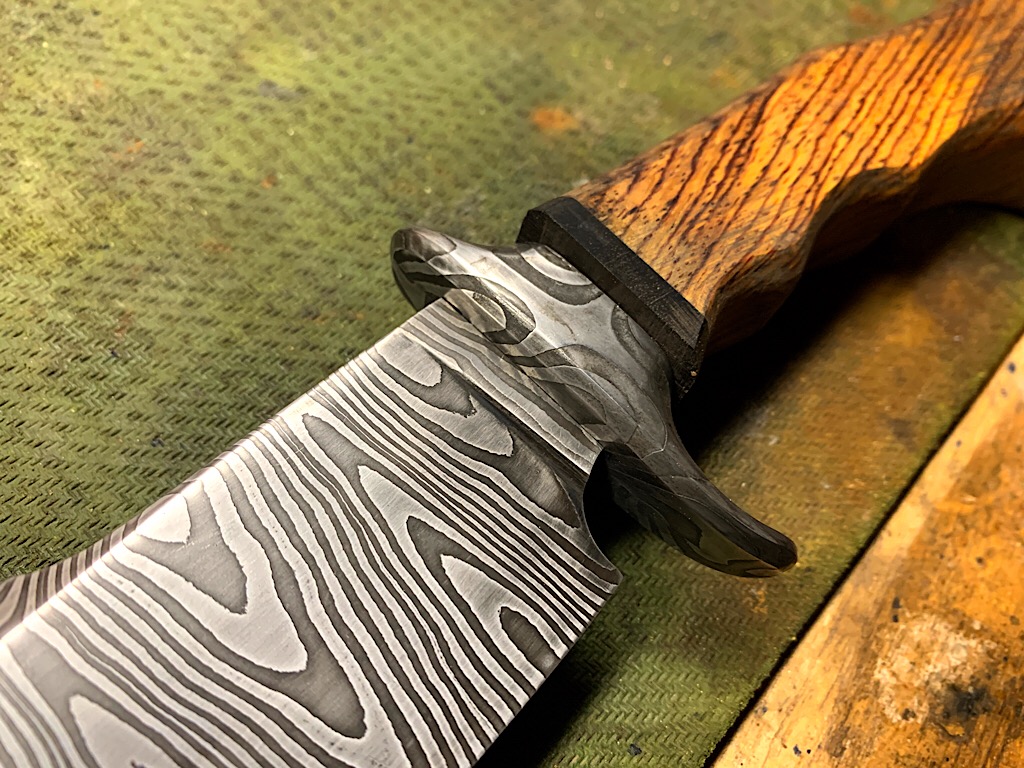
and here we are after a couple cycles of etching in ferric chloride followed by sanding with 1500 grit. This is what brings out the patters, and I’m really happy with the look.
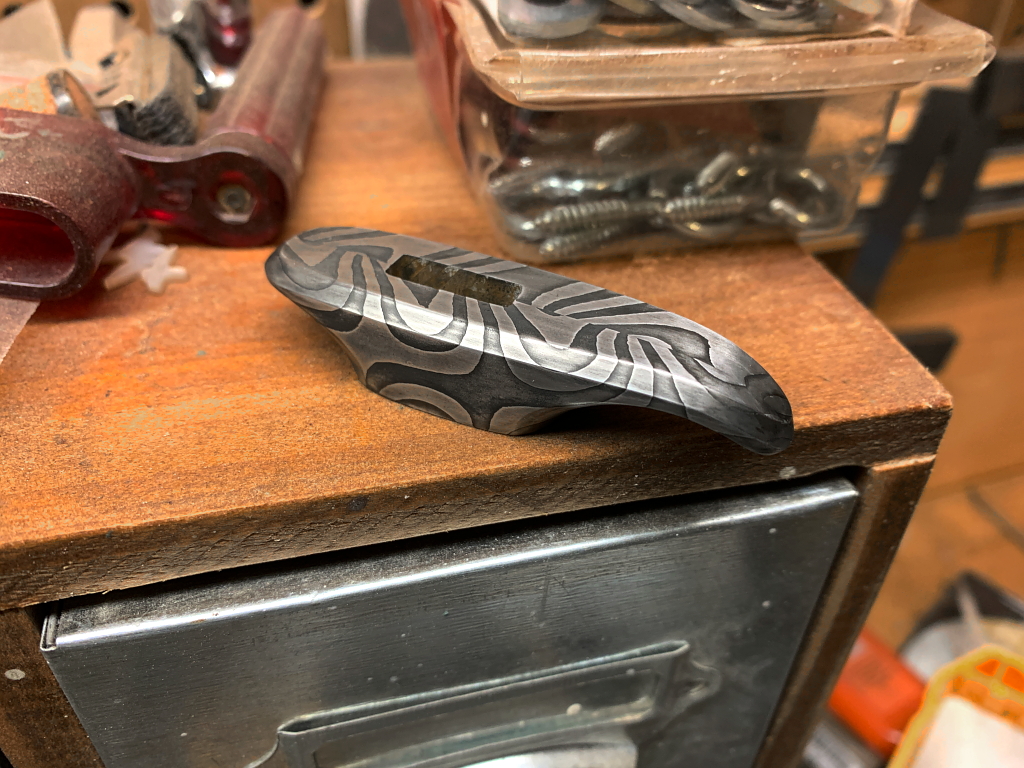
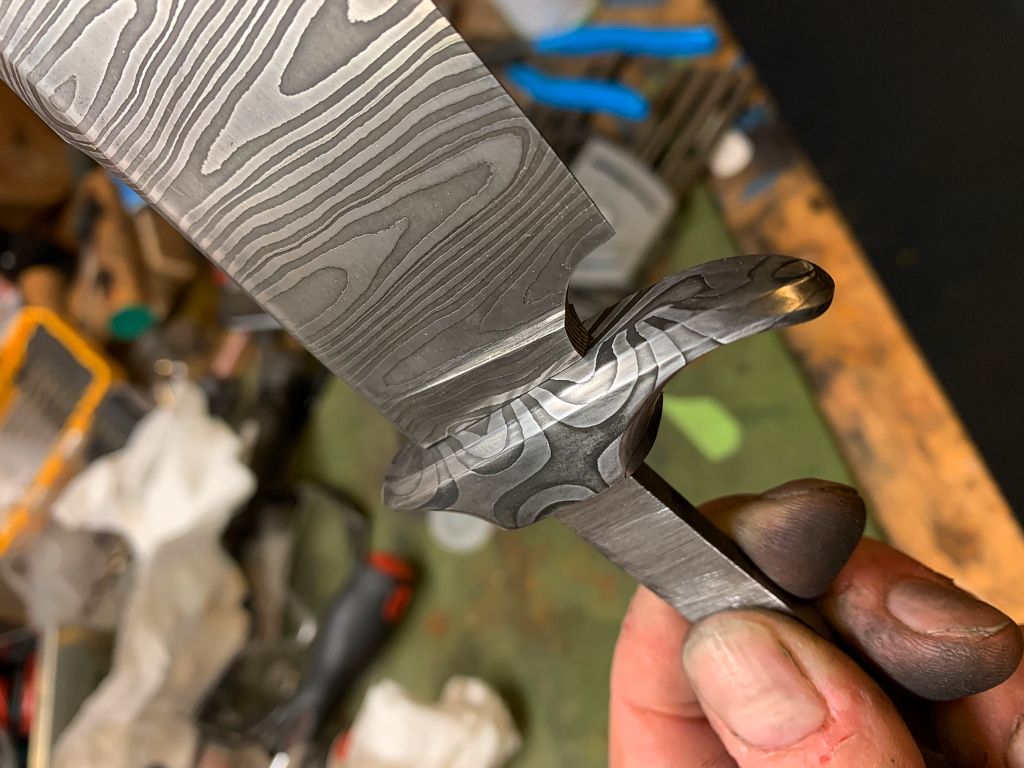
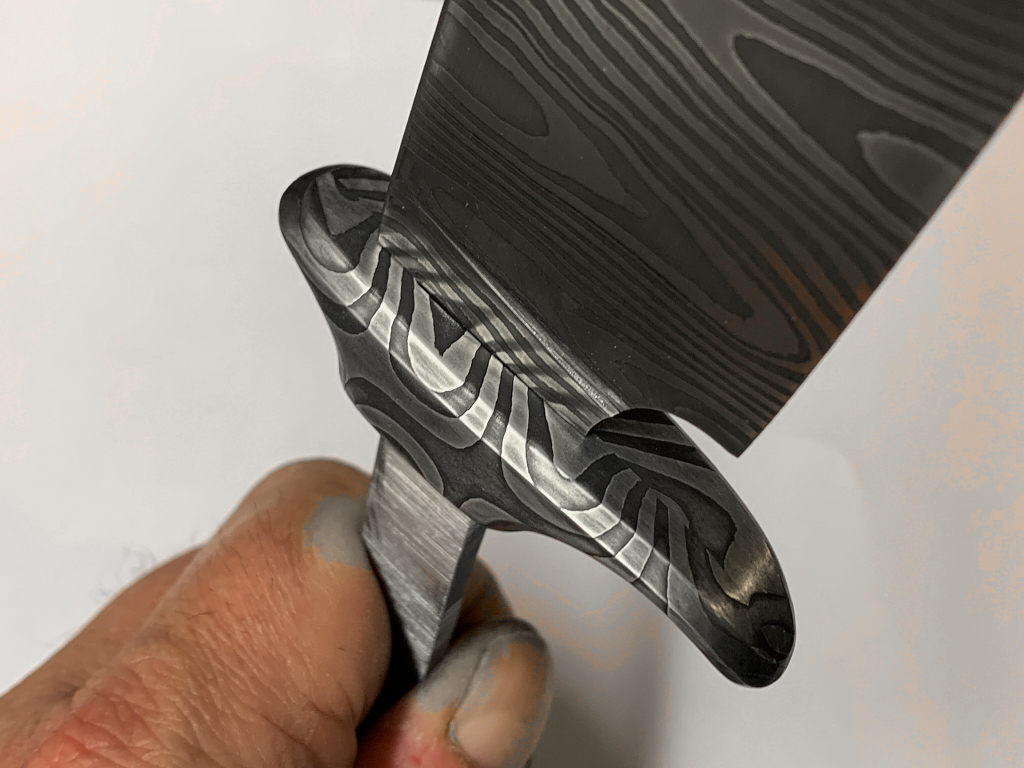
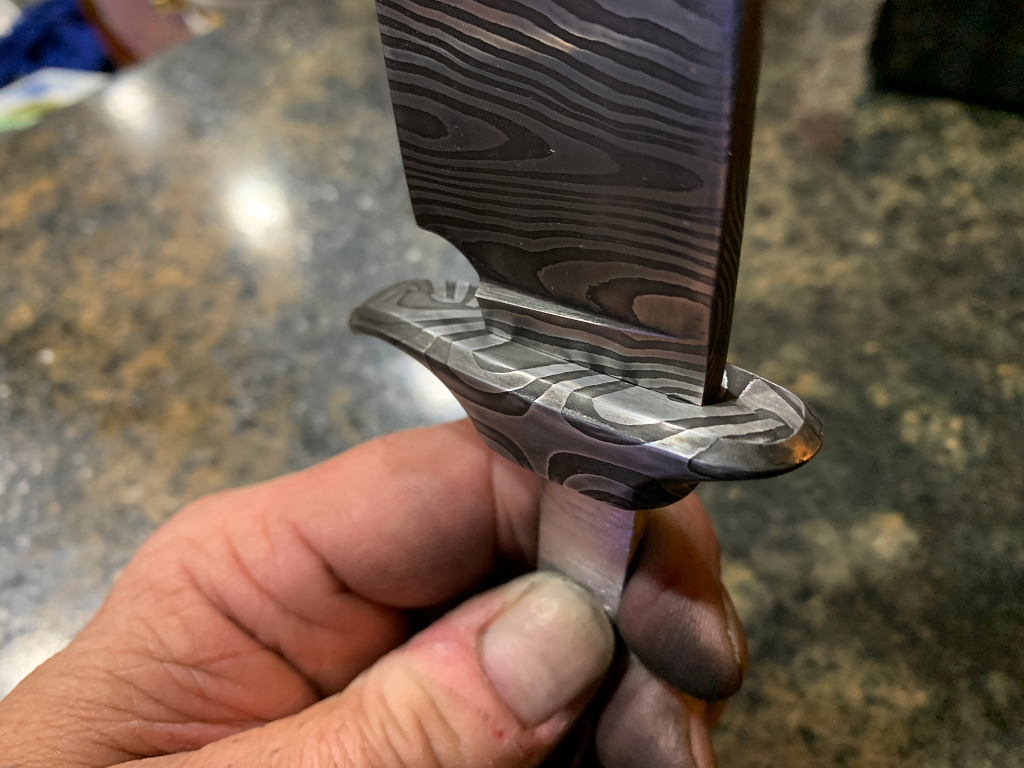

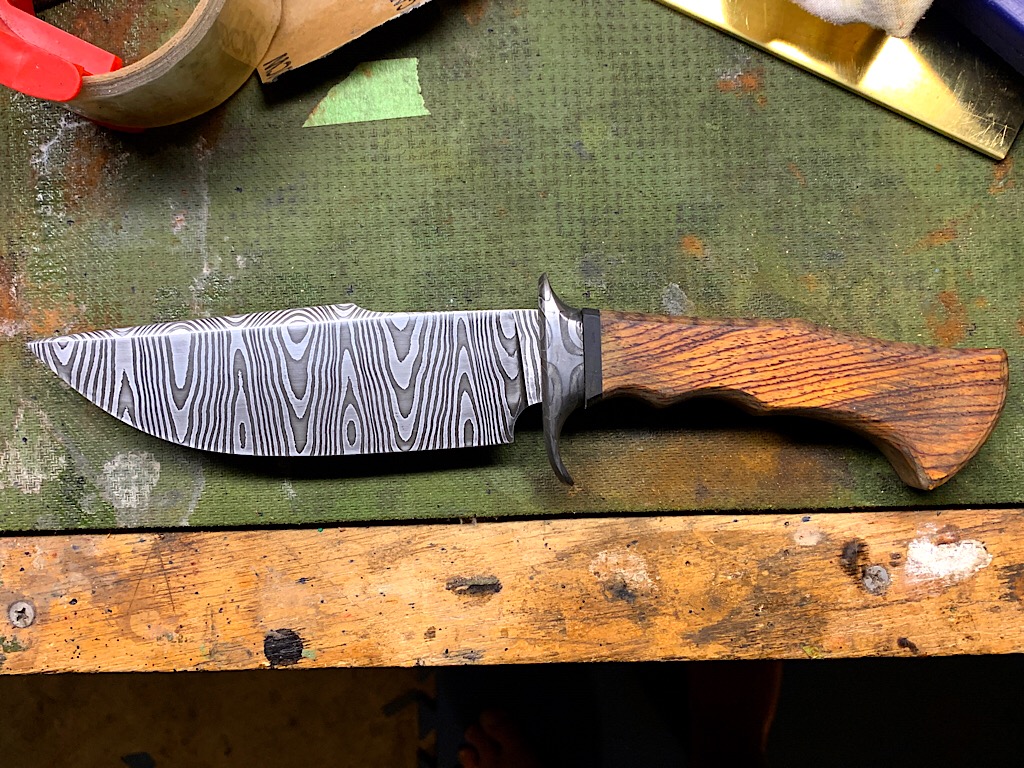
A fit-up that serves no purpose other than to get an idea what it will look like when its all done and take some cool-looking pix.
I need these little milestone enticements along the way otherwise I’ll get distracted by something shiny and lose my way 🙂