This knife will be similar in design and shape to the Coatesville Toothpick
but will be longer, wider, heavier, and meaner 🙂
The features for this recurve bowie will be:
1. 12″ blade made from W2 high carbon steel plus differential hardening with hamon
2. A long, curved, fairly acute false edge
3. Fittings cast from home made gunmetal bronze
4. Desert Ironwood and Macassar Ebony handle w/ Punisher Pin
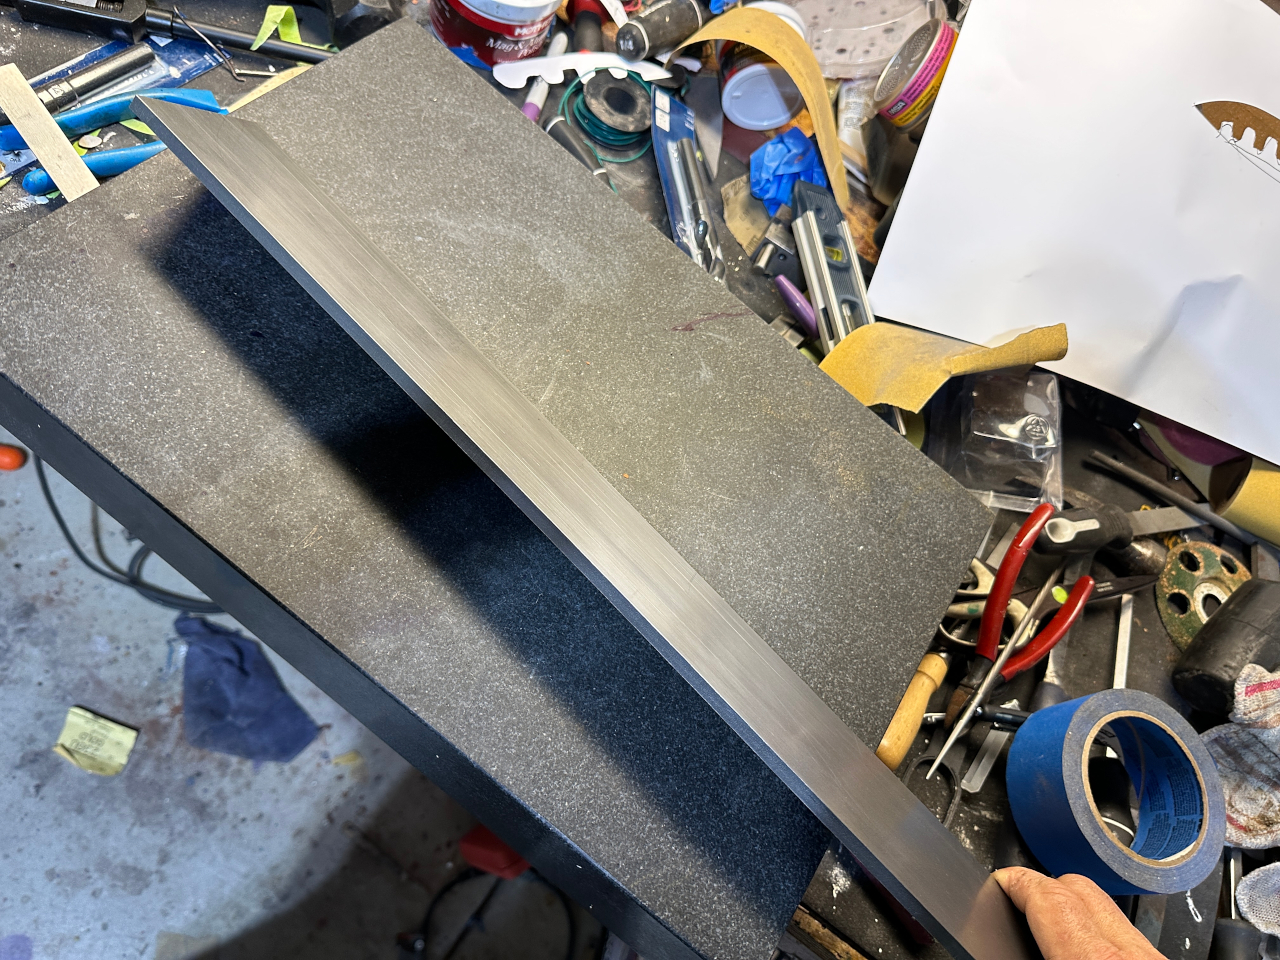
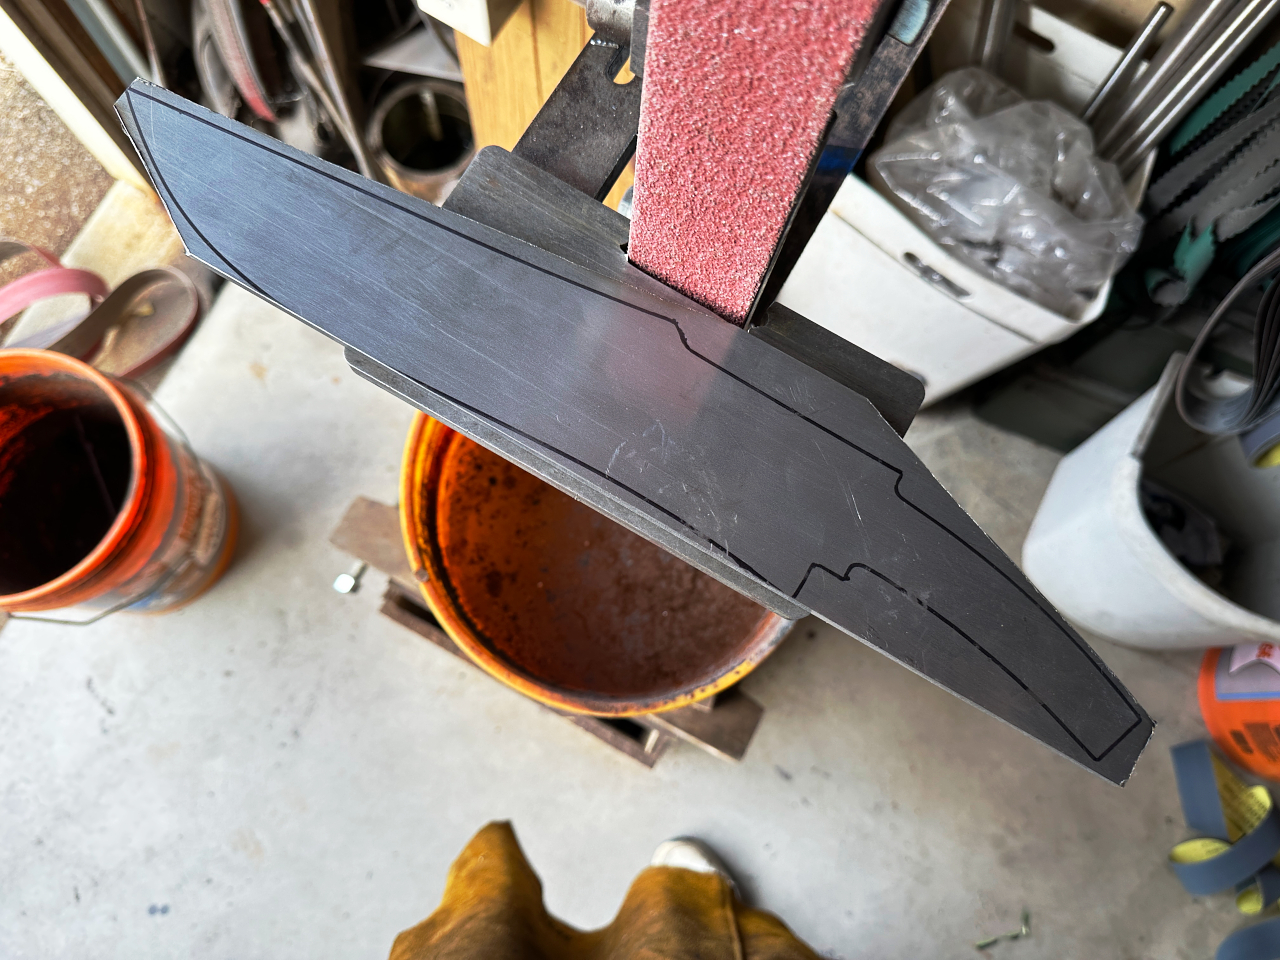
So this is a stock removal knife, meaning I didnt forge the blade to shape. In the case of a very large, thick bladed, recurve bowie knife its far easier and faster to simply grind the profile and bevels out of a piece 24″ x 3″ x 0.265″ flat bar stock. I’ll save you the boredom and not show you the bar stock
OK, heres the bar 😉
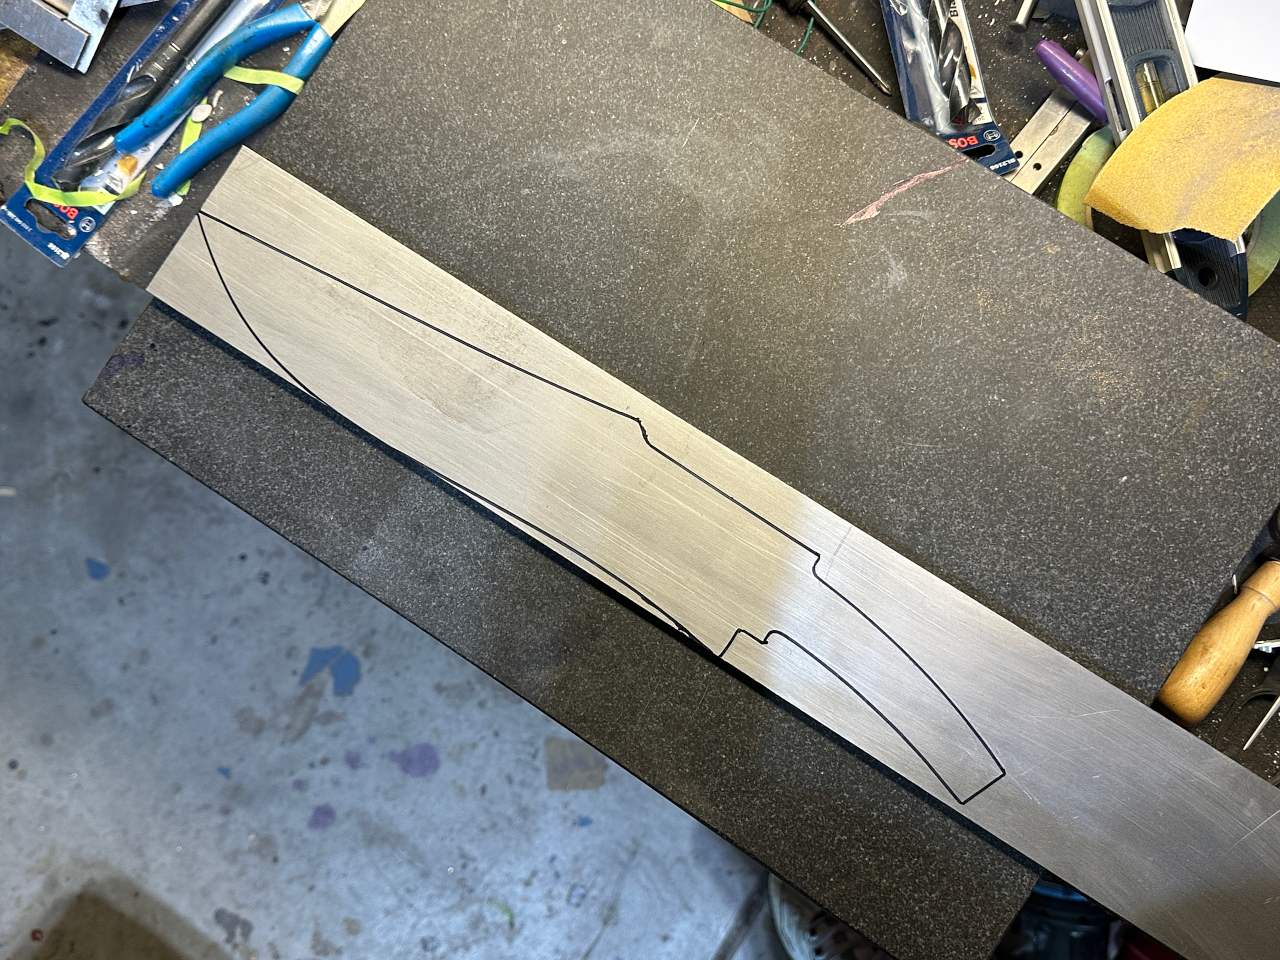
and with the blade profile drawn on…
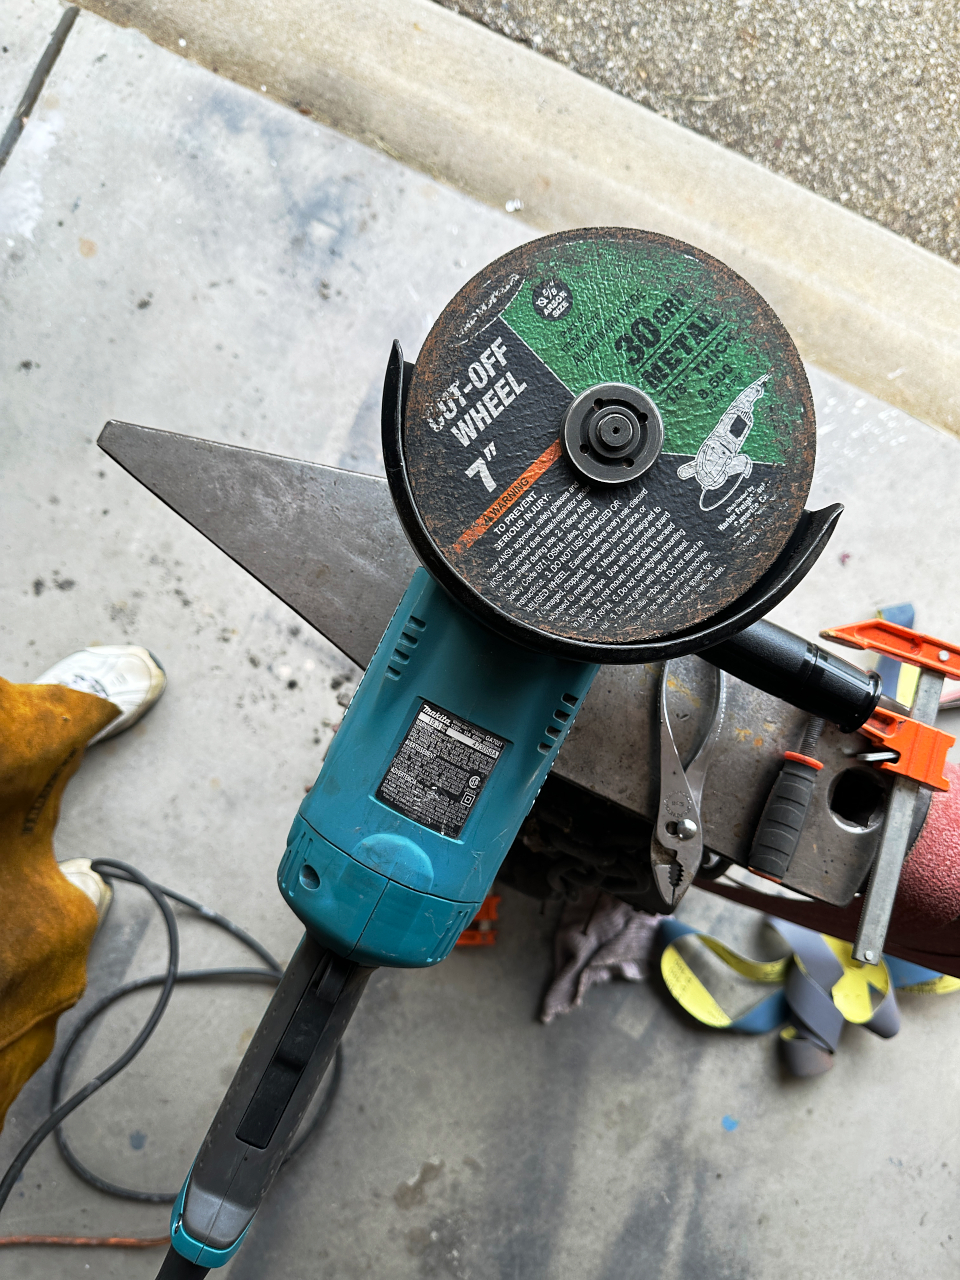
This gets very roughly cut out with an angle grinder and cutoff disk…
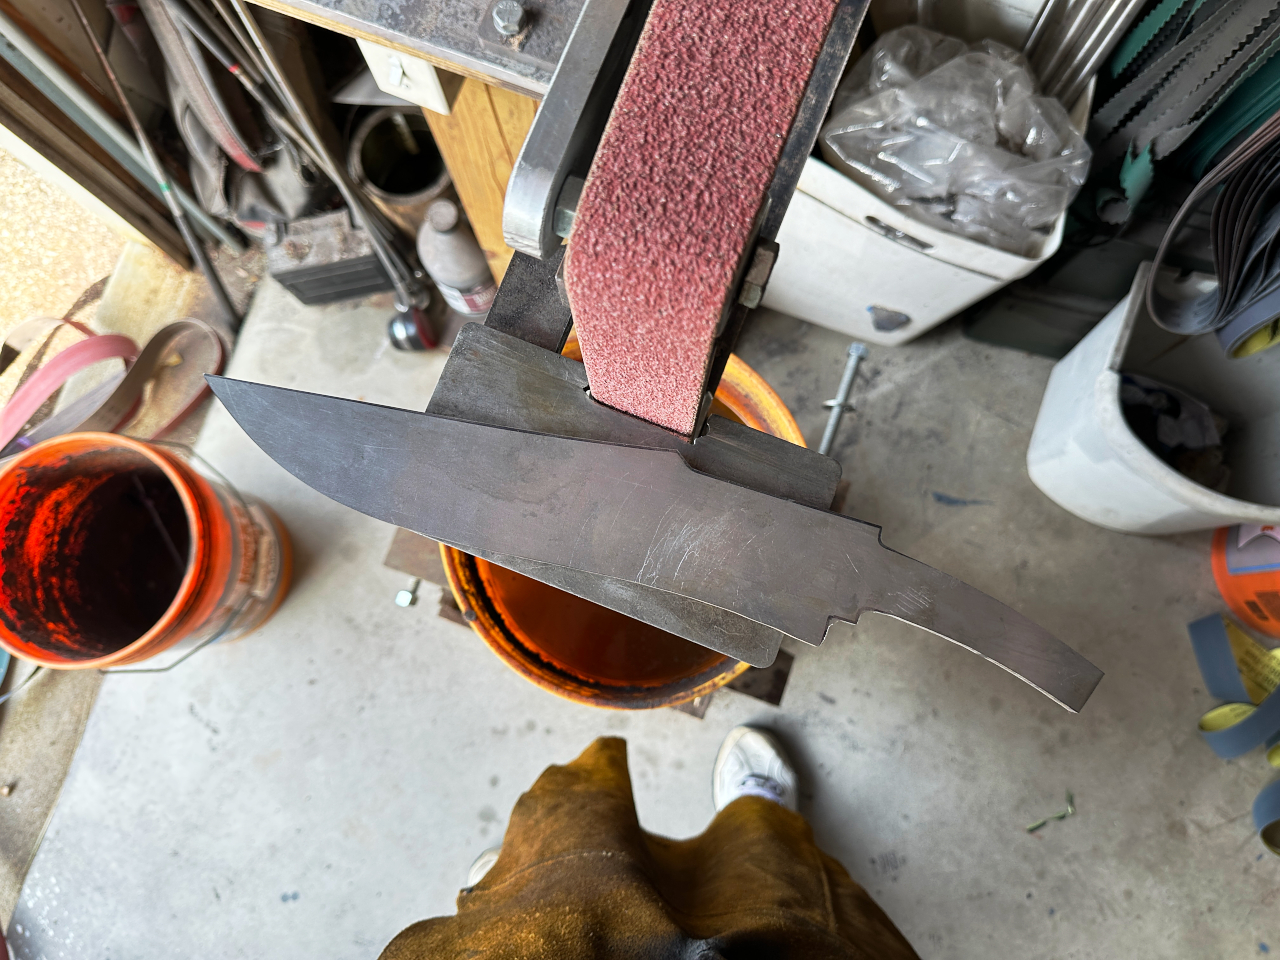
Leaving us with the belt grinder to finish grinding the outline…
a 32 grit belt on high speed finishes the job
and then the surface grinder to make it nice and flat
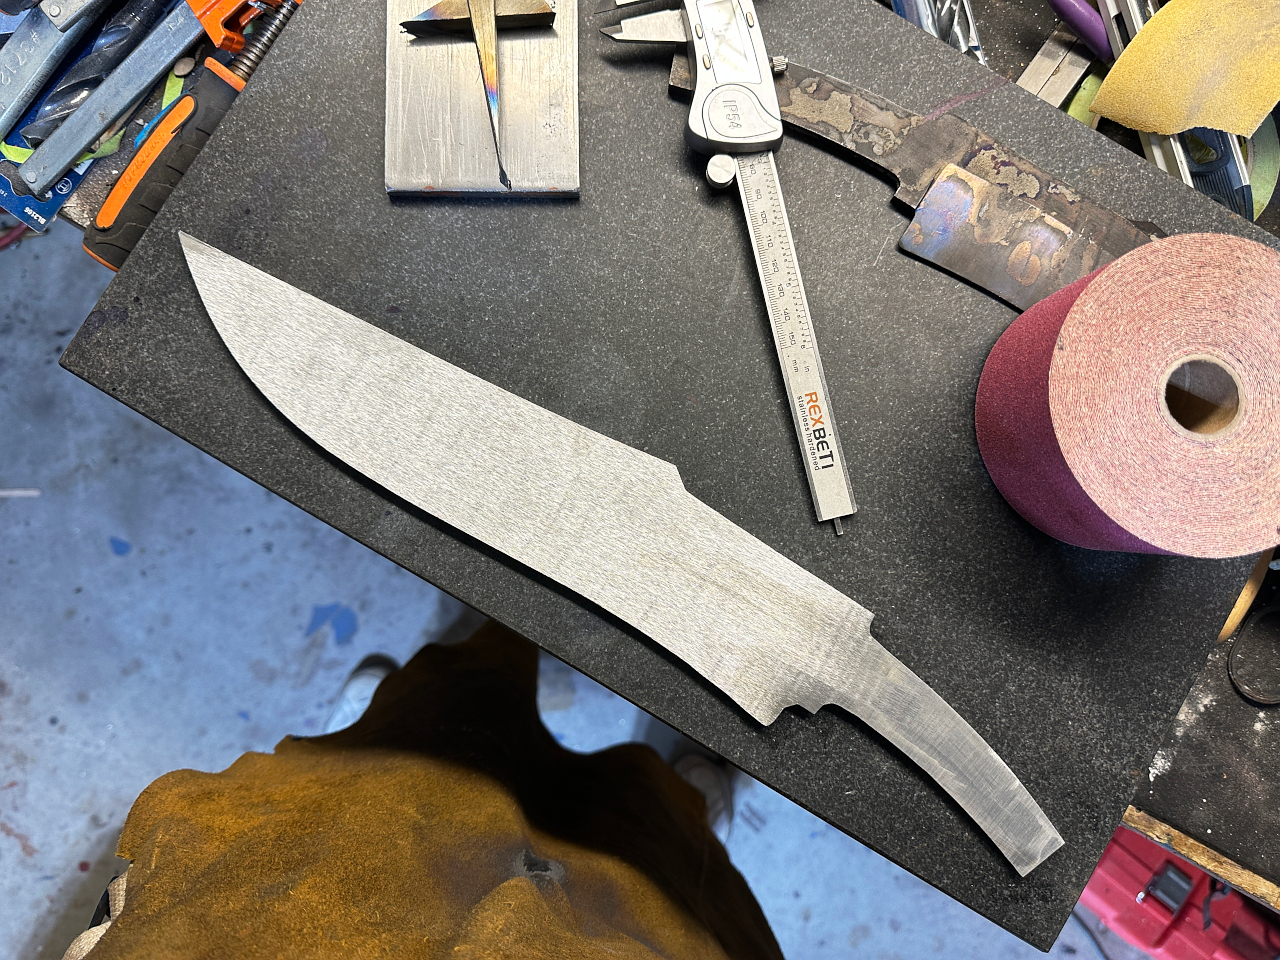
Our blade length is actually just over 12 1/4″ with a 1/4″ ricasso.
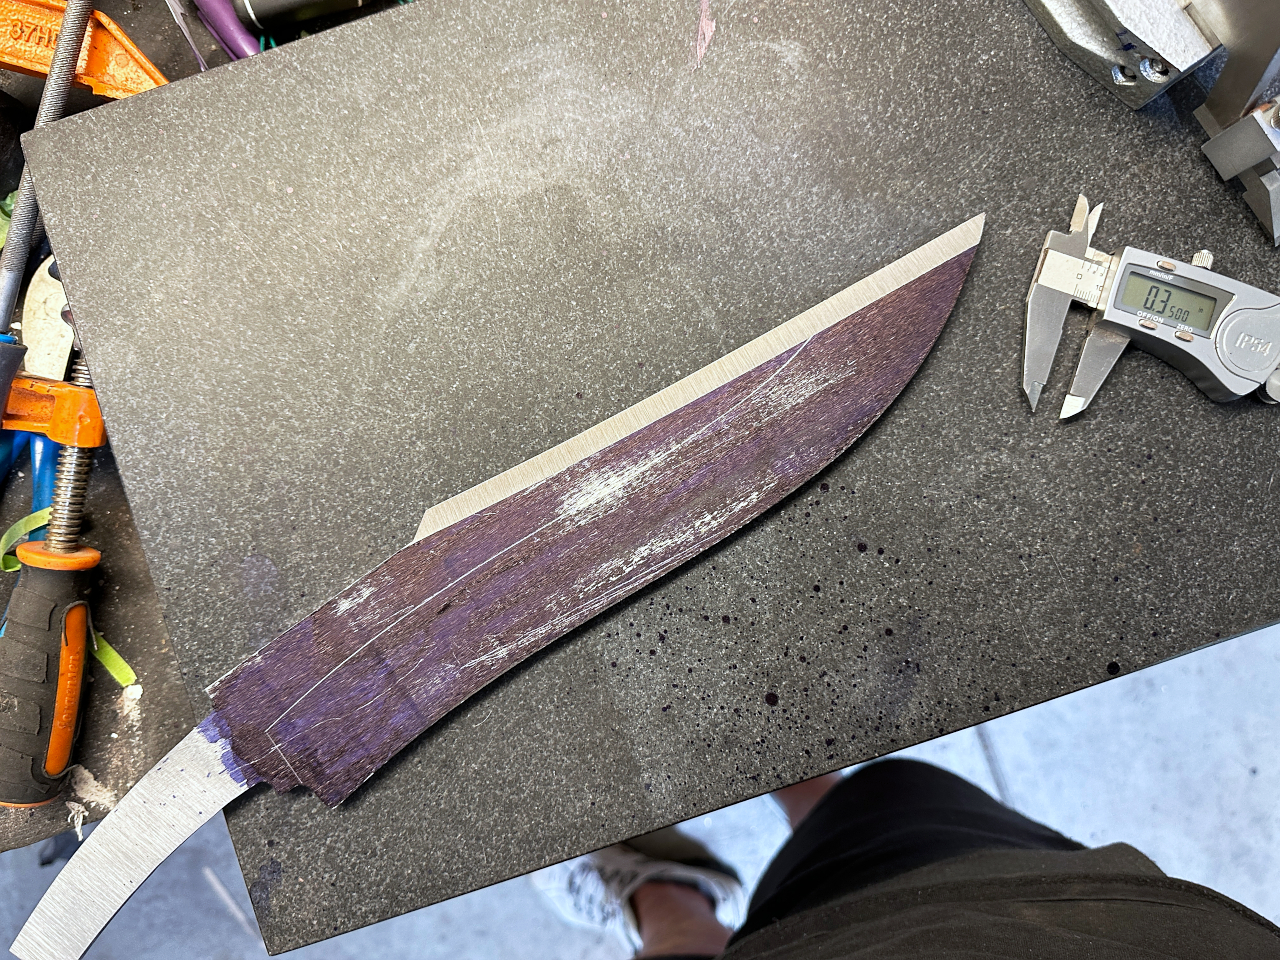
I start here by coating the blade with blue layout fluid. It allows me to scribe highly visible lines that guide me while grinding bevels.
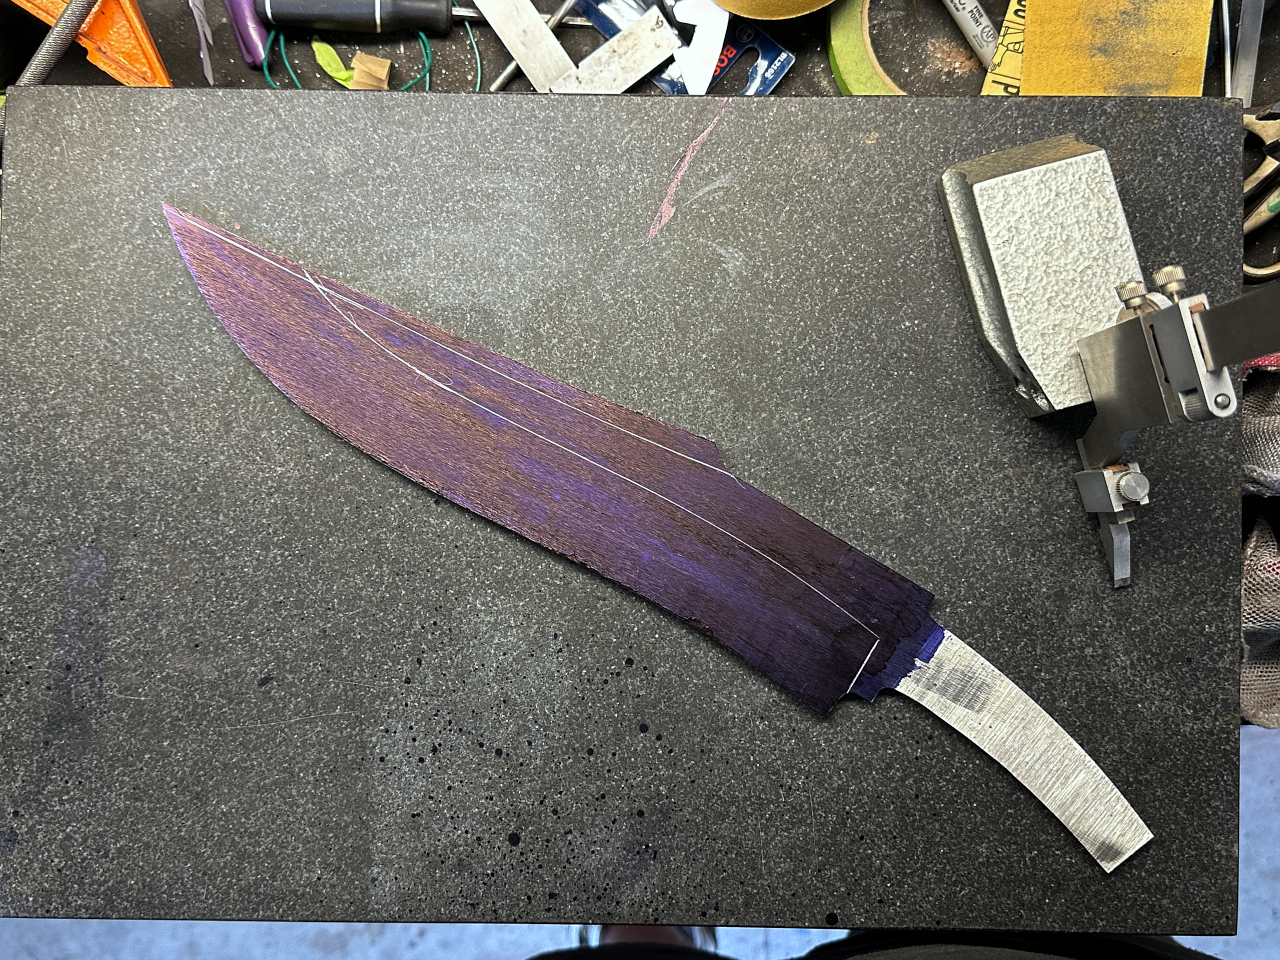
I scribe these lines on both sides, and both edges as well using this height gauge.
A single line for the top false edge because it will be very obtuse and highly unlikely to crack in the quench. This is a guide for grinding
I go with two lines for the cutting edge. Grinding each bevel to this line will leave me with a nice thick edge that is dead straight, and will not crack in the quench…
The false edge, is much less shallow an angle and far narrower and so presents an opportunity to remove a possible point of failure, and also to speed up the process.
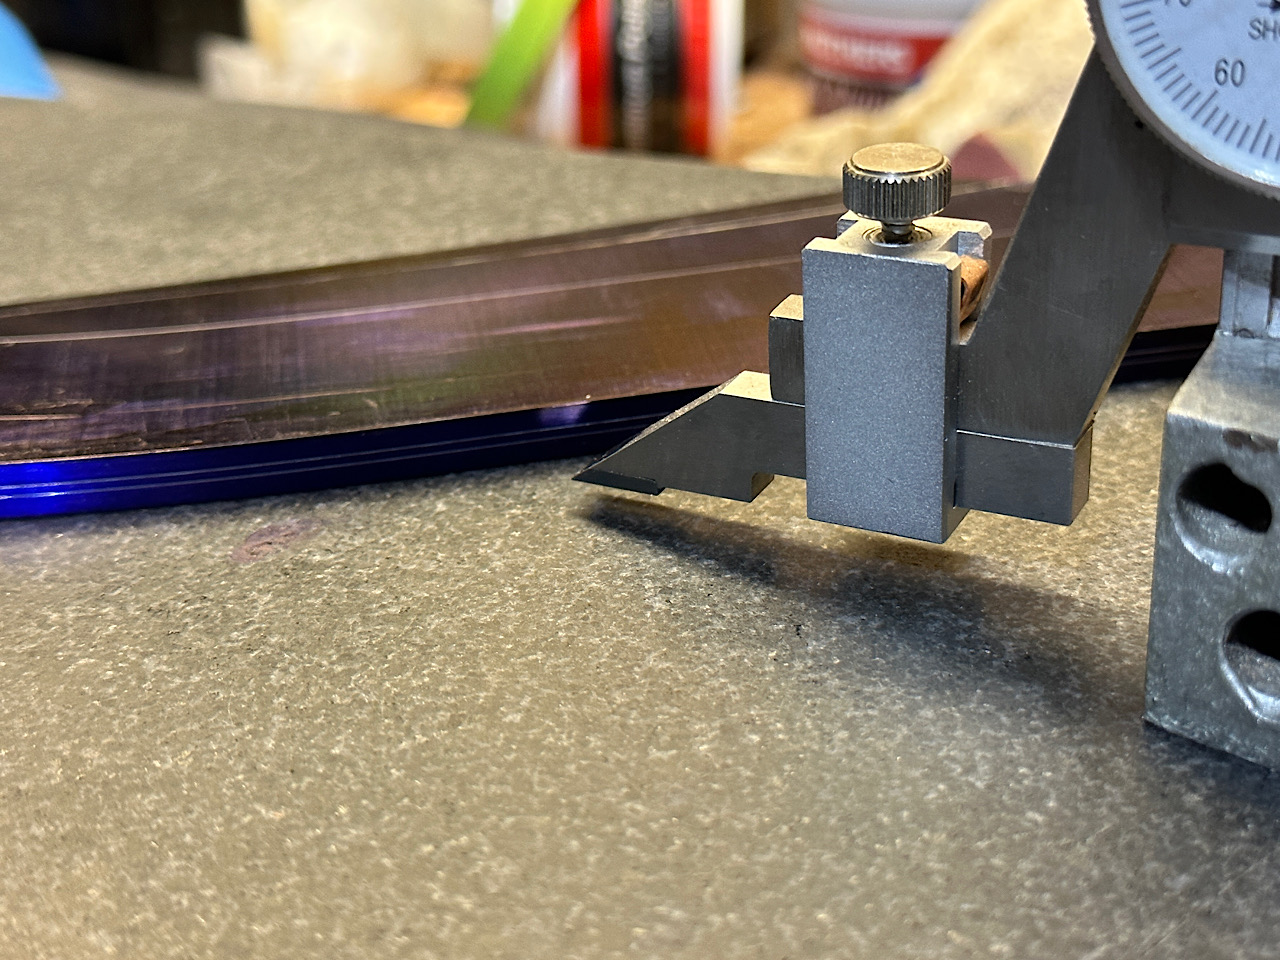
To start, I clamp a very long, flat steel plate to my articulating work rest for the grinder. This allows me to grind a consistent bevel at almost any angle for a stock removal type project.
The trick is to determine the perfect angle to set my grinder table.
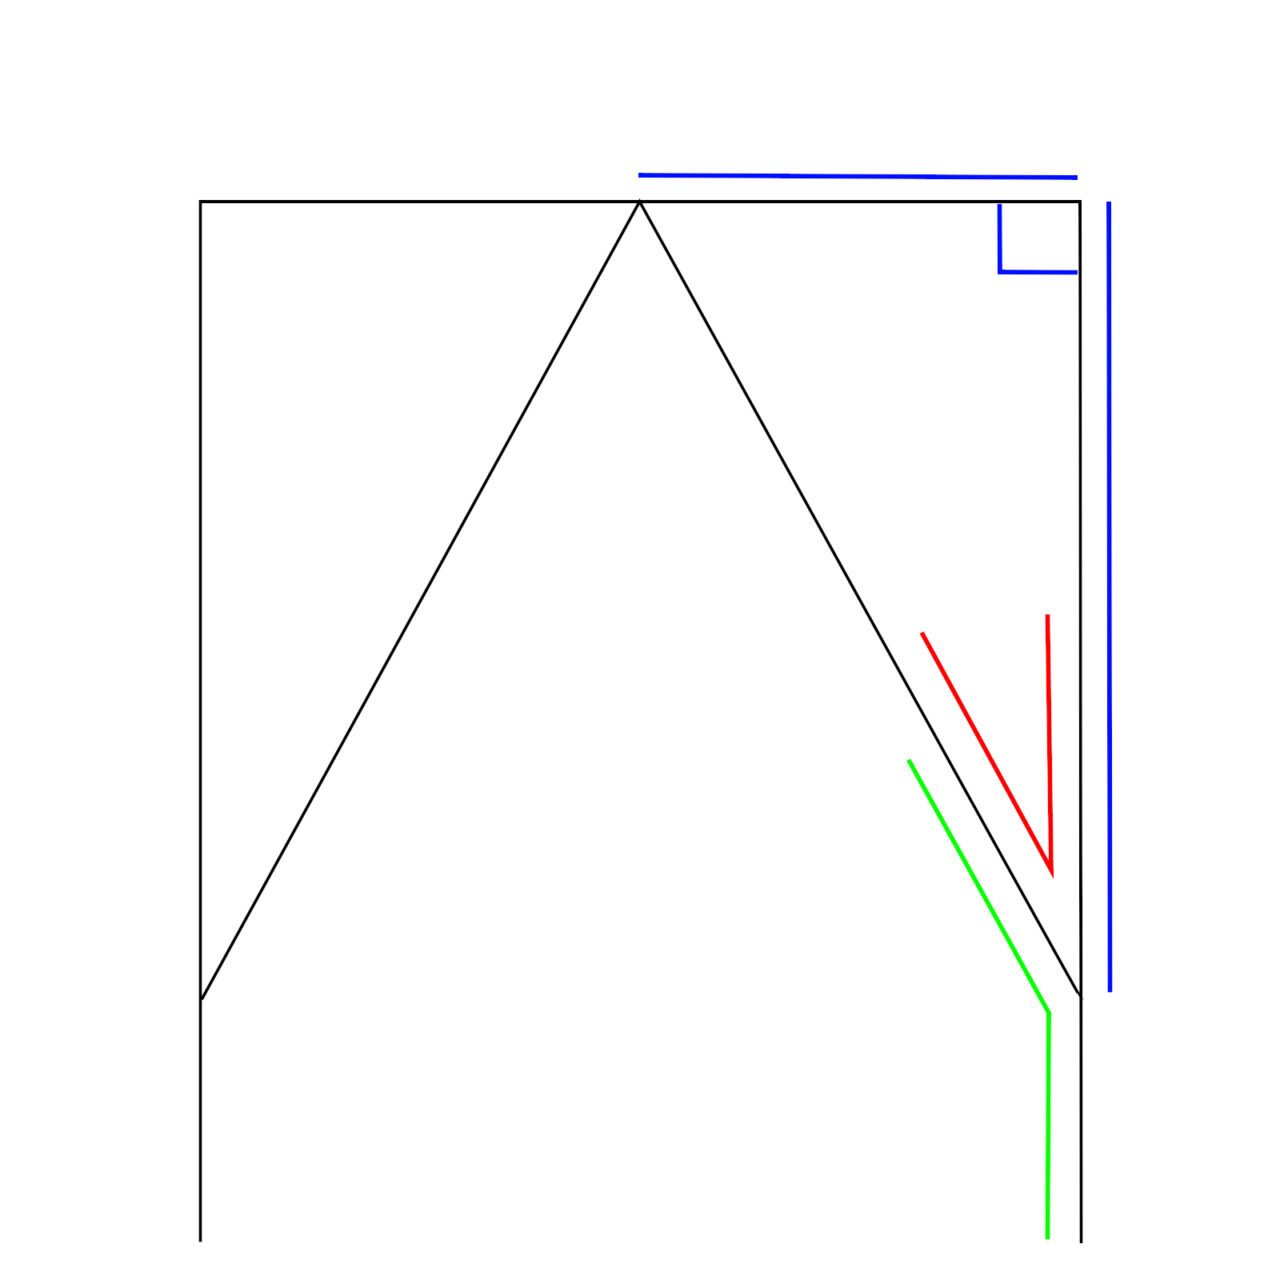
The image below shows the top edge of my knife blade in cross-section.
the black lines going from top center down to each side show where I want the bevel to be ground
The facts I know:
1. the lengths of the two sides shown in blue
2. The blue angle of the top outside corner (its a right triangle, so 90 degrees.
What I need to find out is the green angle, as thats what I set the grinder table to
To find the green angle I need to find out what the red angle is and subtract that angle from 180 degrees (a flat angle), the result will be my green angle.
So, find the other angles of the triangle given the lengths of two sides and the 90 degree angle. Thats a simple trigonometry problem 🙂
Who the fuck am I kidding? I barely got my HS diploma. I definitely don’t know trigonometry!
I found a website with a simple tool that does the math for you 🙂
I plugged in the numbers I had, and it gave me the red angle, which was 21.8 degrees. I subtracted that from 180 and got 158.2 degrees.
So I se my table at precisely 158.2 degrees and started grinding.
Wouldn’t you know it, once the grind reached the top dead center line, the bottom of that bevel ended exactly where I wanted it, right at the bottom of the false edge.
Score 1 for math! (and websites that help you do that math)
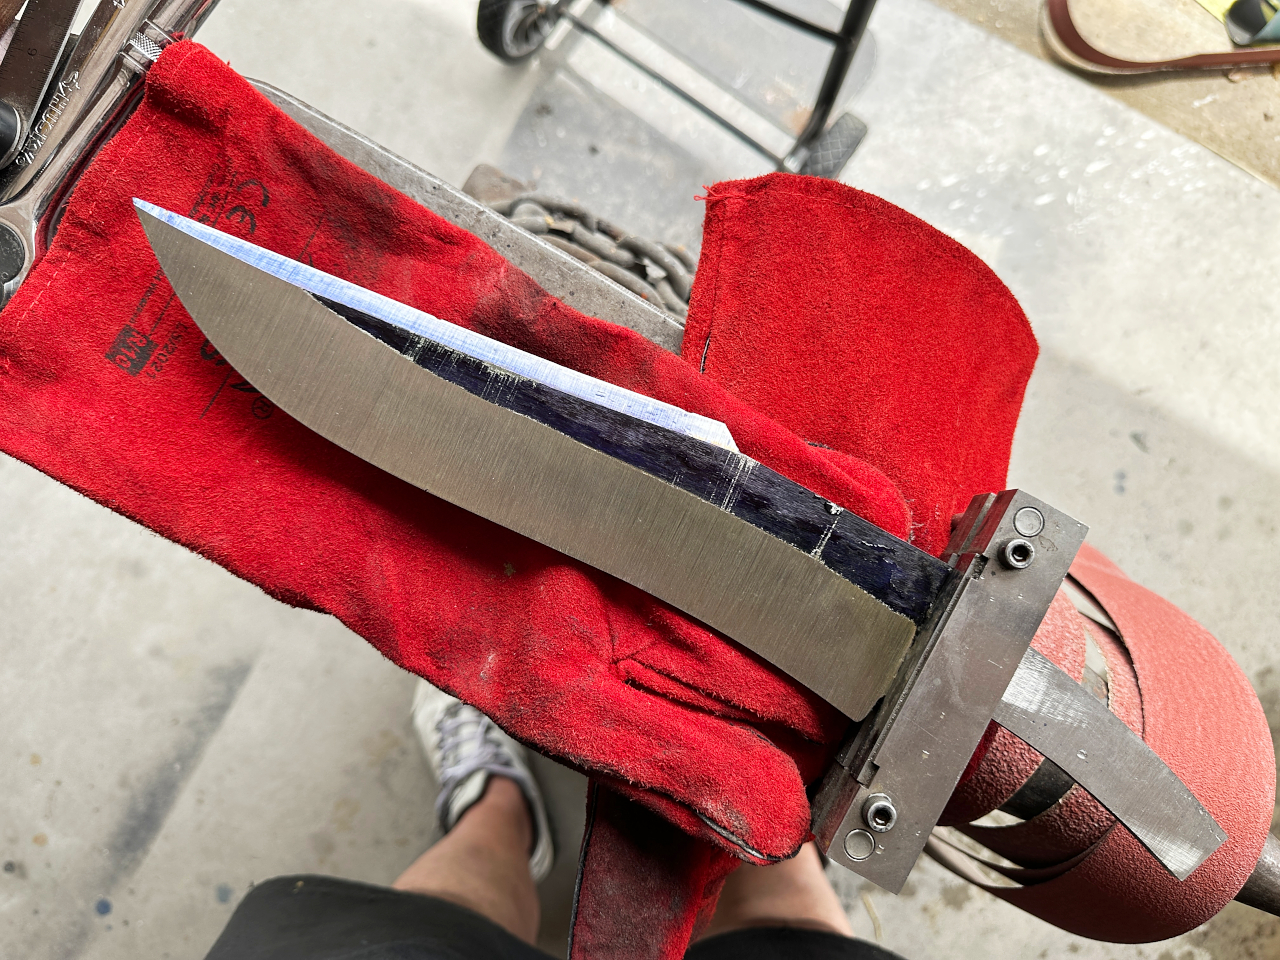
Setting the table to exactly 158.2 degrees….

Carefully grinding, using the single line scribed down the top center of the blade

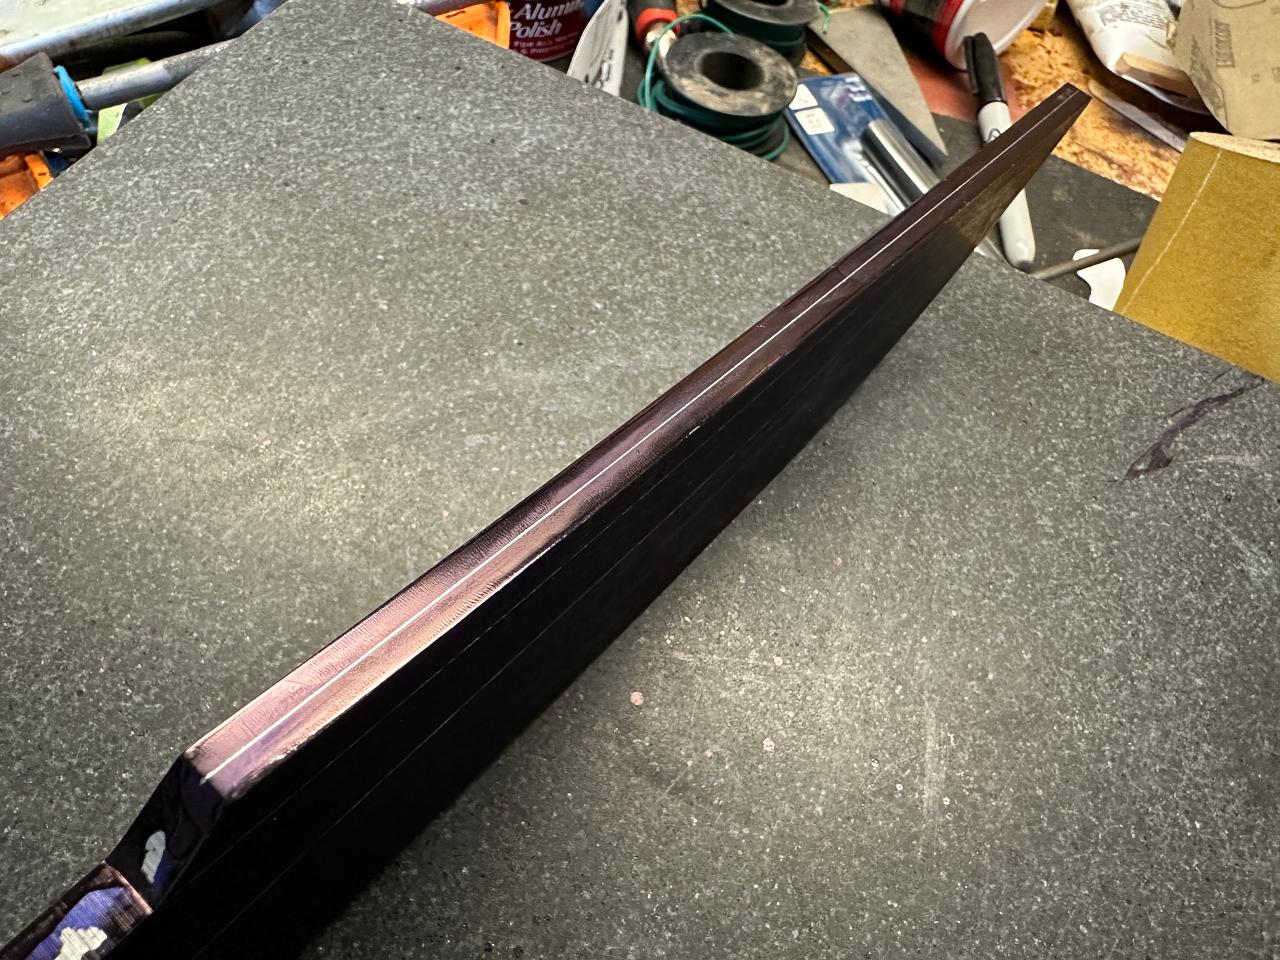
Once that grind reaches the scribed center line, its also simultaneously reaches the bottom of the false edge exactly where I wanted it. At that point I flip the blade over and do the same thing on the other side.
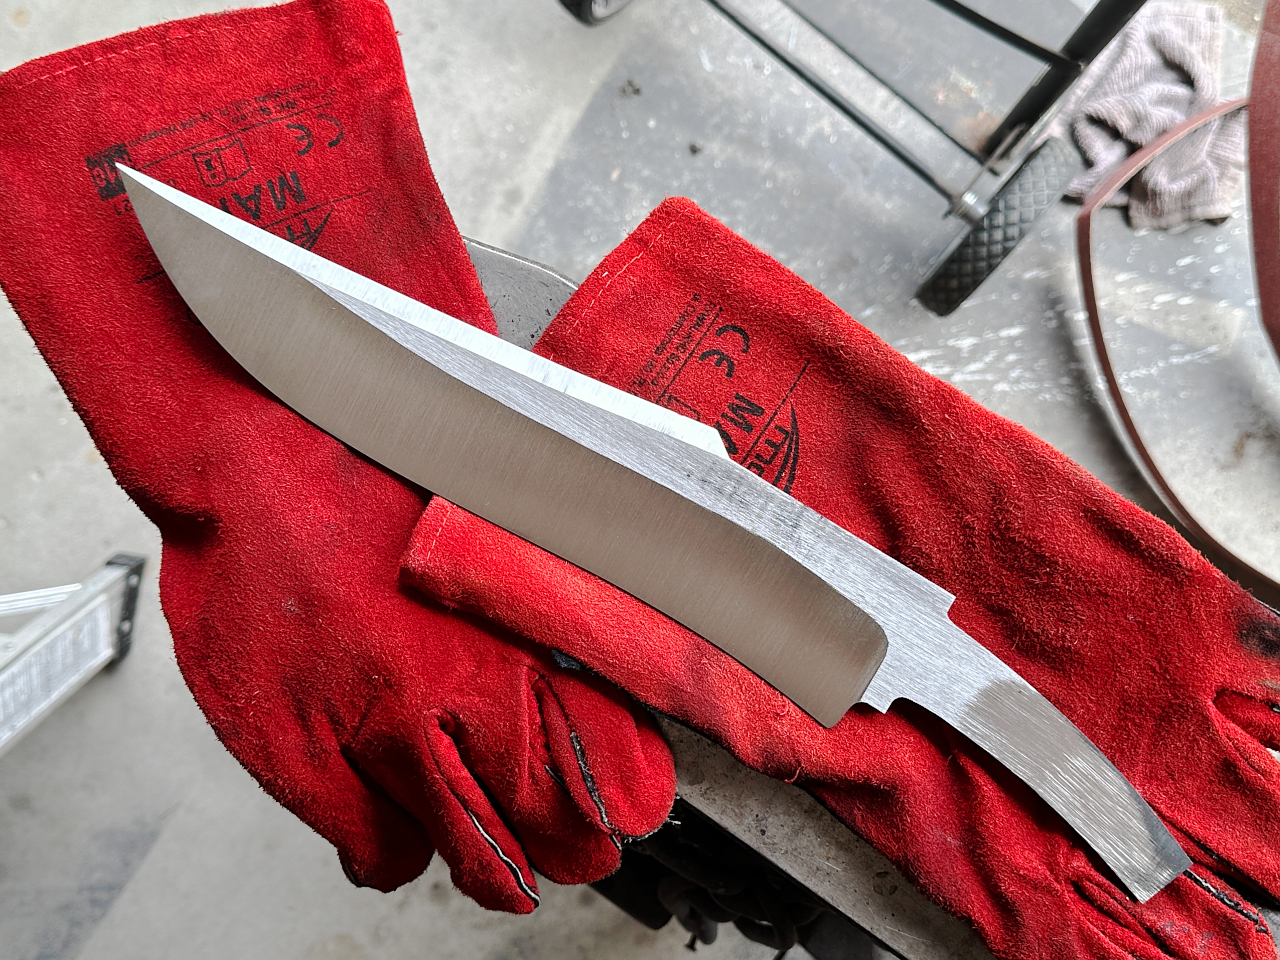
The end result says it all. Its a 8.5″ long, curved false edge with a fairly acute bevel angle, and it turns out perfect. The crest of the blade runs dead center down the middle. I should note that the actual grinding of this edge here took about 5-10 minutes, and involved no stress.
Easy peasy
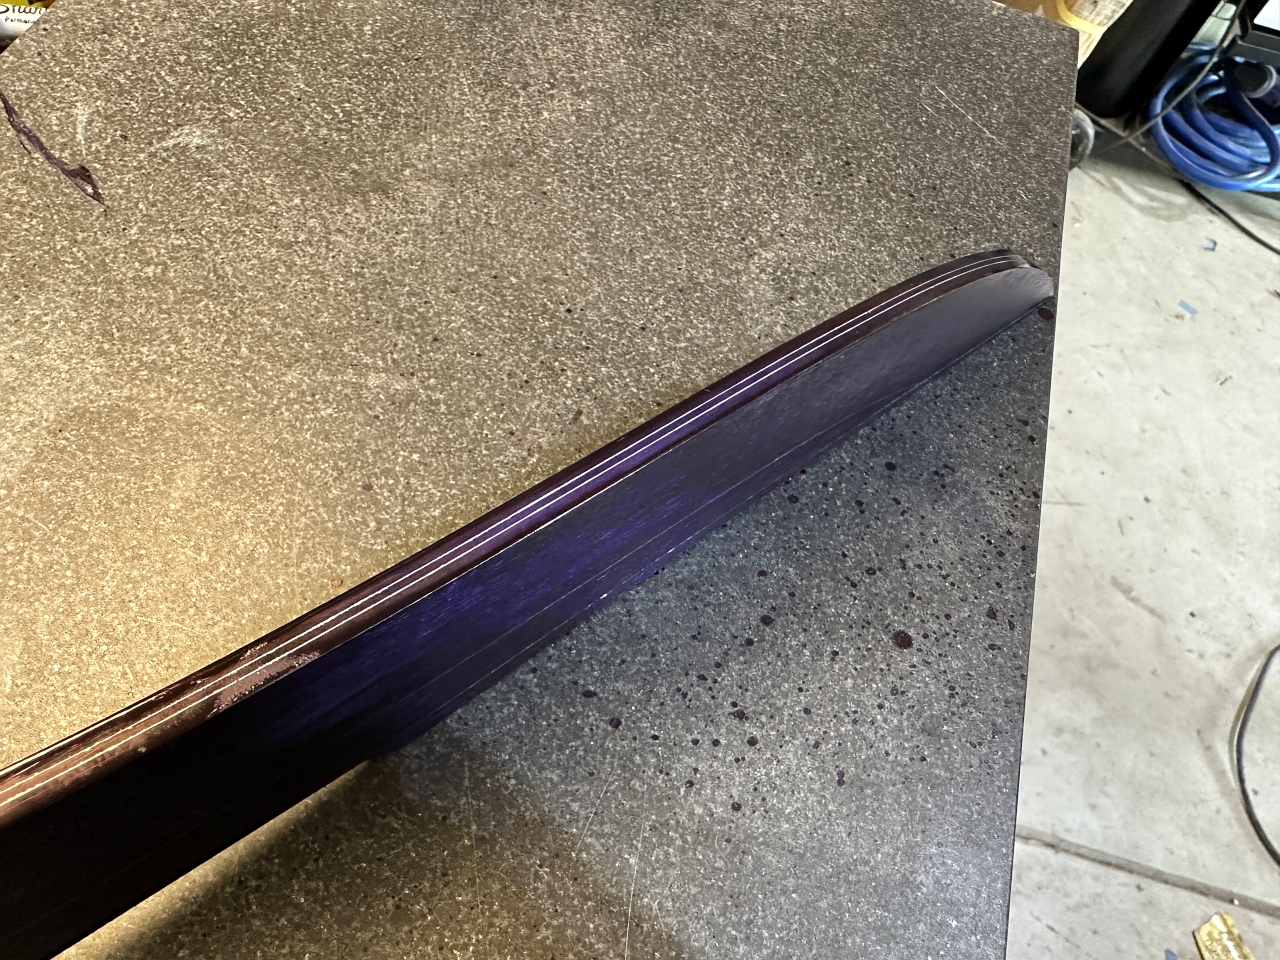
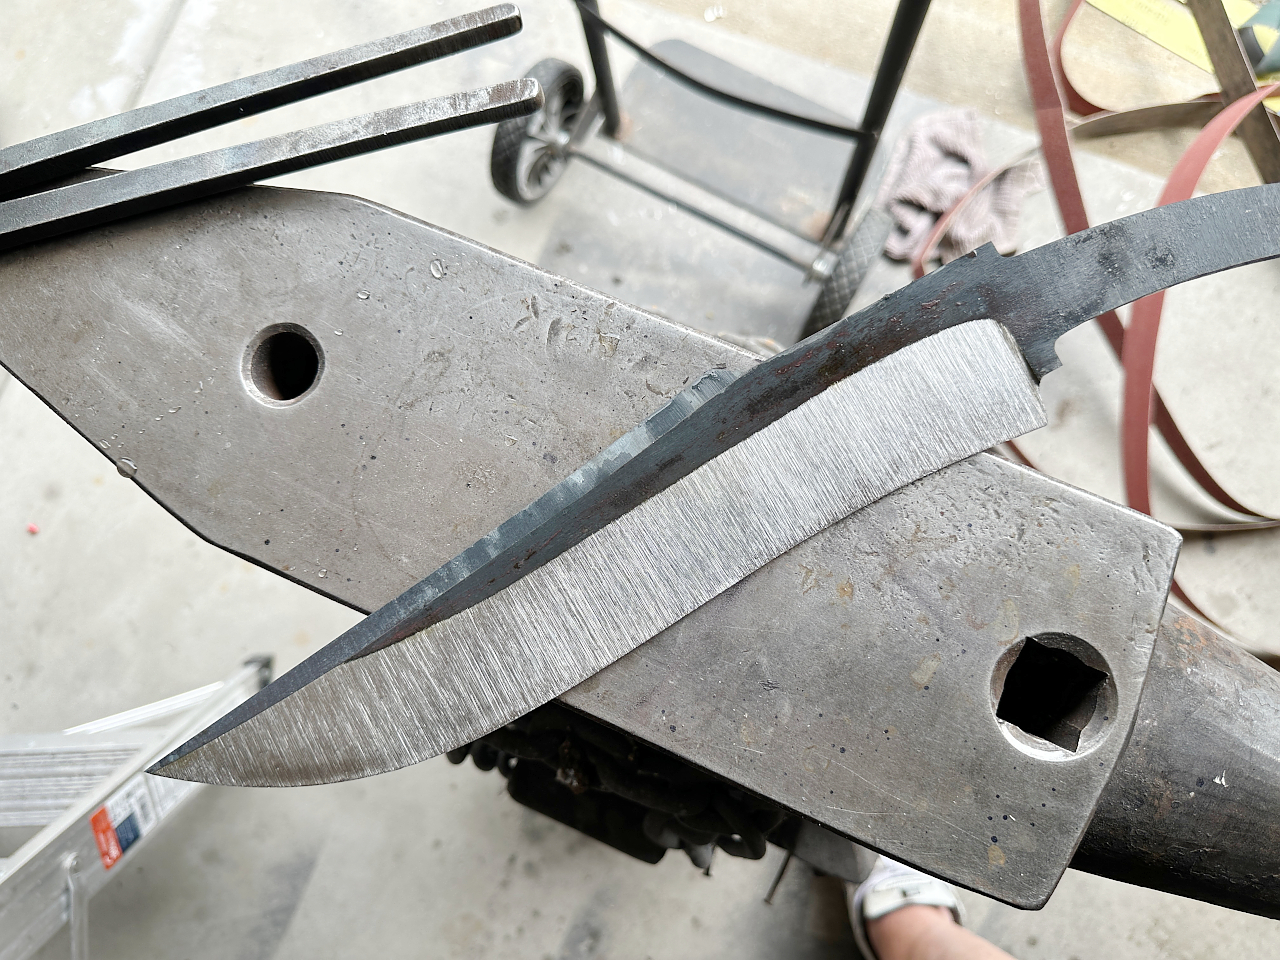
Next up is the edge bevels. Not so easy peasy. Longer, significantly wider, and with a recurve thrown in for good measure. No tricks or jigs for these bevels, just a lot of careful grinding by hand. Grind, check, dip in water. Many many many times, both sides.
The water dipping is because the blade gets too hot to touch very quickly when grinding
Gradually bringing the grind line back toward the line scribed on the side and simultaneously meeting the lines scribed along the edge

Until youve met both lines. Where the main bevels intersect with the top false edge the point where the bevels intersect slowly creeps toward meeting at the tip…
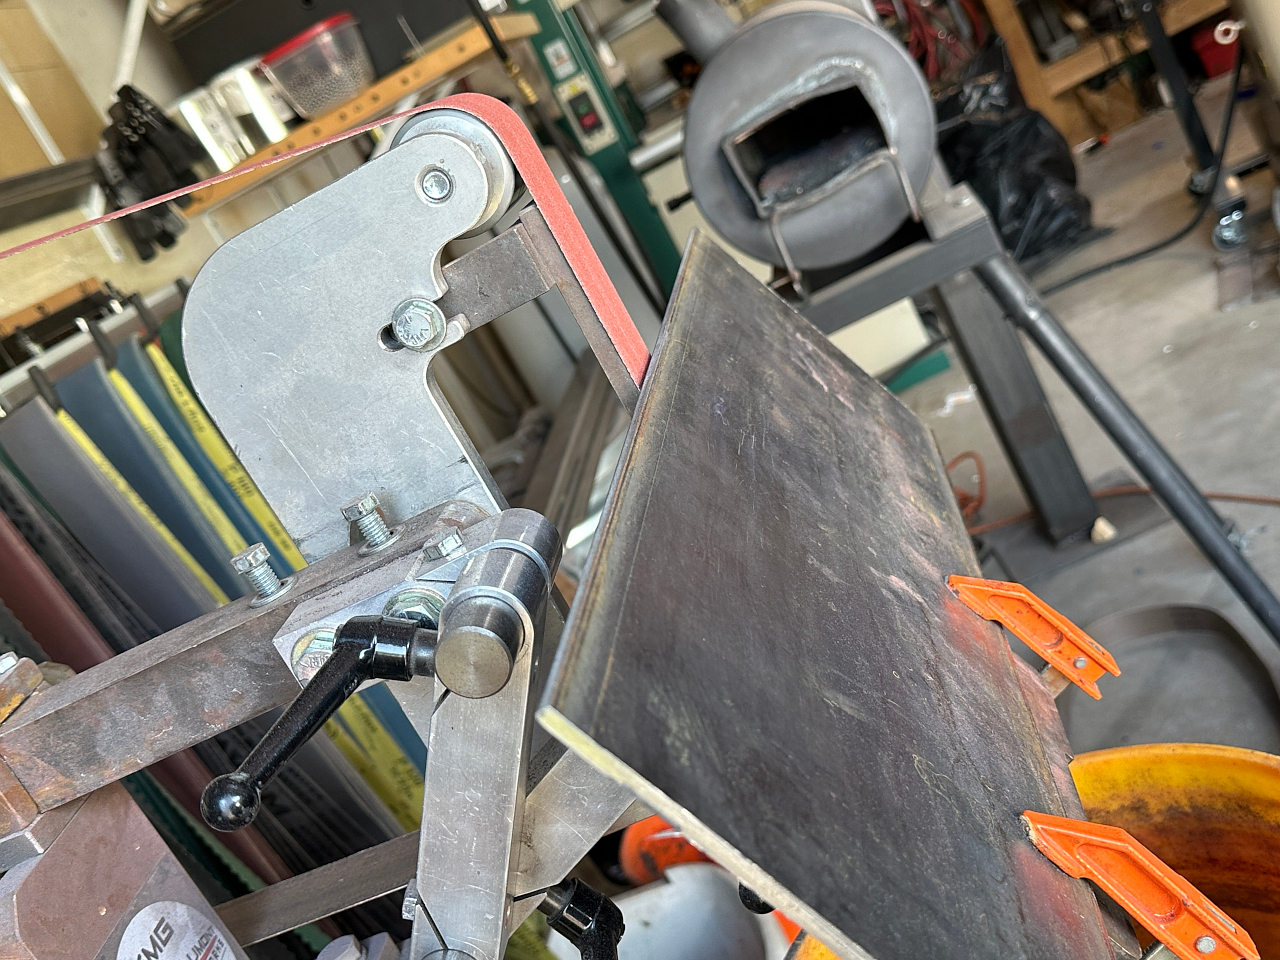
At this point I actually had to do a little bit of forging. As I ground away the bevels the blade took on a distinct curve. This is likely because the steel supplier used mechanical force to flatten the steel stock while cold, so when I ground away the outside it resumed its previous curved shape.
Technically I forged it back into shape, but calling it forging is overstating it somewhat. I simply heated the blade to 1650 F and then flattened it.
Of course any time you heat steel to forging temperatures it develops scale on the outside…

the scale requires a little bit more time on the grinder to remove…
all preliminary grinding complete, and its now ready for heat treating…
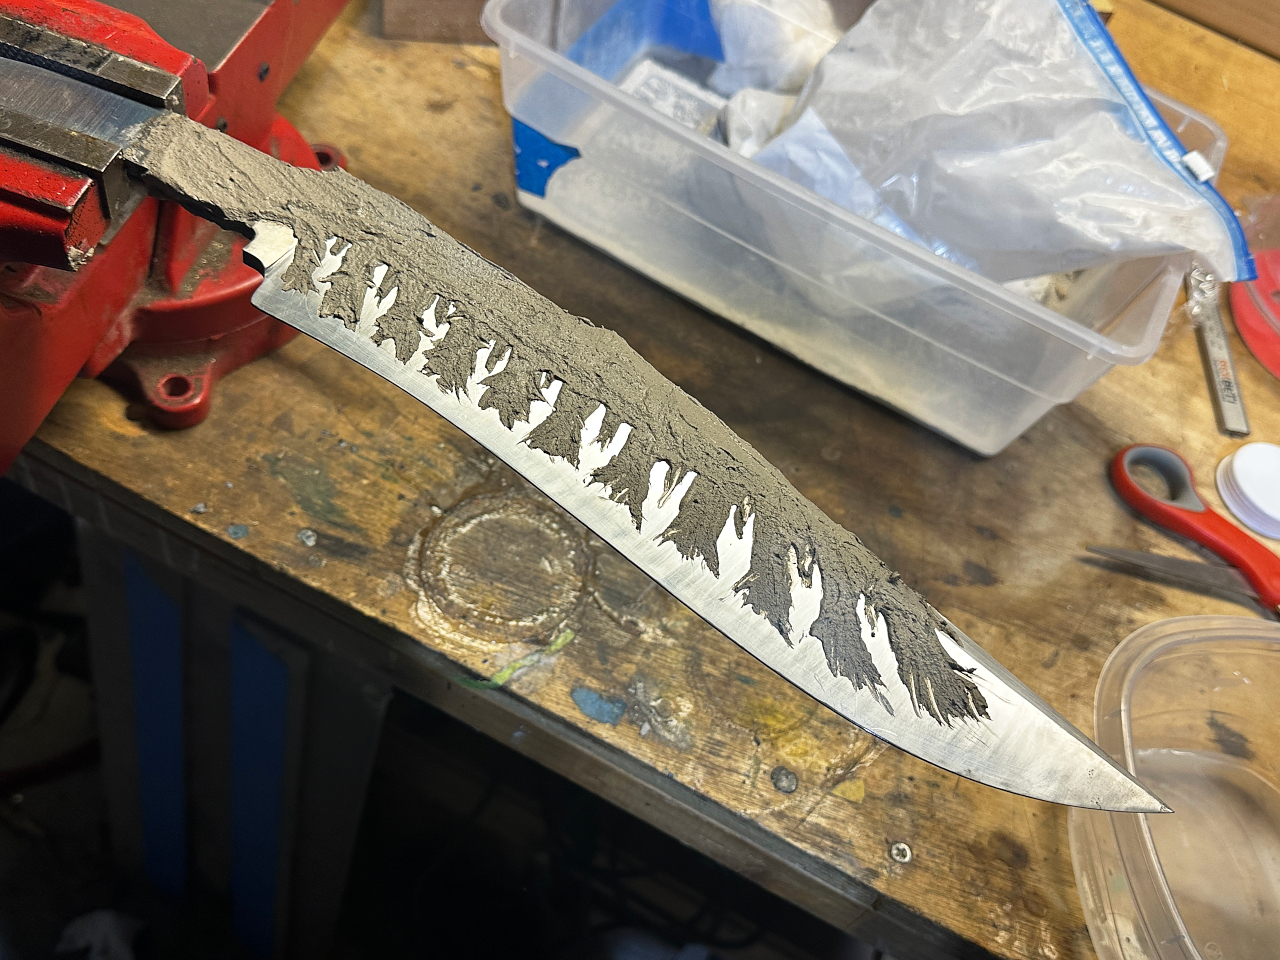
Here is the blade all clayed up and ready for the quench. The clay is used to perform a differential hardening of the blade.
Basically, you simply coat any part of the blade that you dont want hardened with the refractory clay. When quenched, this clay slows down the cooling just enough to prevent these areas from becoming fully hard, and also leaves marks or visible lines between the hard and soft areas of the blade. This is called the hamon.